Bopkit
How I solo-built a full-stack beat selling platform for music producers from the ground up.
Bopkit is a platform for music producers to sell beats online. Every producer gets a branded storefront at username.bopkit.com, along with a full dashboard to manage their business. They can upload and organize beats, configure license pricing, set up audio watermarks, add collaborators with profit sharing, auto-publish to YouTube, track sales and revenue through analytics, manage orders, customize their shop's theme and branding, and more. Payments are handled through a PayPal Commerce Platform partner integration, where collaborators are paid their share directly at checkout. On the buyer side, customers can browse shops, preview watermarked audio, check out, and instantly download their purchased files.
I built Bopkit solo as a side project. This case study is a complete walkthrough of the product and the engineering behind it, going through the entire platform feature-by-feature, showing what the user sees and explaining the technical decisions, challenges, and architecture underneath.
Architecture & Tech Stack
Bopkit is a Next.js application deployed on Vercel, backed by a PostgreSQL database on Supabase. The frontend and backend live in a single codebase with end-to-end type safety from the database layer through to the UI. External services handle payments, file storage, background jobs, email delivery, and audio/video processing.
Tech Stack
Core Framework
- Next.js 16 with App Router
- React 19 with the React Compiler enabled
- TypeScript throughout
Backend & Data
- tRPC for end-to-end typesafe API routes
- Prisma ORM (v7) for database access
- PostgreSQL with PgBouncer connection pooling, optimized for serverless
Authentication
- Better Auth with Prisma adapter
- Google OAuth for social login
- Email/password with verification flow
Payments
- PayPal Commerce Platform (PPCP) as a platform partner integration
Storage
- Supabase Storage for audio files, images, and assets
Background Jobs
- Inngest for durable workflows with step-by-step execution, retry logic, concurrency controls, and scheduled cron jobs
Audio & Video Processing
- Resend for transactional email delivery
- React Email for templating
UI
- Tailwind CSS v4
- shadcn/ui component library
- Motion for animations
- Recharts for analytics charts
- Tabler Icons
State & Forms
- Zustand for global state management (music player)
- React Hook Form with Zod for form validation
- nuqs for URL search parameter state
Audio Playback
- Howler.js for client-side audio playback with continuous playback across navigation
Hosting & Monitoring
- Vercel for hosting and deployment
- Vercel Analytics for web analytics
- Upptime for status page monitoring
Why PayPal over Stripe?
The most common question about the stack is why I chose PayPal Commerce Platform over Stripe Connect. The short answer is the target audience. Most music producers, especially independent ones, already have a PayPal account. Stripe requires sellers to go through a full onboarding process with identity verification, bank account linking, and approval wait times. With PayPal, producers connect their existing account via an OAuth popup and are ready to receive payments in seconds.
PayPal's Commerce Platform also supports multi-party payment splits natively, meaning each collaborator receives their share directly from PayPal at checkout time rather than the platform collecting the full amount and distributing it later. This removes the need for Bopkit to hold funds or handle manual disbursements. The tradeoff is that PayPal's APIs and documentation are significantly harder to work with than Stripe's, which made the integration one of the most complex parts of the project.
Landing Page & Marketing
The first thing any visitor sees is the marketing site at bopkit.com. It needs to communicate what Bopkit does, show the product in action, and convince producers to sign up. Every section of the homepage maps directly to a core product feature that gets covered in detail later in this case study. The page makes heavy use of scroll-triggered animations via Motion to reveal sections as the visitor scrolls.
Homepage Walkthrough
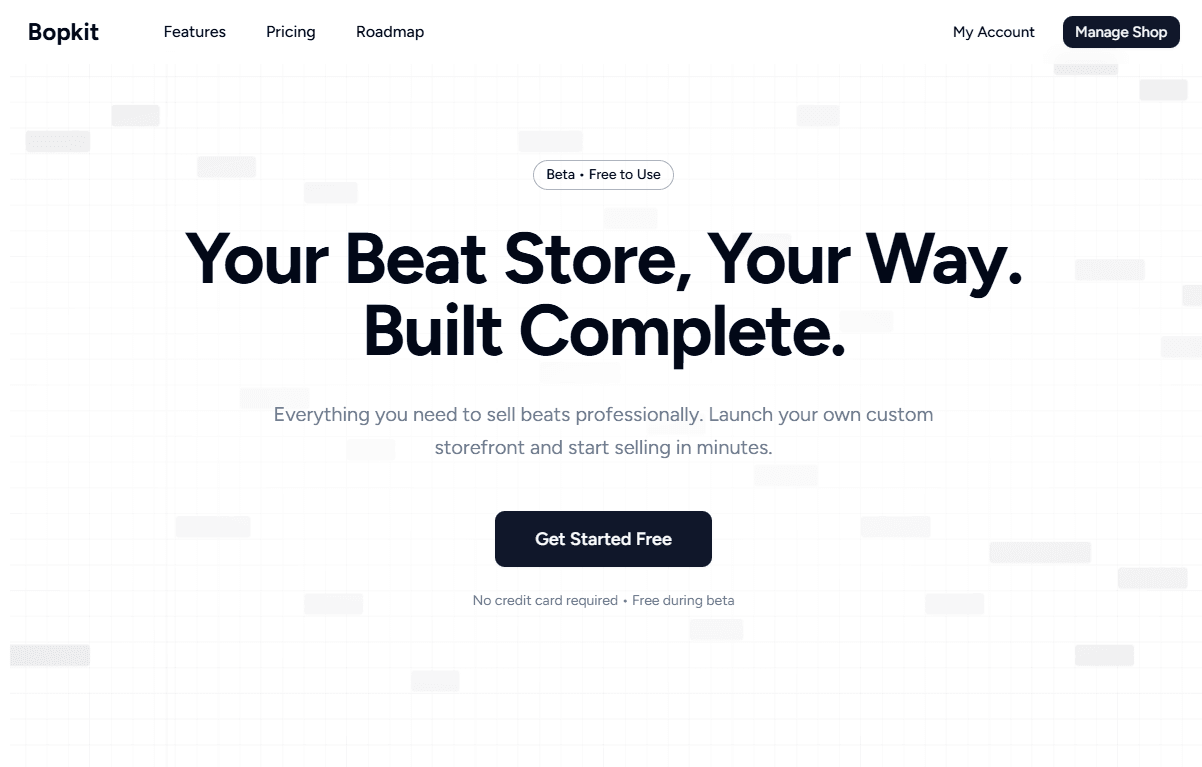
Hero Section
The hero leads with the headline “Your Beat Store, Your Way. Built Complete.” followed by a single-sentence value proposition and a “Get Started Free” call-to-action. A beta badge and “No credit card required” reassurance text lower the barrier to entry. The messaging is deliberately concise: producers scanning the page should understand what Bopkit does within seconds.
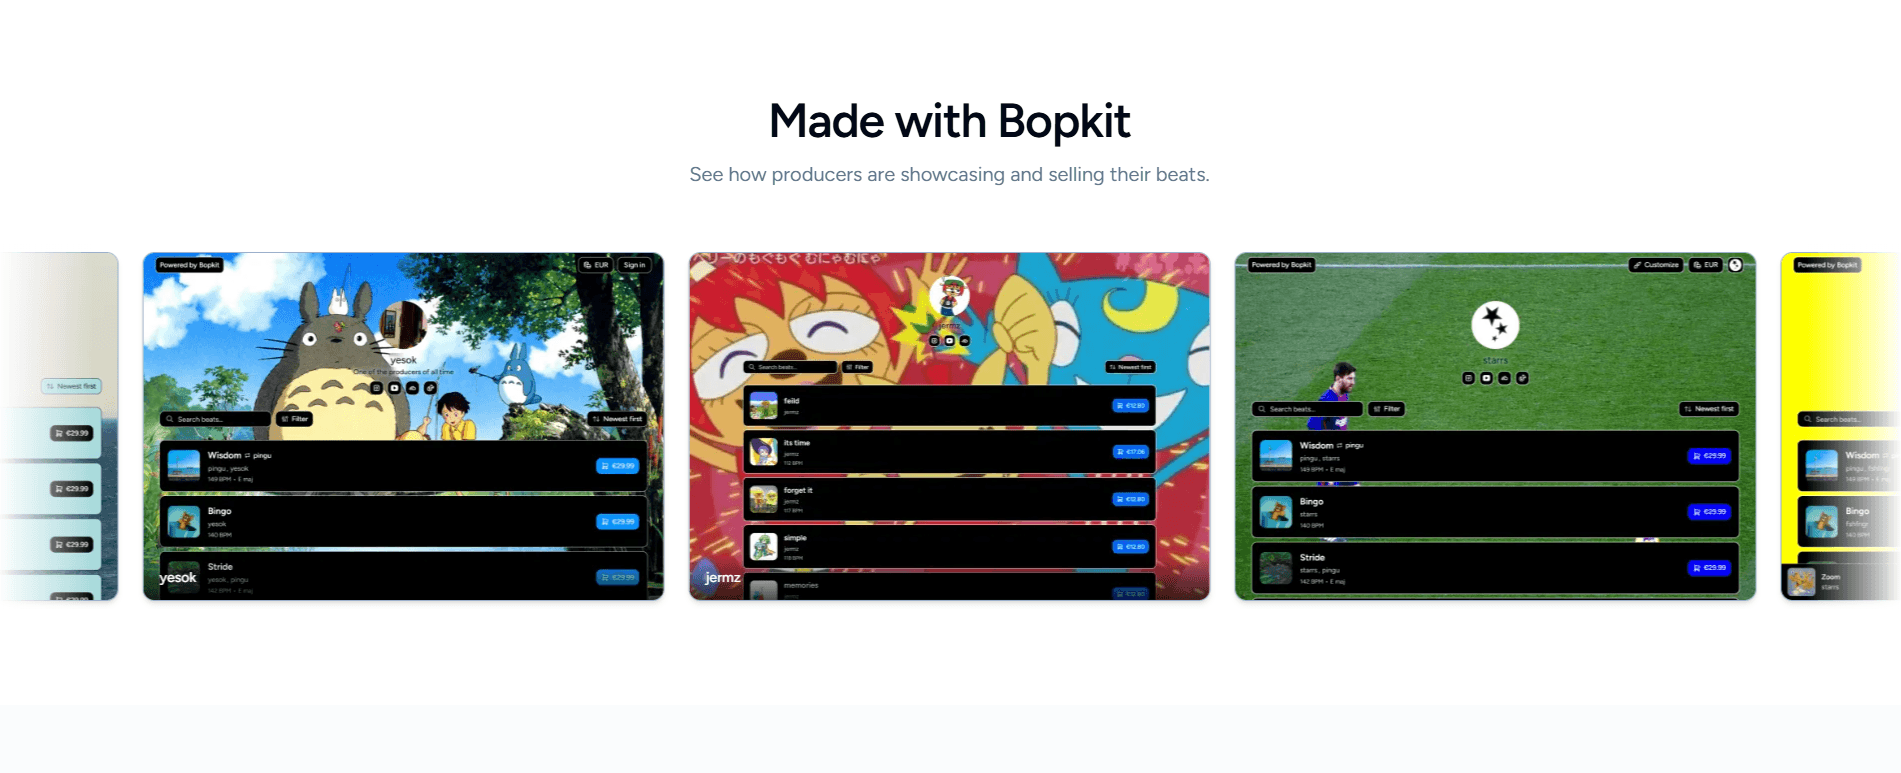
Shops Showcase
Titled “Made with Bopkit,” this section showcases real producer storefronts, each with their own theme and branding. It serves two purposes: it shows visitors what a finished store could actually look like and it acts as social proof by showing that real producers are already using the platform.
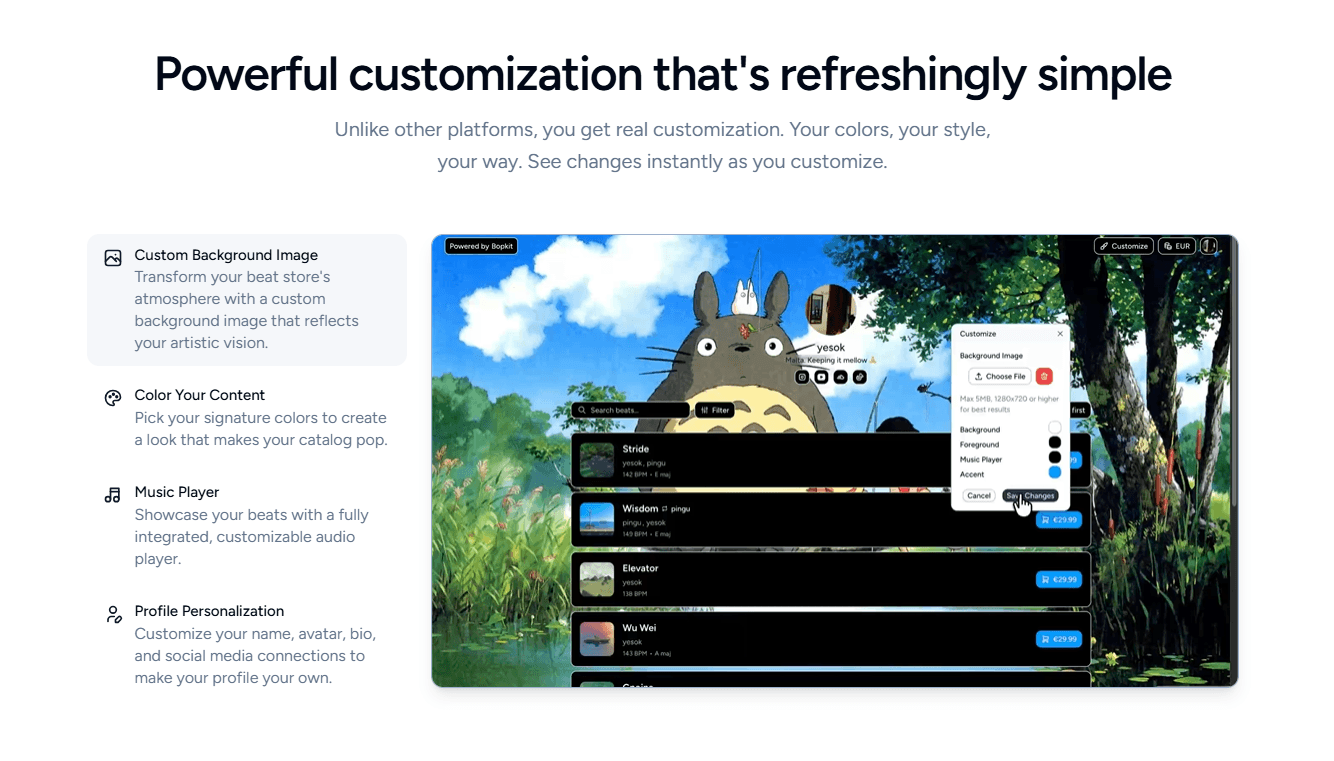
Feature Showcases
The homepage includes four dedicated showcase sections: customization, YouTube auto-publishing, collaboration tools, and analytics. Each section is interactive, with a “Tap any feature to explore” prompt and clickable feature cards that play a corresponding demo video when selected. For example, the customization section lets visitors step through custom backgrounds, color themes, music player styling, and profile personalization, each with its own video.
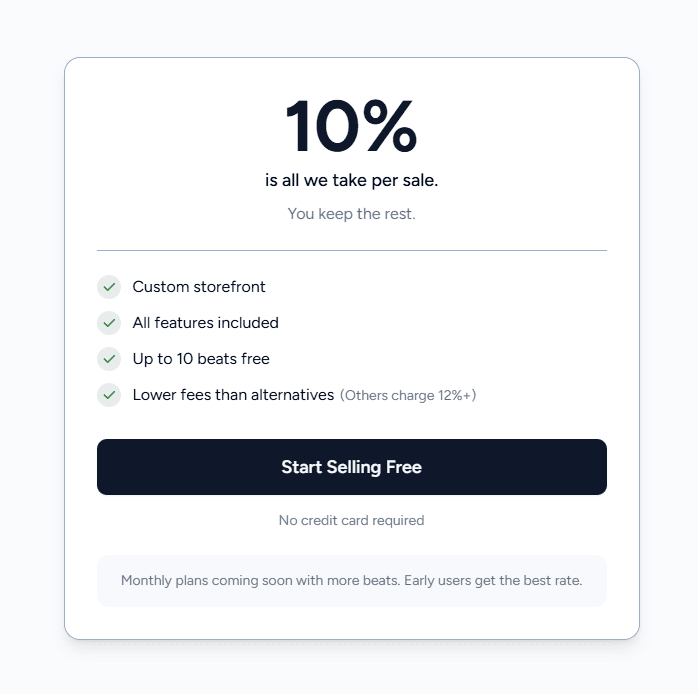
Pricing & FAQ
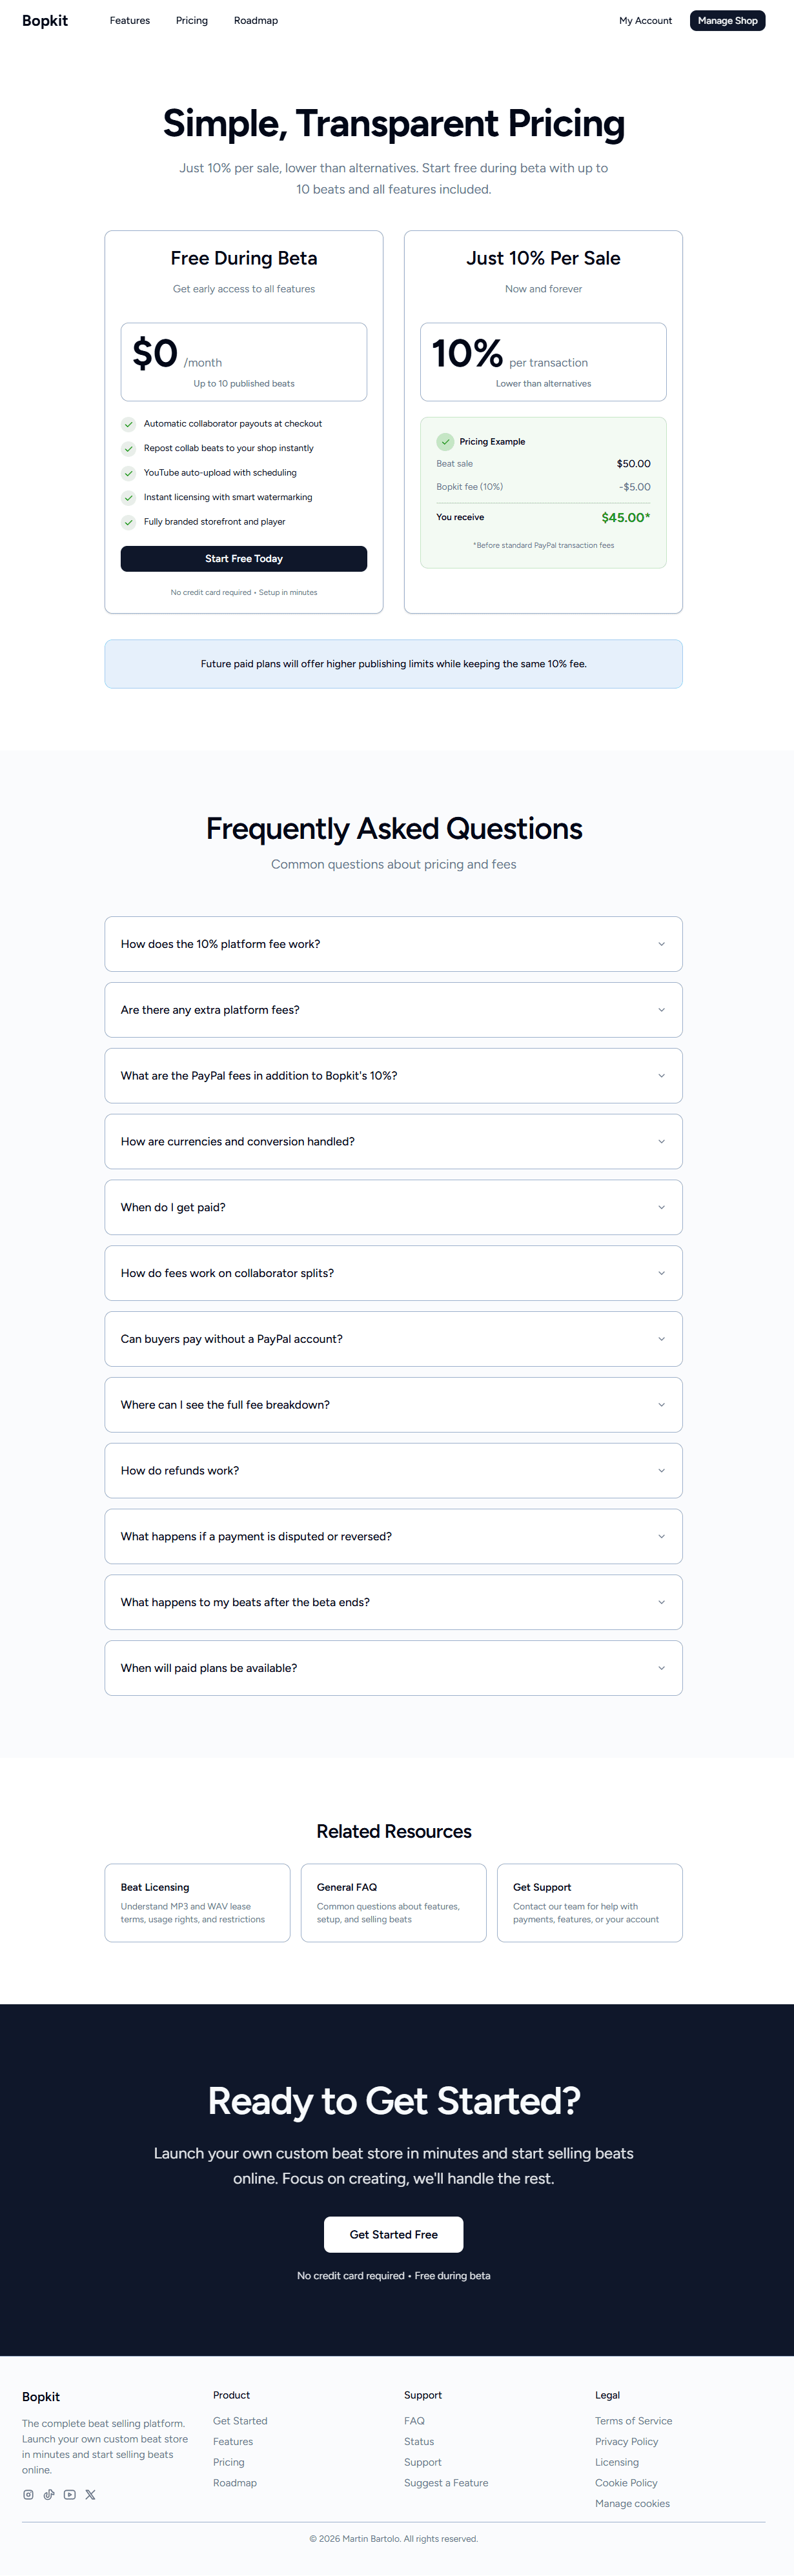
Since the platform was in early access, pricing was kept as simple as possible: a flat 10% per sale with everything included and no subscription tiers. The goal with the section was to communicate that in a single glance. The FAQ section directly below addresses the 10 most common questions that came up during beta testing, placed here intentionally so visitors don't leave the page to find answers.
Mission & Footer
A mission section explains why Bopkit exists and how it positions itself against existing platforms in the beat selling space. The page closes with a final call-to-action and a footer linking to social accounts (TikTok, YouTube, Instagram, X as @getbopkit), legal pages, and support resources.
Additional Marketing Pages
Beyond the homepage, the marketing site includes several standalone pages that support the product and build trust with potential users.
Pricing Page
A dedicated pricing page that breaks down the 10% model with a concrete example: a $50 beat sale, minus the $5 Bopkit fee, equals $45 received (before PayPal transaction fees). It lists everything included in the free beta tier and has its own 12-question FAQ covering fees, collaborator splits, refunds, disputes, and currency handling.
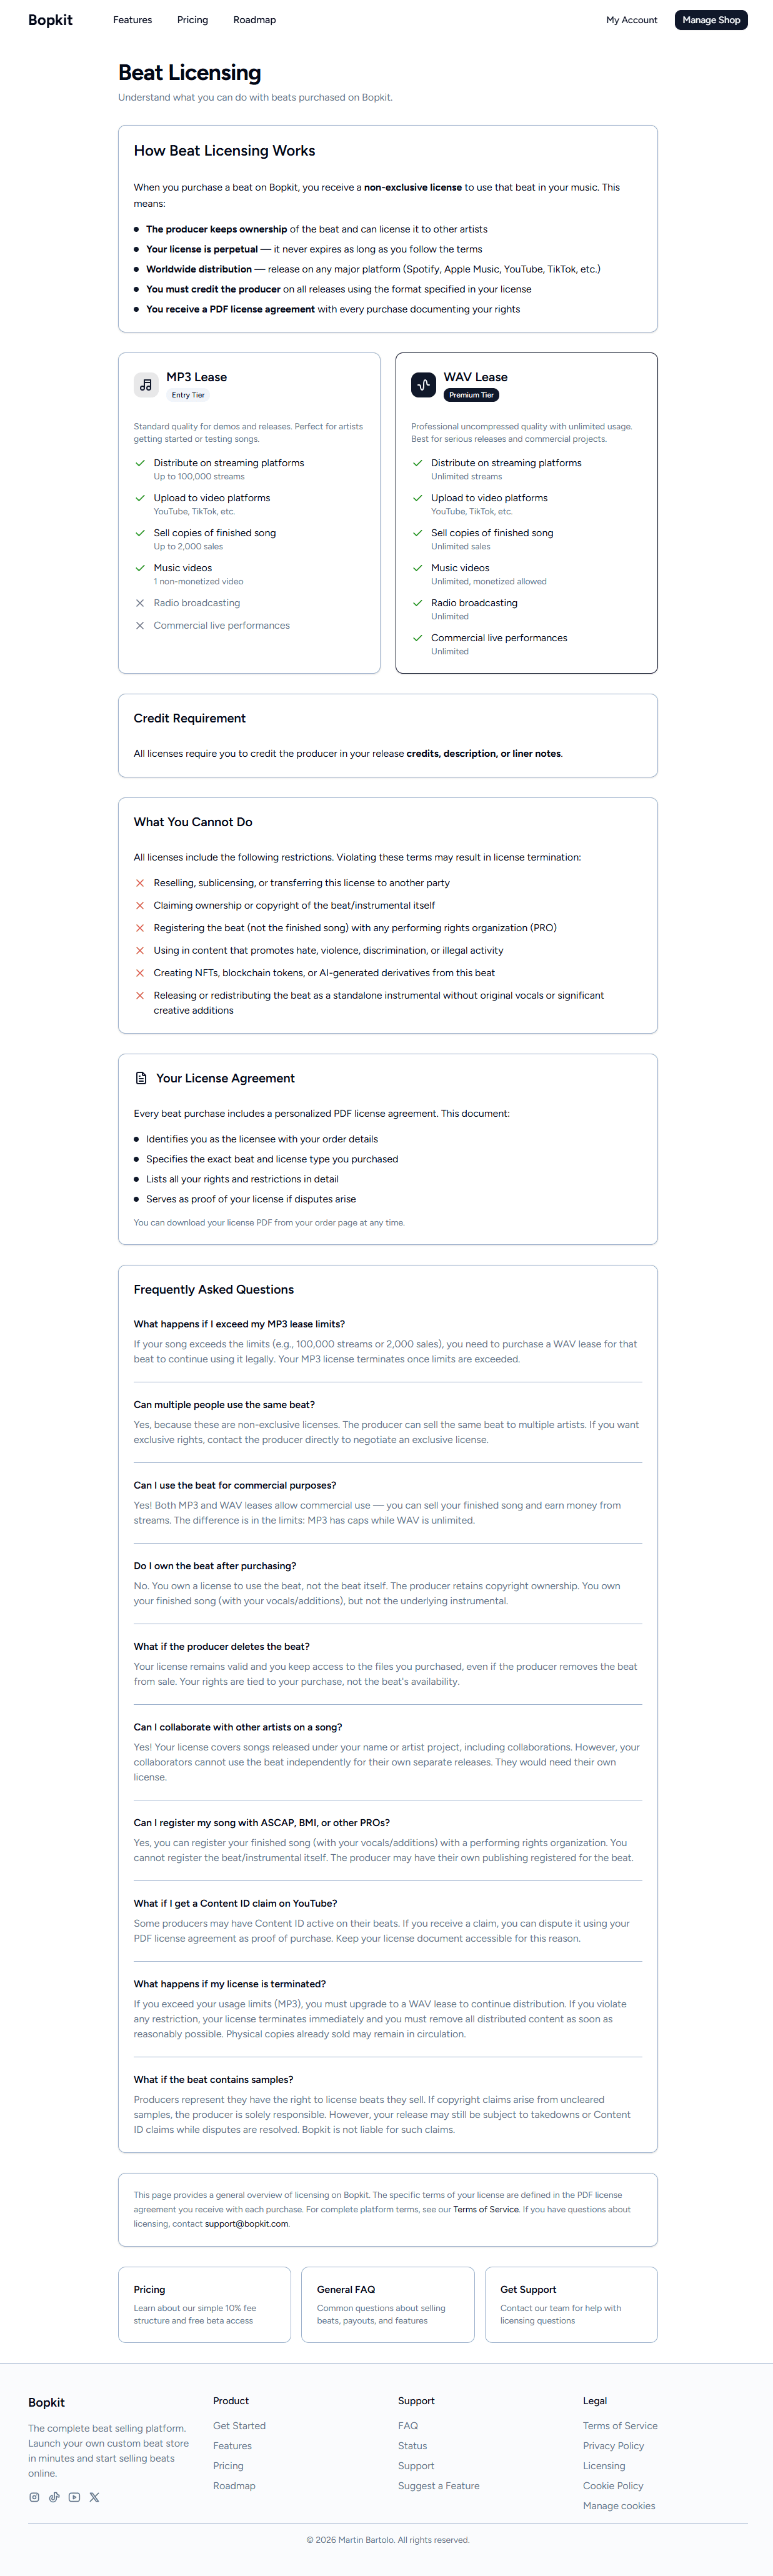
Licensing Page
Licensing is critical in the beat selling industry. Buyers need to understand exactly what they can and cannot do with a purchased beat. This page explains the different license types (MP3 vs WAV), usage rights, and includes an FAQ section addressing common licensing questions.
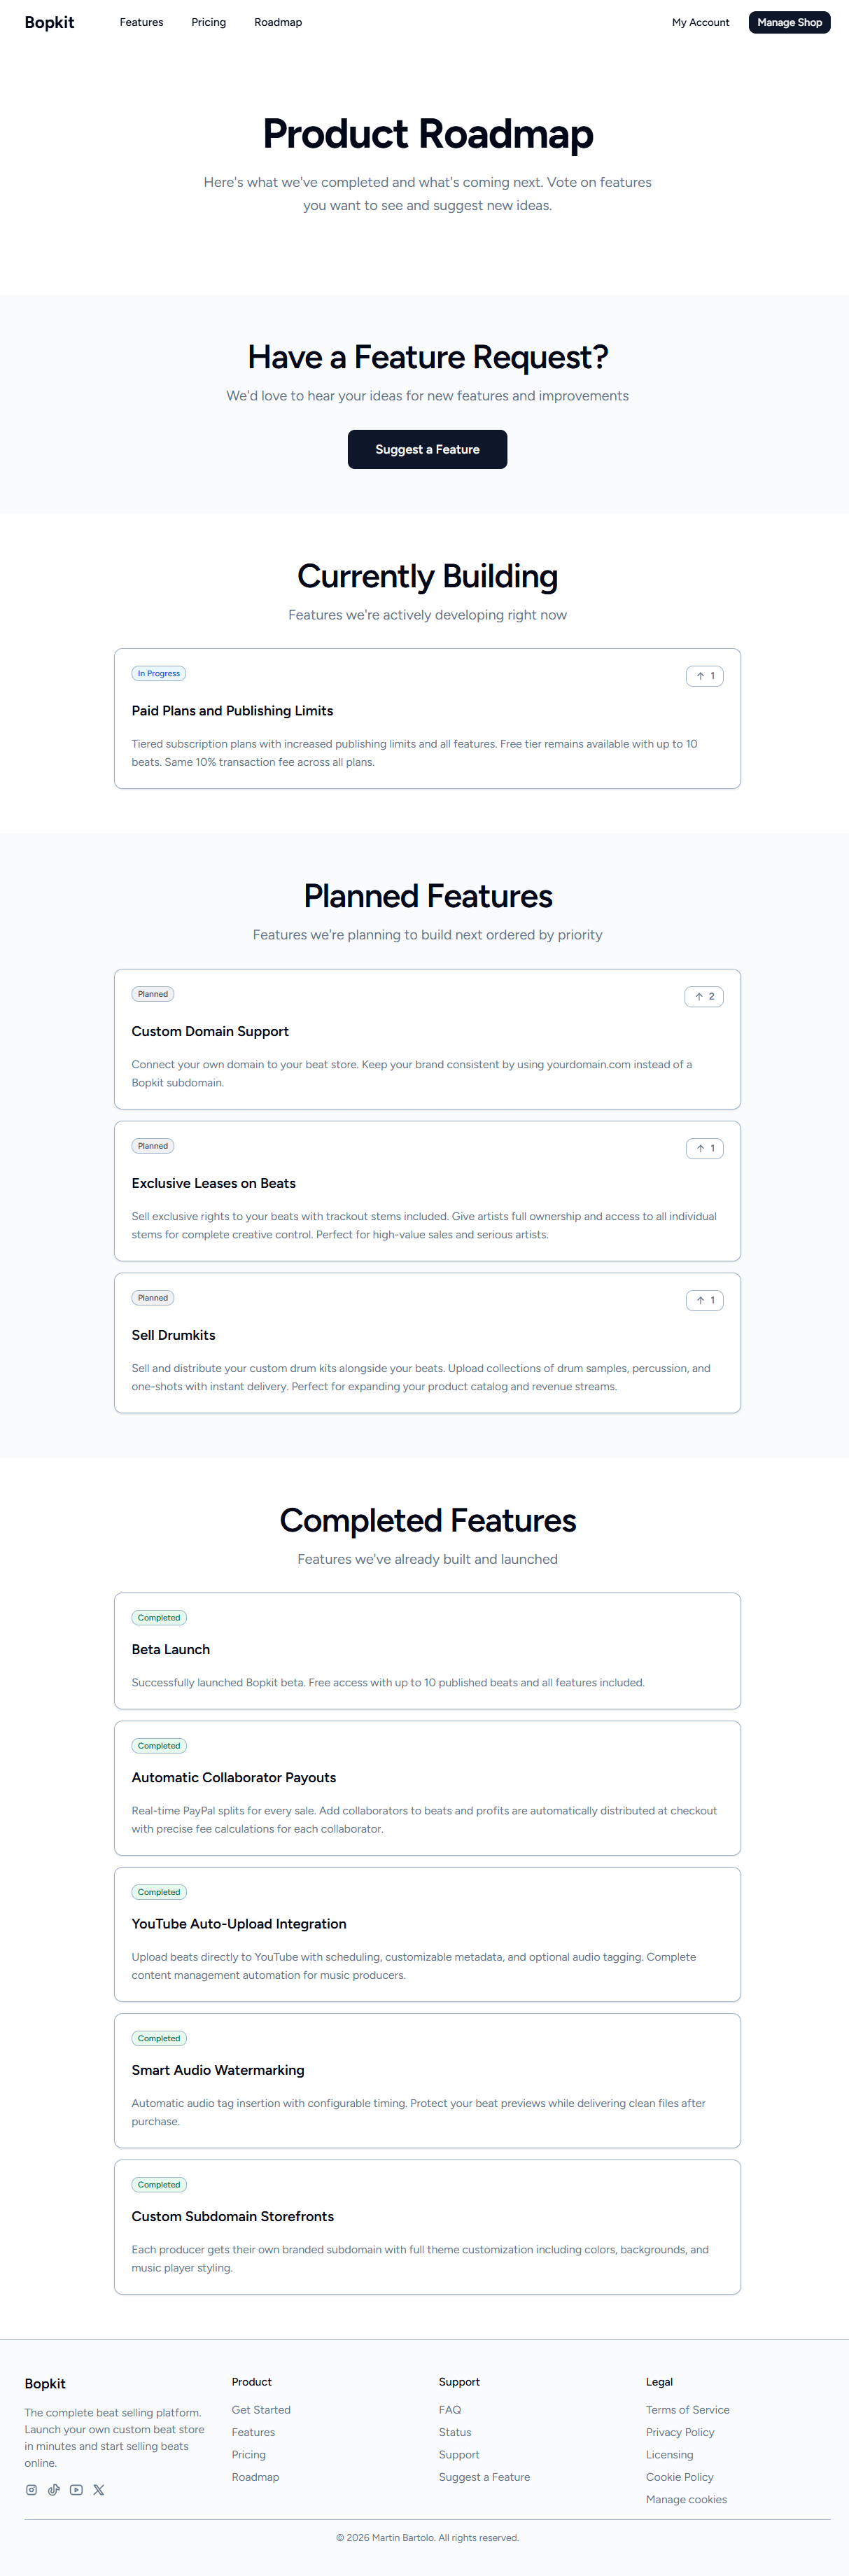
Roadmap Page
A public roadmap organized into three sections: Currently Building, Planned Features, and Completed Features. Users can vote on planned items and submit their own feature suggestions.
Support Page
A support hub linking to the FAQ, the public status page (Upptime at status.bopkit.com), and the roadmap. It includes a direct email contact (support@bopkit.com) with guidelines on what to include in a support request: screenshots, steps to reproduce, order or transaction IDs, and account details.
Legal Pages
Terms of Service, Privacy Policy, and Cookie Policy pages, all required for a platform that handles payments and user data.
SEO & Programmatic Pages
To drive organic traffic, the marketing site includes programmatic SEO pages generated from structured data. Competitor comparison pages at /compare/[slug] cover both “Bopkit vs X” and “X vs Y” formats. Alternative pages at /alternatives/[competitor] target “alternative to X” search queries.
Every page includes dynamic metadata (title, description, Open Graph, Twitter cards) generated via Next.js generateMetadata(). A default OG image is generated at the Edge using Next.js ImageResponse, with dynamic per-shop OG images for producer storefronts. Five JSON-LD schema types are used across the site: BreadcrumbList, FAQPage, Product (for individual beats with pricing and availability), Organization, and WebSite (with a SearchAction template).
The sitemap is a paginated index with sub-sitemaps for static routes, user shops, and beats (10,000 URLs per file). Beat sitemaps include Google image sitemap data with titles and captions. Canonical URLs are set on every page using a utility that handles both main-site and subdomain URLs, with alphabetical slug normalization on comparison pages to prevent duplicates. The robots.txt is environment-aware: production allows crawling of public pages while blocking auth, dashboard, API, and webhook routes; preview and dev deployments block everything.
Authentication & Security
Authentication is handled by Better Auth with a Prisma adapter connecting to the same PostgreSQL database. The system supports email/password registration with email verification, Google OAuth, and a username-based sign-in option. Sessions persist across subdomains so a producer signed in at bopkit.com stays signed in on their own shop at username.bopkit.com.
Sign-Up Flow
Registration is a two-step split form. The first screen collects the email address, and the second collects the password (8-128 characters, validated with Zod). After submitting, the user lands on a check-your-email page. A verification email is sent automatically via Resend with a link that expires after one hour. Clicking the link verifies the account and signs the user in automatically. The check-email page includes a resend button with a 60-second cooldown to prevent abuse. Expired verification tokens are auto-cleaned every hour using a cron job.
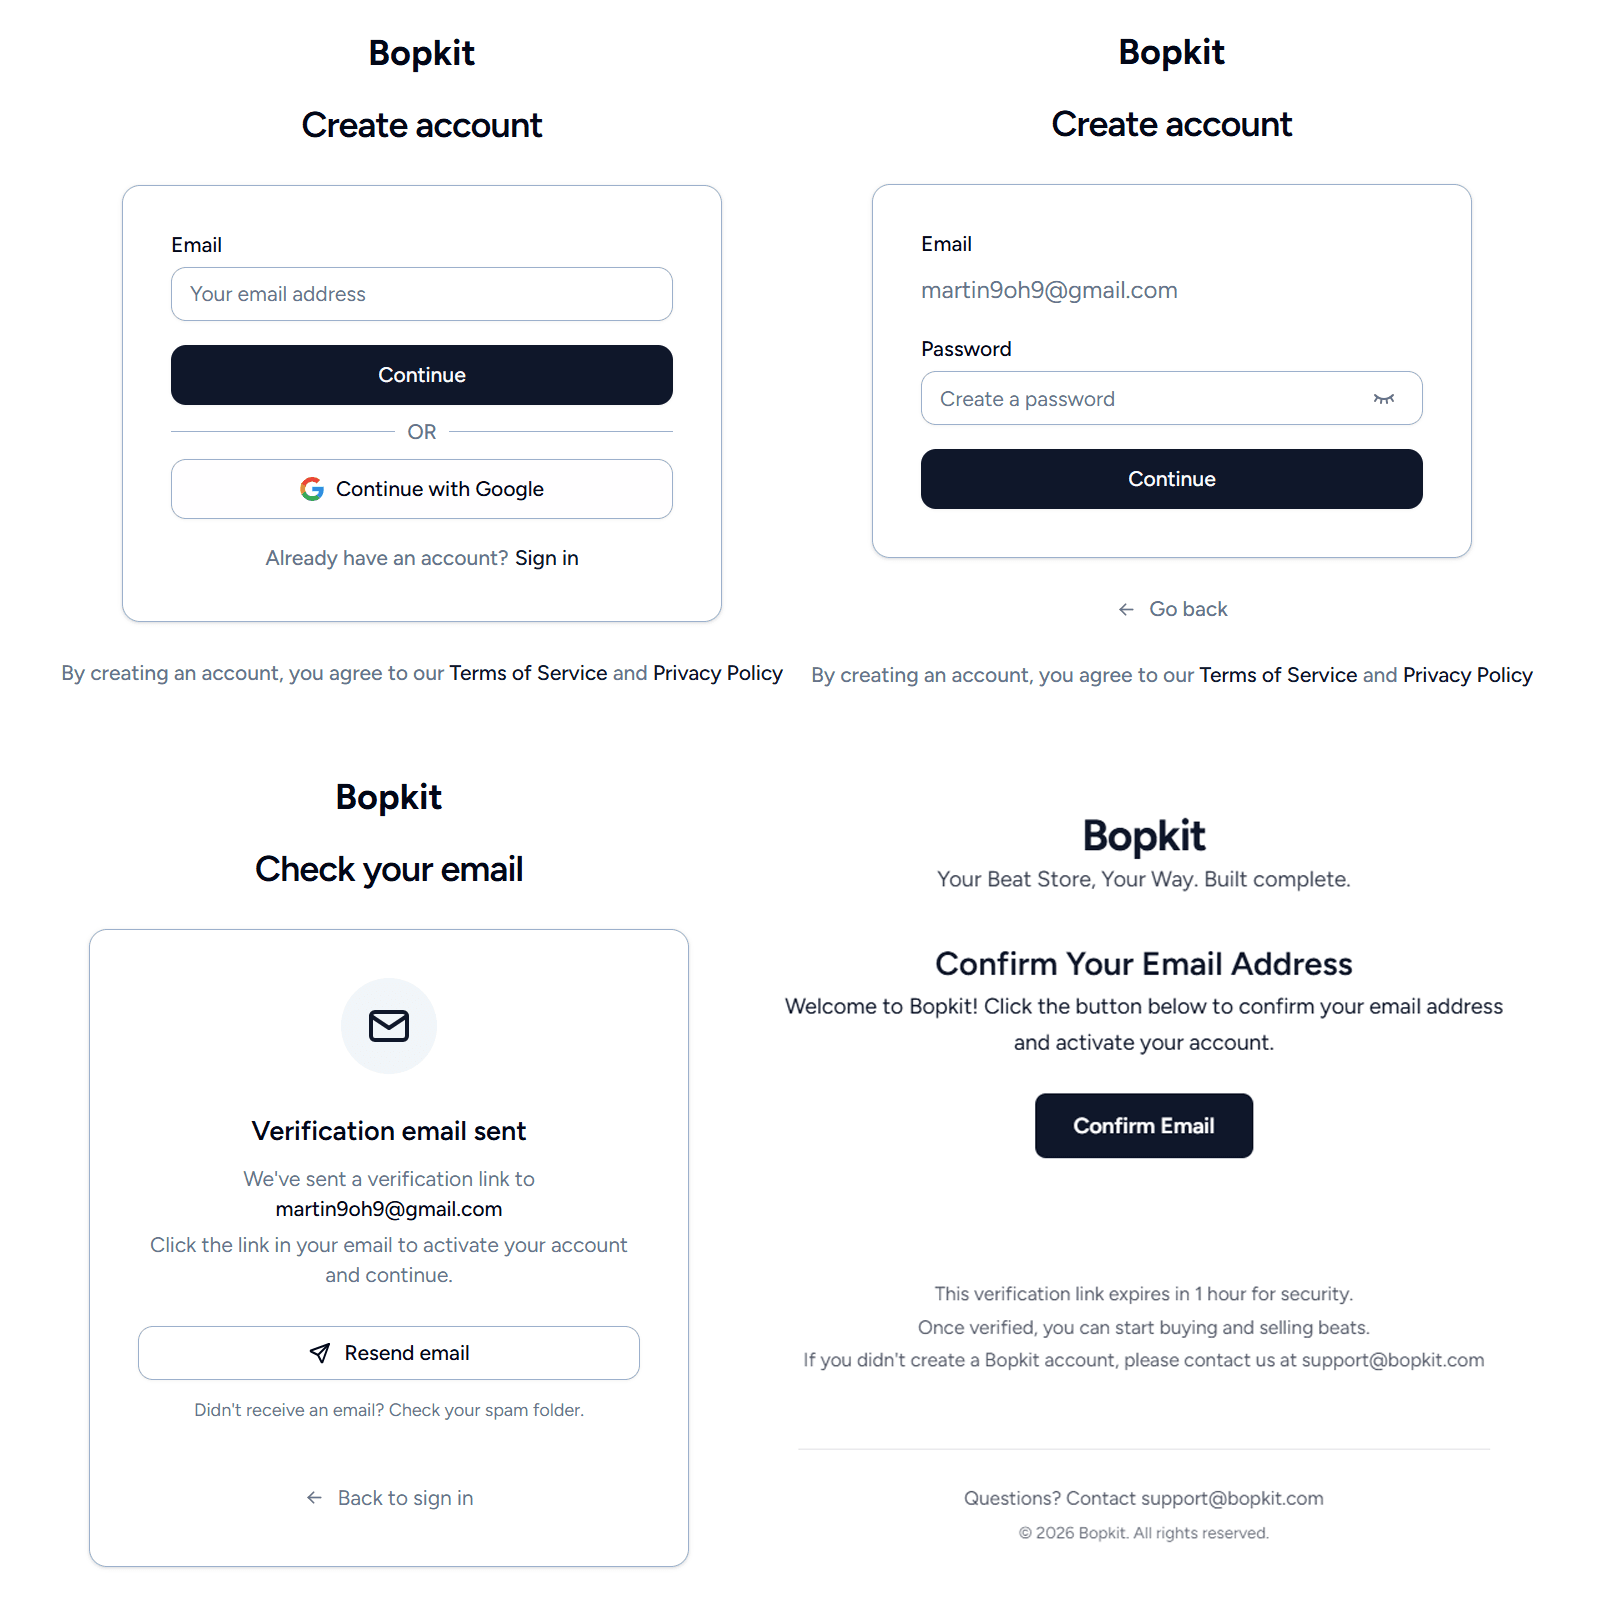
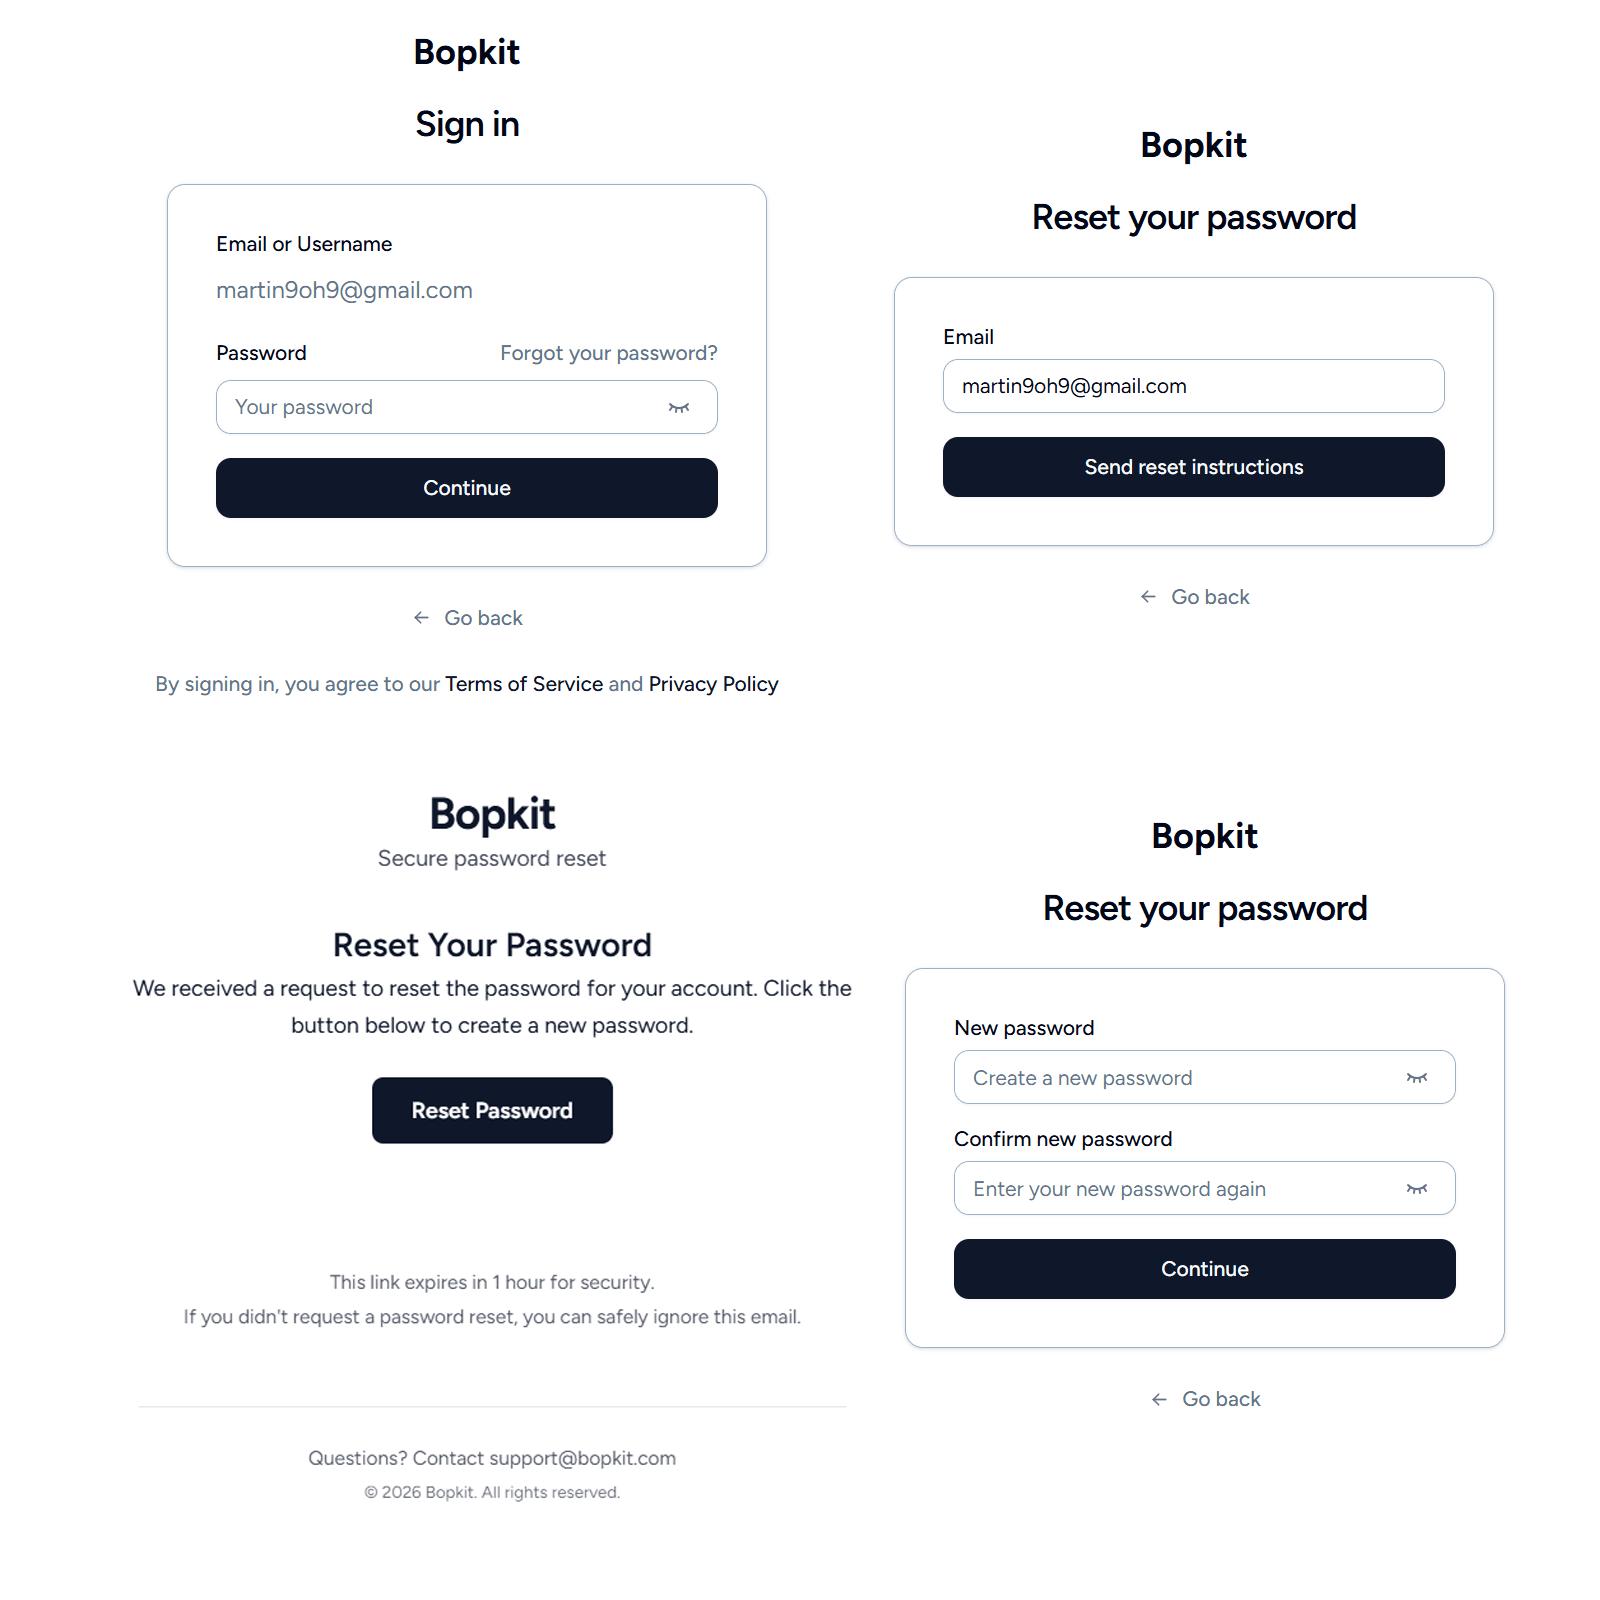
Sign-In
Sign-in uses the same split form pattern. The first screen accepts either an email address or a username in a single input field. The system detects which one was entered by checking for an @ symbol and routes to the appropriate sign-in method. The second screen collects the password and includes a forgot-password link.
Google OAuth
Both the sign-in and sign-up pages include a Continue with Google button. Google is configured as a trusted provider with account linking enabled, meaning if a user registers with email and later signs in with Google using the same or a different email, the accounts are linked rather than creating a duplicate. Profile data (name, email, avatar) is mapped from the Google profile, and the email is marked as verified automatically since Google has already verified it.
Password Reset
The forgot-password flow sends a reset link that expires after one hour. When the user sets a new password, two things happen on the server side: all existing sessions for that user are deleted from the database, and a password-changed confirmation email is sent. Revoking all sessions ensures that if the password was reset because of a compromise, no previously authenticated session can persist. The user must sign in again with the new password.
Session Management
Better Auth uses opaque session tokens stored in the database, not JWTs. When a request comes in, the server looks up the token to authenticate the user. There are no refresh tokens. Instead, sessions use a sliding-window approach: sessions last 30 days, and if the user is active and the session hasn't been updated in the last 7 days, Better Auth extends the expiry to another 30 days from that point. Active users stay signed in indefinitely.
To avoid hitting the database on every request, session data is also cached in a signed cookie with a 5-minute TTL. Within that window, requests are authenticated from the cookie alone. After 5 minutes, the session is re-verified against the database and the cache is refreshed. For sensitive operations like PayPal onboarding and profile updates, the cache is bypassed to force a fresh database read.
Since Bopkit is a multi-tenant platform with subdomains, cookies need to work across both bopkit.com and username.bopkit.com. The cookie domain is dynamically computed to .bopkit.com in production, which allows a single session to authenticate requests on any subdomain.
Guest Cart Merging
An auth hook runs whenever a new session is created, regardless of auth method (email sign-in, Google OAuth, or email verification auto-sign-in). It checks for a guest cookie. If a guest user had items in their cart before signing in, the cart is merged into their authenticated account and the guest cookie is cleared. This prevents losing cart items during sign-in.
Route Protection
Protected routes are enforced at three layers. Server-side layouts check the session and redirect unauthenticated users to the sign-in page with a callback URL. API routes use a tRPC middleware that rejects requests with no valid session. Dashboard pages additionally verify that the signed-in user owns the shop they are trying to access.
Account Deletion
Users can delete their account from settings. Before deletion, a hook deletes all of the user's storage files (beats, artwork, audio tags) from Supabase. If file cleanup fails, the account is still deleted to avoid blocking the user. Orphaned files are cleaned up separately with a cron job.
Onboarding & PayPal Setup
After signing up and verifying their email, new users are redirected to the onboarding flow where they claim their shop URL and configure initial settings. Once inside the dashboard, a getting started checklist guides them through the remaining setup steps, including connecting their PayPal account to receive payments.
Username & Shop URL
The first screen asks the user to choose a username. As they type, the input shows a live preview of their shop URL (username.bopkit.com) and validates availability in real time with a 300ms debounce. Usernames are validated against a Zod schema (3-30 characters, letters, numbers, and dashes only) and normalized to lowercase before the availability check, making them case-insensitive.
Below the username field, the currency for the shop is auto-detected based on the user's location and can be overridden with a dropdown. This determines the currency that prices are listed in and payments are received in.
When the user submits, the server runs a database transaction that double-checks username availability to prevent race conditions, creates the shop with default theme colors and the selected currency, and initializes default settings for pricing, audio tags, and YouTube metadata. After setup, dashboard at username.bopkit.com/dashboard.

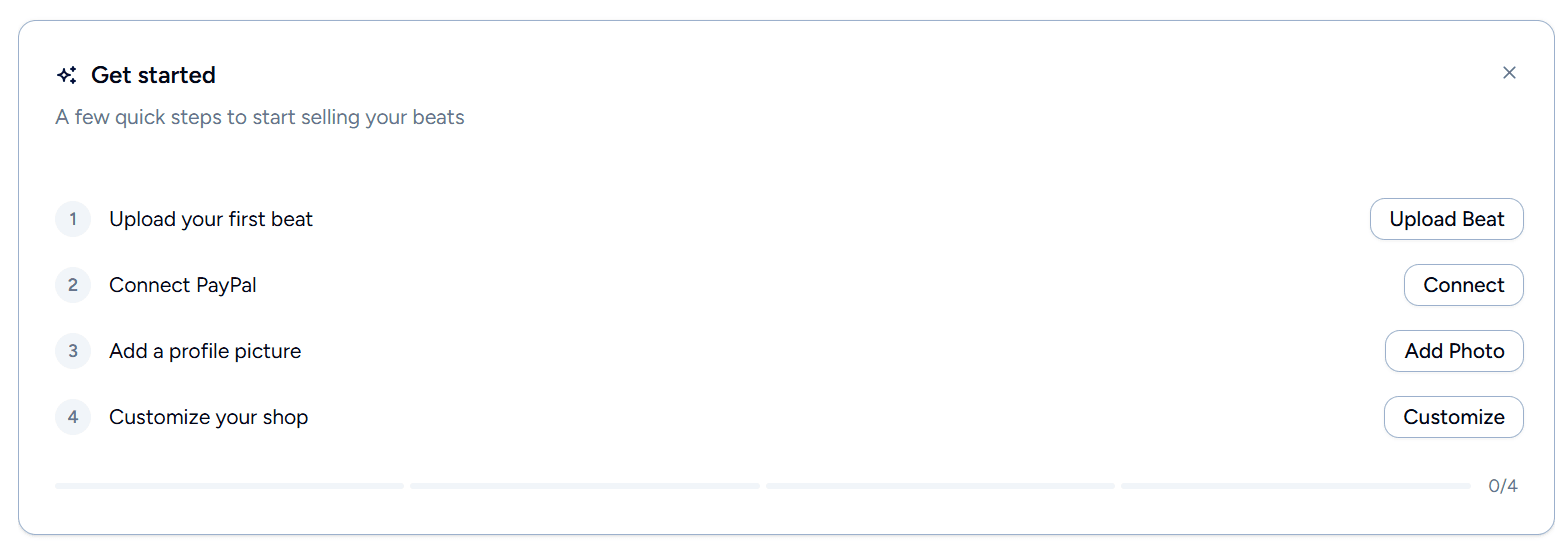
Getting Started Checklist
Once in the dashboard, a getting started card appears with four tasks to complete:
- Upload your first beat — checks whether the user has any published beats
- Connect PayPal — checks whether the user has completed PayPal onboarding
- Add a profile picture — checks whether the user has uploaded an avatar
- Customize your shop — checks whether the theme colors have been changed from defaults
When all four are complete, the checklist records a completion timestamp and shows a congratulations message.
PayPal Merchant Onboarding
Before a producer can receive payments, they need to connect their PayPal account. This is not a simple API key integration. Bopkit is registered as a PayPal Commerce Platform partner, which means producers are onboarded as merchants under Bopkit's partner umbrella. This is the same integration model used by marketplaces and platforms that need to facilitate payments between multiple parties.
When the user clicks Connect PayPal, the server calls PayPal's Partner Referrals API to generate a unique referral URL. The request specifies the features Bopkit needs: PAYMENT for processing transactions, PARTNER_FEE for deducting the platform fee, and ACCESS_MERCHANT_INFORMATION for verifying account status. The user's ID is passed as a tracking_id so that when PayPal sends the completion webhook later, the system knows which user it belongs to.
The user is redirected to PayPal where they log in and grant permissions. After authorizing, PayPal redirects back to a callback page that validates the response parameters and shows a three-step progress indicator while it waits for confirmation.
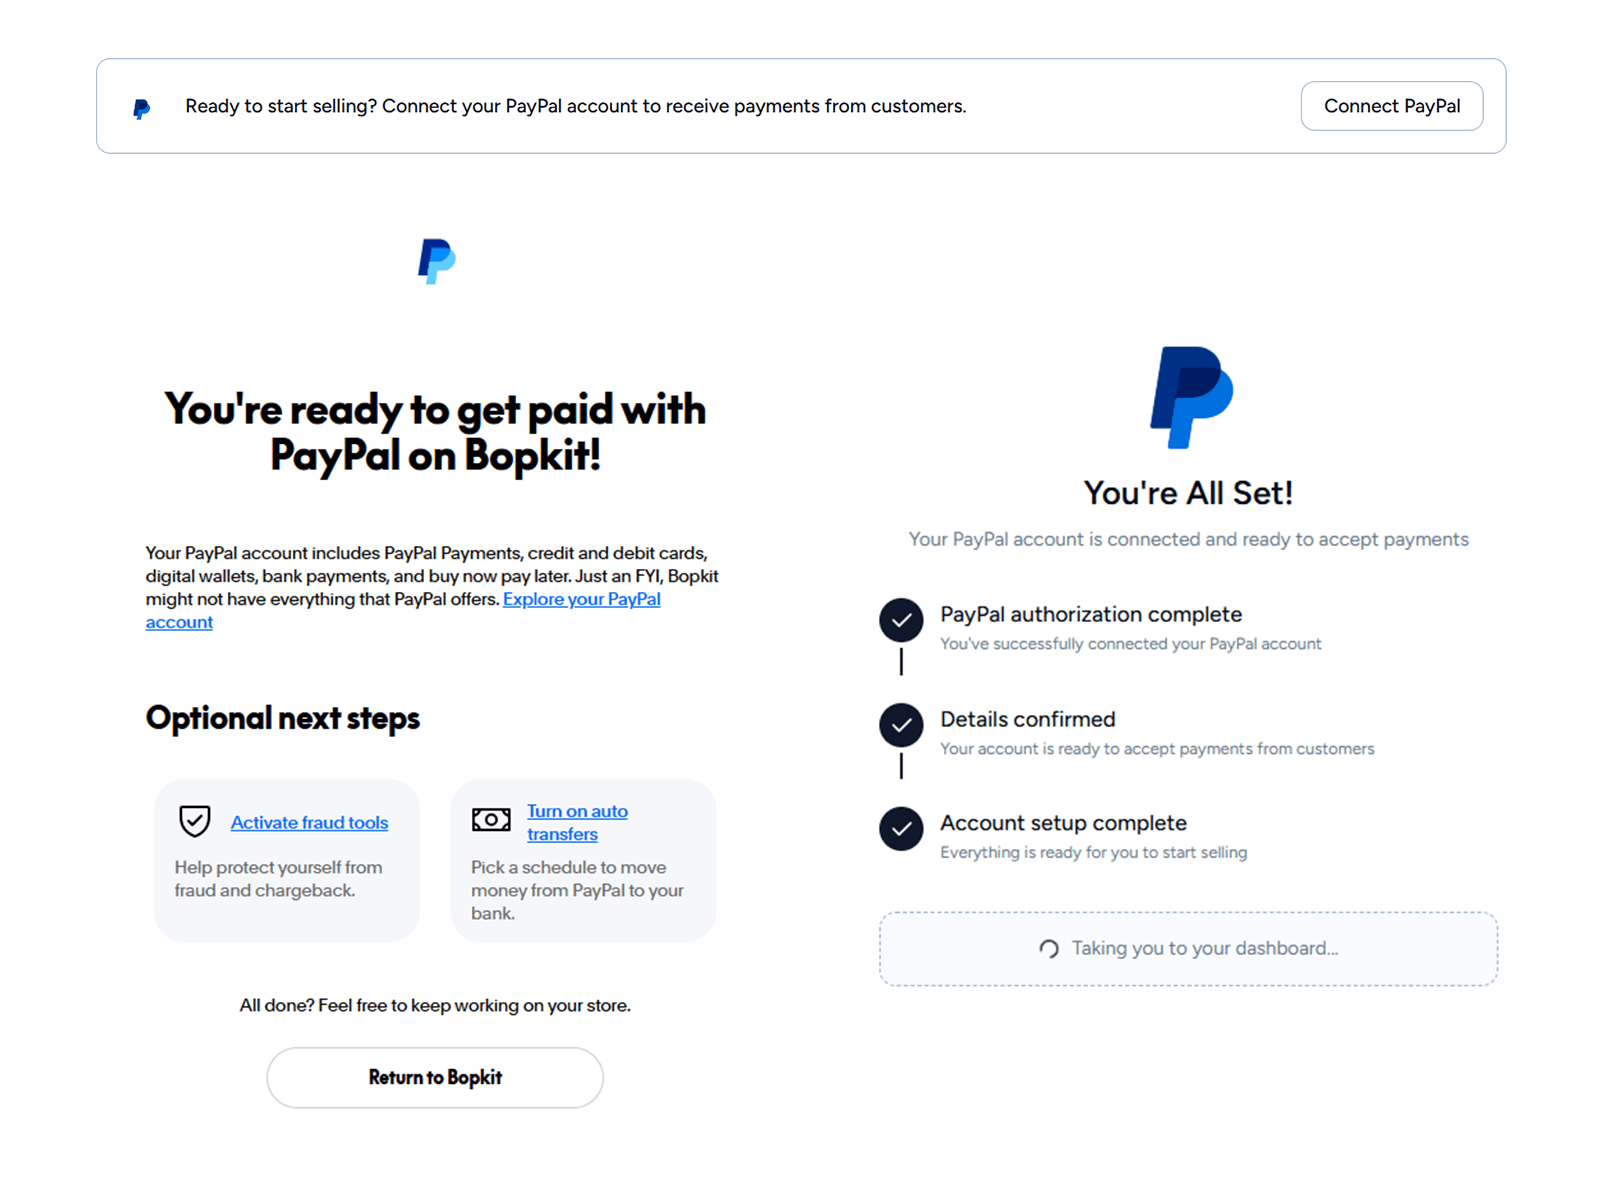
Asynchronous Completion via Webhook
The reason the callback page needs a progress indicator is that PayPal does not confirm the onboarding synchronously. The redirect back to Bopkit happens immediately, but the actual confirmation arrives asynchronously as a MERCHANT.ONBOARDING.COMPLETED webhook event. There is a race between the user landing on the callback page and the webhook arriving.
To handle this, the callback page polls the user's profile every 2 seconds, checking whether onboarding has completed. Meanwhile, when the webhook arrives, the handler runs inside a database transaction: it idempotently marks the onboarding as complete (so re-delivered webhooks are harmless), stores the merchant's PayPal identifiers, and sends an in-app notification only on the first successful transition. Once the polling detects the change, the callback page bypasses the session cookie cache to get a fresh read and redirects to the PayPal settings page.
Ongoing Status Verification
Connecting a PayPal account is not a one-time event. The merchant's status can change at any time: they might not confirm their email, their account could be restricted, or they could revoke consent through PayPal's settings. The dashboard continuously verifies the merchant's integration status by calling PayPal's merchant-integrations endpoint and checking three things: whether the primary email is confirmed, whether the account can receive payments, and whether the OAuth integration is still active.
If any of these checks fail, a warning banner appears on the dashboard with a specific message and action button for each state: not connected, email not confirmed, payments not receivable, OAuth missing, or verification failed. If a merchant revokes consent through PayPal, a MERCHANT.PARTNER-CONSENT.REVOKED webhook marks the account as disconnected (keeping their PayPal IDs for re-onboarding) and sends a notification. Users can also manually disconnect their PayPal account from settings at any time.
Beat Creation
Beat creation is the core workflow of the platform. It covers everything from uploading an audio file to having a published beat in the producer's shop (and optionally on YouTube). The creation flow is a single multi-section form where the producer works through audio upload, watermark configuration, metadata, pricing, collaborators, and YouTube information before publishing.
Everything on the creation page auto-saves as a draft. The form watches for changes with a 3-second debounce, and only sends the specific fields that changed to the server. It compares current values against the last saved state to avoid unnecessary writes, and skips saves entirely while a publish is in progress. Stale drafts are cleaned up automatically by two daily cron jobs: one removes drafts older than 7 days that were never published, and another cleans up drafts whose publish jobs have completed or failed. Both delete associated storage files before removing the database records.
Upload
The creation page opens with a drag-and-drop zone for the audio file. Only MP3 and WAV files are accepted, with a 50MB size limit. Dropping an unsupported file type shows an error immediately. During upload, a progress bar with a percentage indicator shows the upload status.
The source file type matters. If the producer uploads a WAV file, both WAV and MP3 license types become available for purchase since the system converts WAV to MP3 during publishing. If they upload an MP3, only the MP3 license is offered since converting MP3 to WAV would not improve quality.
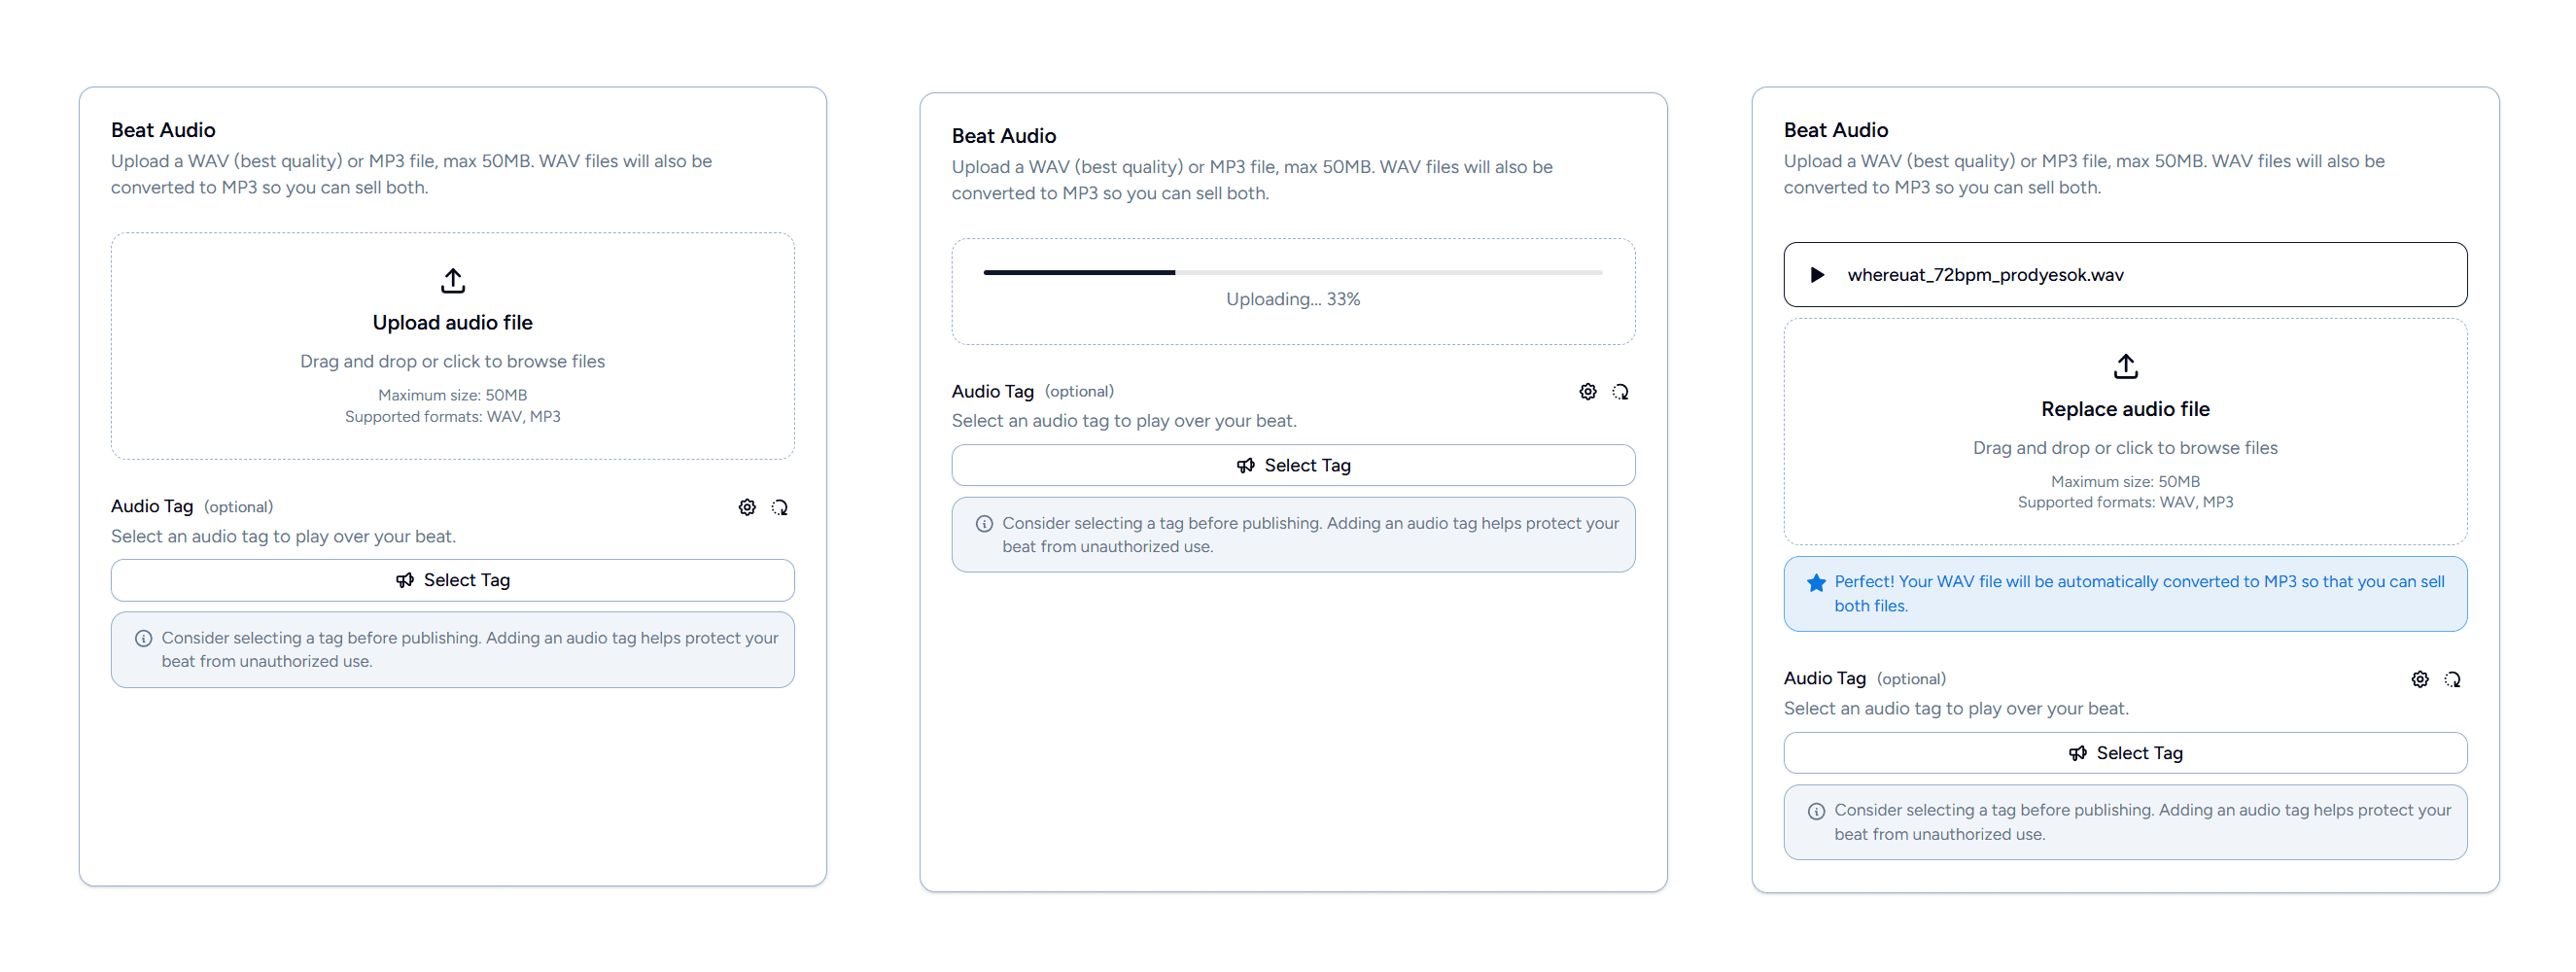
Audio Watermarking
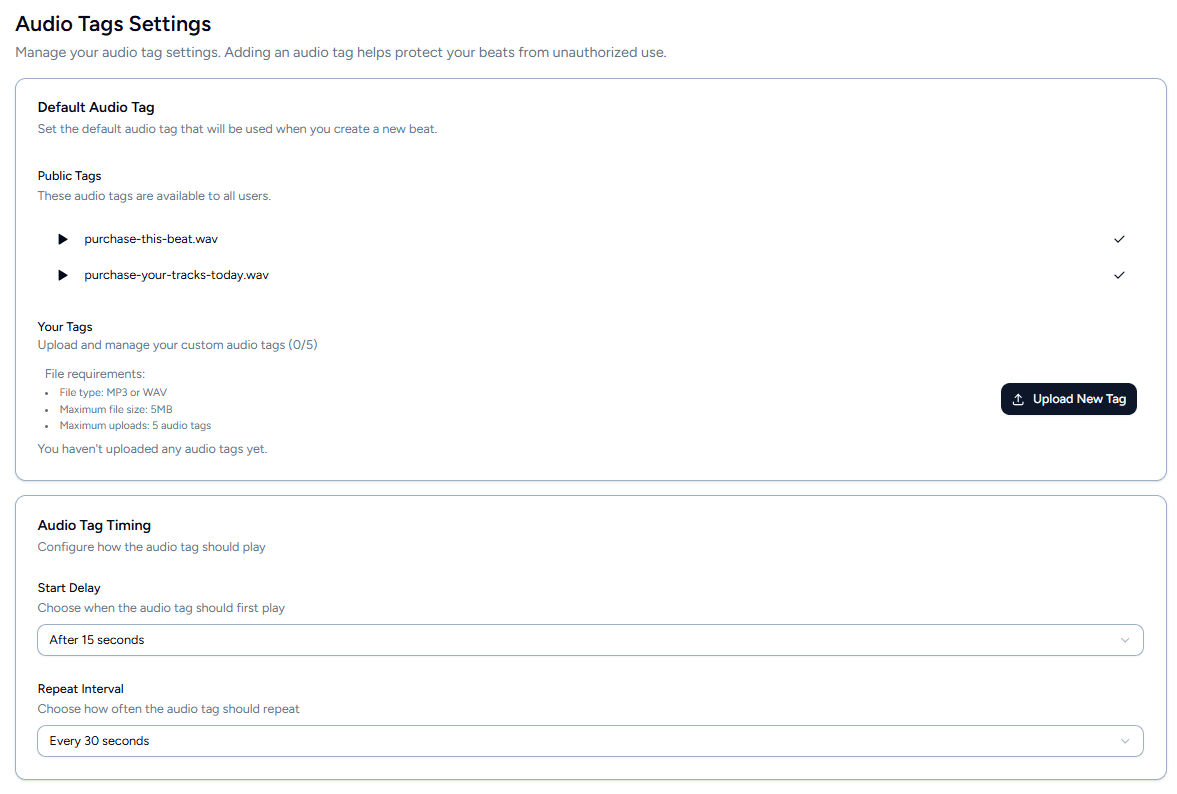
Audio watermarks (called “audio tags” in the UI) are short audio clips that play over a beat's preview to protect it from being used without purchasing. When a buyer browses a shop, they hear the tagged version. Only the clean, untagged files are included in the download after purchase.
Producers can choose from a set of public tags available to all users, or upload up to 5 custom tags of their own (MP3 or WAV, max 5MB each). A default tag can be set in settings so new beats are pre-configured. Two timing options control how the tag plays: a start delay (Immediately, 5s, 10s, 15s, or 30s) that determines when the tag first plays, and a repeat interval (Never, 15s, 30s, 45s, or 60s) that controls how often it repeats.
The actual watermarking happens server-side during publishing via FFmpeg. The process builds a filter graph that generates silence for the gaps between tag repeats, concatenates the tag audio with the silence to form a repeatable unit, loops it indefinitely, delays the first occurrence by the configured start time, reduces the tag volume to 40% so it doesn't overpower the beat, and mixes it with the original audio. The entire operation is streamed. The beat audio is streamed in from Supabase, the tag file is written to a temporary directory for FFmpeg, and the output streams directly to storage without saving an intermediate file to disk.
Metadata & Artwork
After uploading the audio file, the BPM and key fields are auto-populated when possible. The extraction runs in parallel with the upload and uses a three-tiered detection approach: first it reads embedded metadata (ID3v2 tags for MP3 files, ACID chunks for WAV files), and if that yields nothing, it falls back to parsing the filename for common patterns like 140bpm or G minor.
Artwork can be added in several ways: drag-and-drop, file picker, pasting from clipboard (Ctrl+V / Cmd+V), or pasting a URL. Supported formats include JPEG, PNG, WebP, GIF (up to 5MB), and even video files like MP4, MOV, and WebM (up to 10MB, max 30 seconds), meaning beat artwork can be animated. After selecting an image, a cropping interface lets the producer adjust the framing.
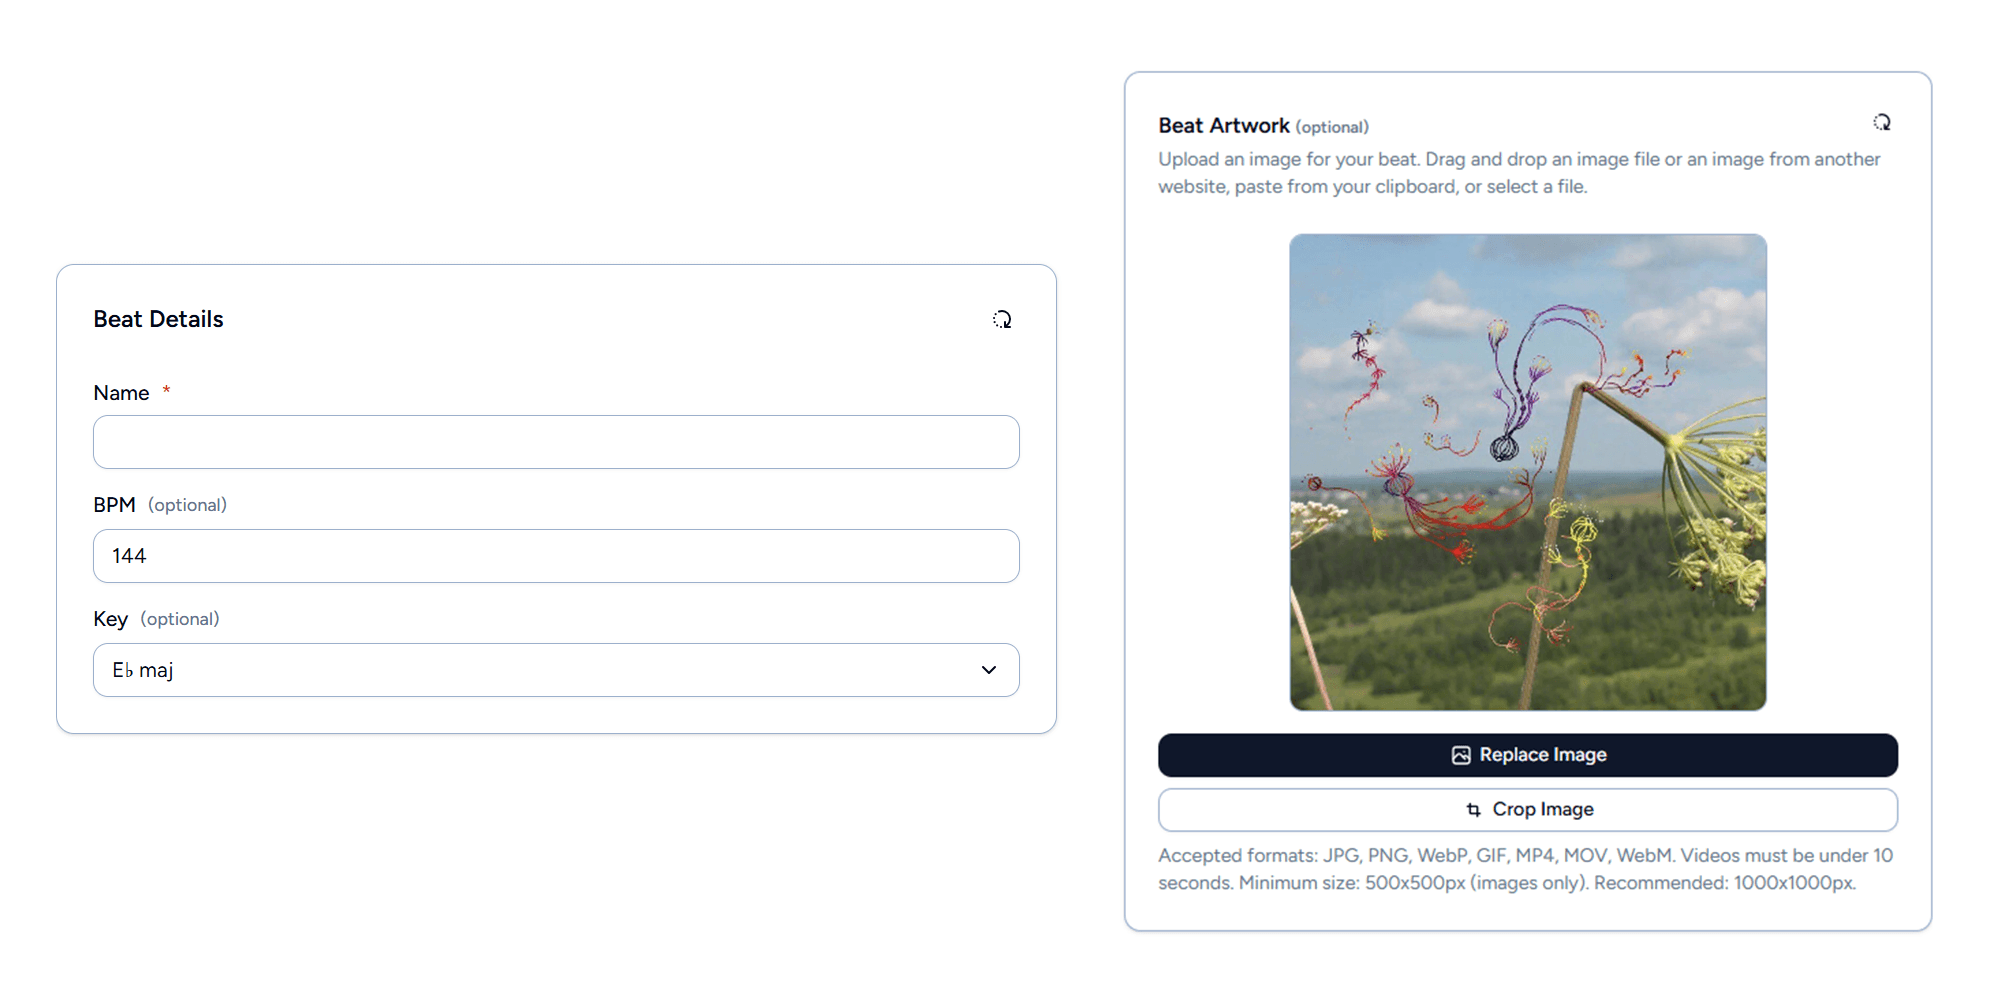
Image processing is handled by Sharp on the server during publishing. Static images are resized to a 128x128 WebP thumbnail at 80% quality. Animated media (GIFs and videos) go through a different pipeline: FFmpeg converts them to WebM in three variants: a full-resolution hero version, a 128x128 thumbnail at a reduced 15fps framerate, and a static WebP poster extracted from the first frame for use in contexts that don't support video (like email clients).
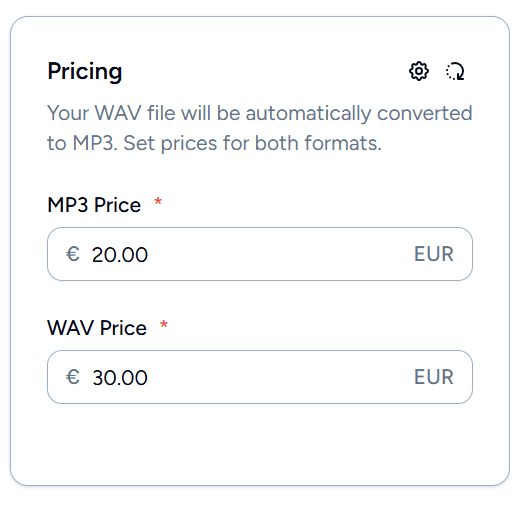
Pricing & Validation
Producers set prices for each license type: MP3 and WAV (if the source file was a WAV). Prices are stored in cents to avoid floating-point issues. Default prices can be configured in settings so new beats are pre-filled.
The interesting technical challenge here is minimum price validation. Every collaborator on a beat must receive at least the PayPal minimum payout after all fees are deducted. For USD, that minimum is $5.00. The fees that get deducted include the 10% platform fee, PayPal's percentage fee (up to 4.99% in the worst case), a fixed fee per currency (e.g., $0.49 for USD), and a potential cross-border conversion fee of up to 4%.
The problem is that you cannot simply reverse the fee formula to find the minimum price. Each fee component in the chain rounds independently: collaborator shares round down, the platform fee rounds to nearest, and PayPal fees round up. A one-cent difference in the input can cause a different rounding outcome at each step, and those small differences compound through the chain in unpredictable ways. No closed-form formula can account for this because the rounding behavior depends on the exact cent value at each stage. The only way to know for certain whether a price is sufficient is to simulate the entire fee calculation and check the result. The system does exactly that: it starts with an analytical estimate, runs the full fee simulation at that price, and if the net payout falls short, increments by one cent and simulates again until every collaborator clears the minimum.
Collaborators
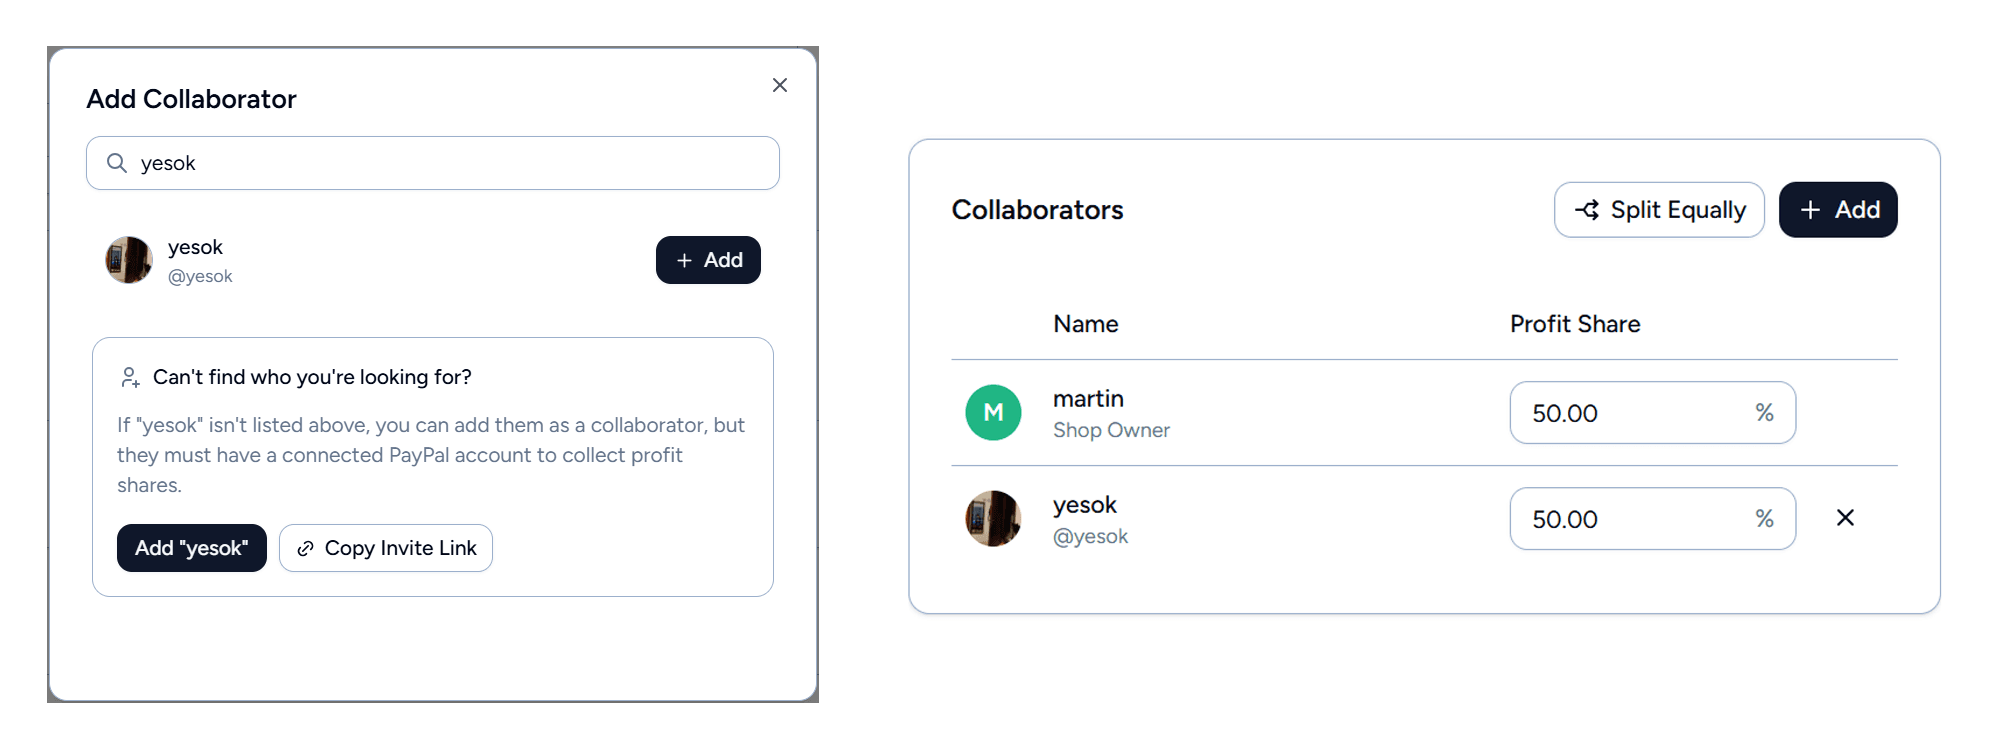
Producers can add collaborators to a beat to credit other people involved and automatically split revenue. Clicking Add Collaborator opens a search dialog that queries registered users as they type. If the collaborator is not on the platform, the producer can add them as an anonymous collaborator by name for credit purposes.
Each registered collaborator gets a profit share percentage, adjustable with 0.01% precision. An equal split button distributes shares evenly across all registered collaborators, and adjusting one share automatically redistributes the others proportionally. The total must equal exactly 100% (with a 0.01% floating-point tolerance). Anonymous collaborators always have a 0% share since they have no PayPal account to receive payouts.
At checkout, each registered collaborator becomes a separate payment recipient in the PayPal order. PayPal pays each party their share directly at the time of purchase. The owner receives the remainder after all collaborator shares are rounded down, which means any rounding cents favor the owner.
YouTube Integration
Producers can opt to auto-publish beats to YouTube as part of the creation flow. A toggle enables the YouTube section, which requires connecting a YouTube account via Google OAuth (requesting upload and read-only scopes). Once connected, the account name and channel link are displayed with options to switch accounts or unlink.
The YouTube form includes a title, a {beat-id} placeholder that auto-generates a purchase link to the beat in the shop, tags, a visibility selector (private, unlisted, or public), and an optional scheduler. A Use tagged audio toggle (shown only if the beat has a watermark configured) lets the producer choose whether the YouTube version uses the watermarked audio. Default values for title, description, and tags can be set in settings so they pre-fill for every new beat.
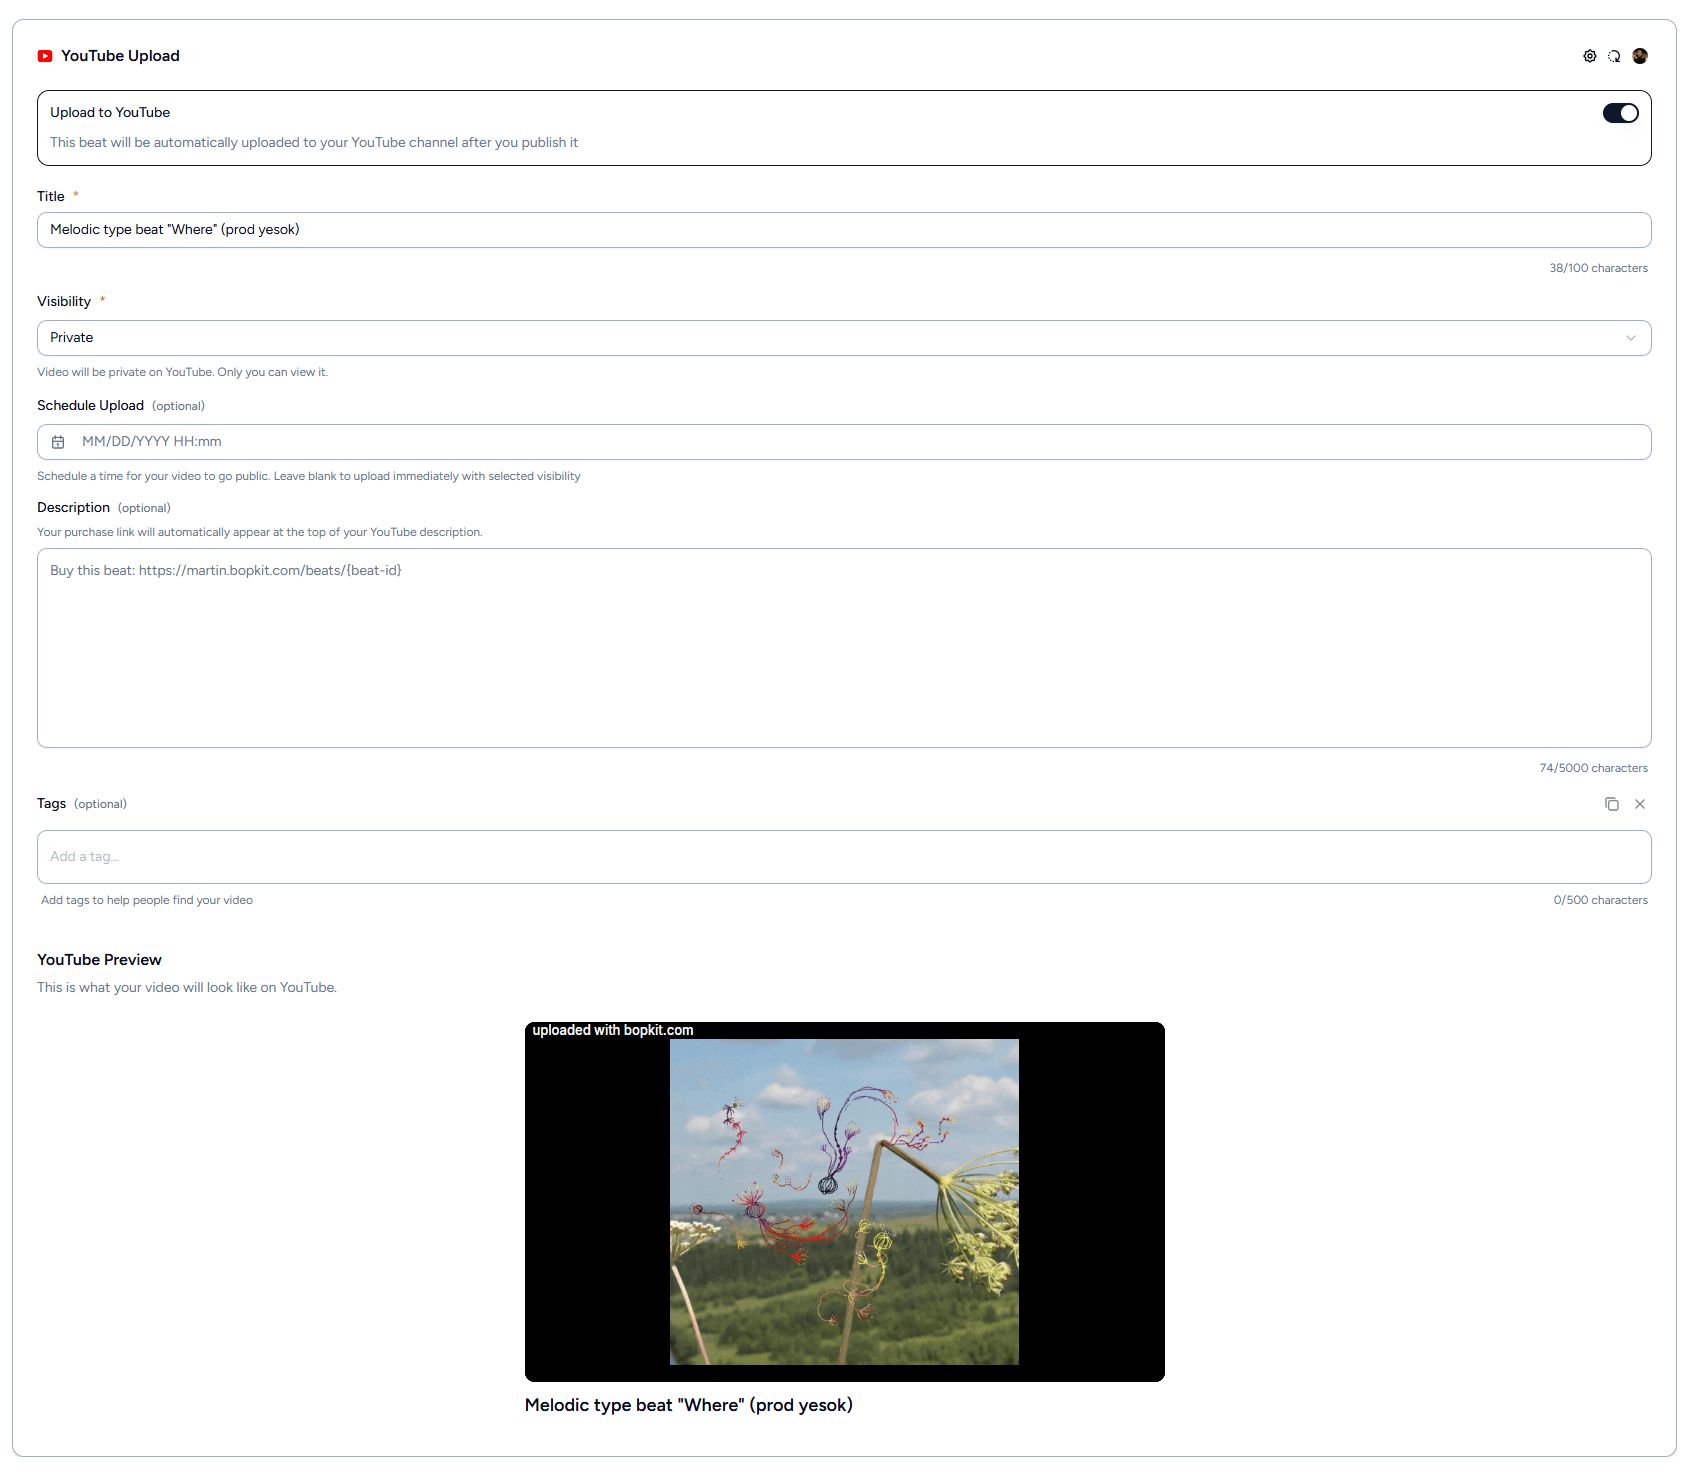
The video is generated server-side by FFmpeg, which combines the beat's audio with its artwork (either a static image or an animated WebM) into an MP4 video. The video is streamed directly to the YouTube Data API v3 without saving an intermediate file. For producers on the free plan, a Bopkit watermark is applied to the video. The description is composed using a utility that ensures the purchase link is always included regardless of what the producer entered.
Publishing
When the producer clicks Publish, the beat enters a multi-step background workflow powered by Inngest. The UI shows a publishing jobs panel with real-time progress, polling every 2 seconds.
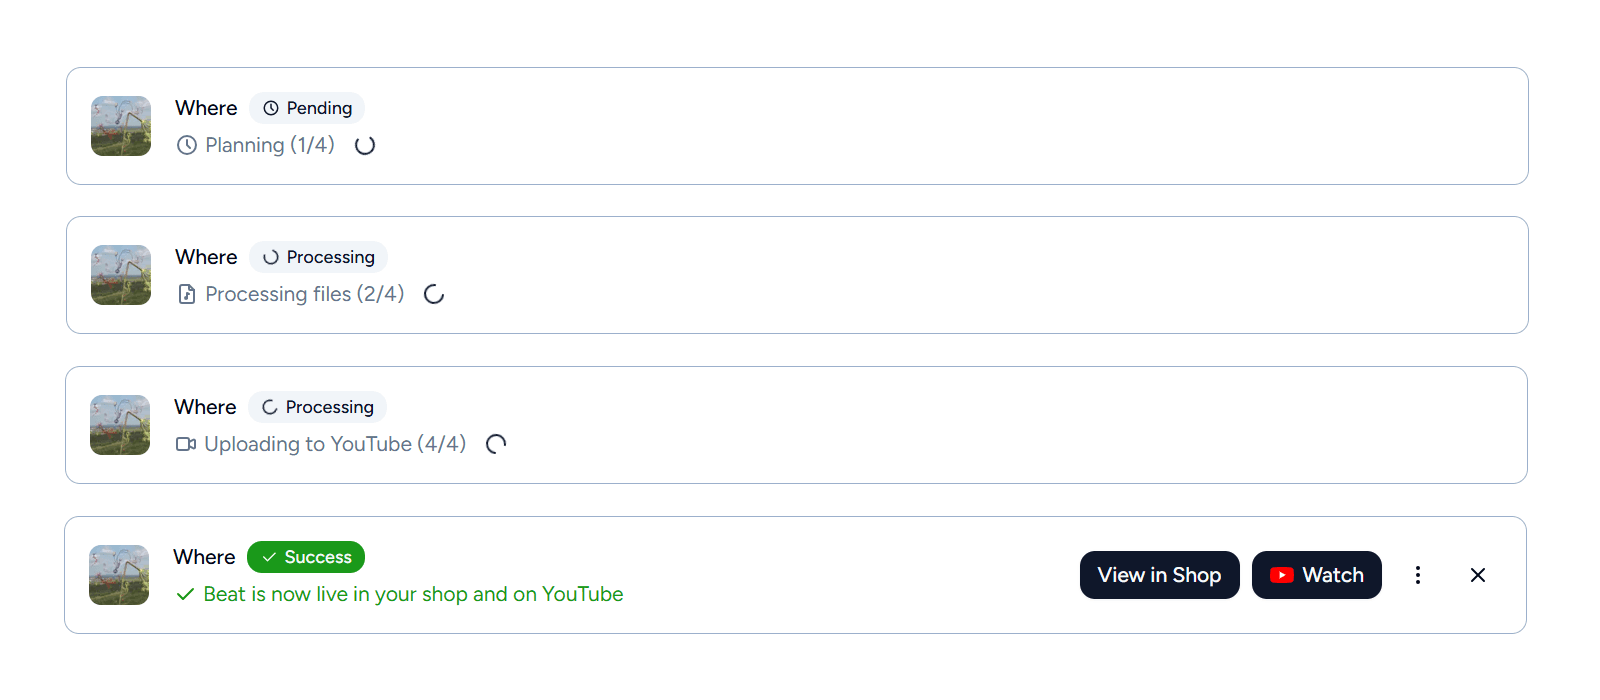
The workflow has four steps. The first is Planning, which analyzes the draft and builds an execution plan: what files need to be copied, whether a WAV-to-MP3 conversion is needed, whether audio tagging is required, and what image processing to perform. The second step is Processing Files, which runs three operations in parallel: FFmpeg handles audio conversion and watermarking, direct file copies move assets from the draft bucket to the permanent beats bucket, and Sharp (or FFmpeg for animated media) processes the artwork into its final variants. The third step is Saving to Database, which runs inside an atomic transaction that creates the Beat record, links all collaborators, and updates the publish job status. Critically, this step double-checks the free plan beat quota inside the transaction to prevent a race condition where two concurrent publishes could exceed the limit. The fourth step, Trigger YouTube, dispatches a separate workflow for the YouTube upload if the producer enabled it. Because it runs as its own workflow, a YouTube failure does not prevent the beat from appearing in the shop, and the producer can retry the upload independently.
Each step in the workflow is independently retriable. If step two fails, step one does not re-run because its result is already persisted. If any step fails, the system cleans up any files that were created during the failed attempt, marks the job as failed with a user-friendly error message specific to which step failed, and if a beat record was partially created, it is deleted. A concurrency key based on the draft prevents duplicate workflows from double-clicks or retries, while still allowing multiple different beats to publish concurrently.
On success, the publishing panel shows a View in Shop button, and if YouTube was enabled, a Watch button linking to the uploaded video. A dropdown provides additional actions like copying the beat link or navigating to the edit page. On failure, context-specific retry buttons appear: Edit and Retry if only the YouTube step failed.
Shop Customization
Every producer's shop lives at their own subdomain: username.bopkit.com. Underneath, a Next.js middleware intercepts incoming requests, extracts the subdomain, normalizes it to lowercase, and rewrites the URL to an internal route. In production, if someone navigates to the shop via the main domain (e.g. bopkit.com/user/username), they get redirected to the subdomain automatically.
The shop layout sets a handful of CSS custom properties on a root container based on the producer's saved colors and automatically derived text and contrast values. Every component in the shop, from beat cards to the cart to the music player, references these variables through Tailwind utility classes. A single set of components renders every shop, and the visual identity is entirely controlled by the CSS variables set at the layout level.

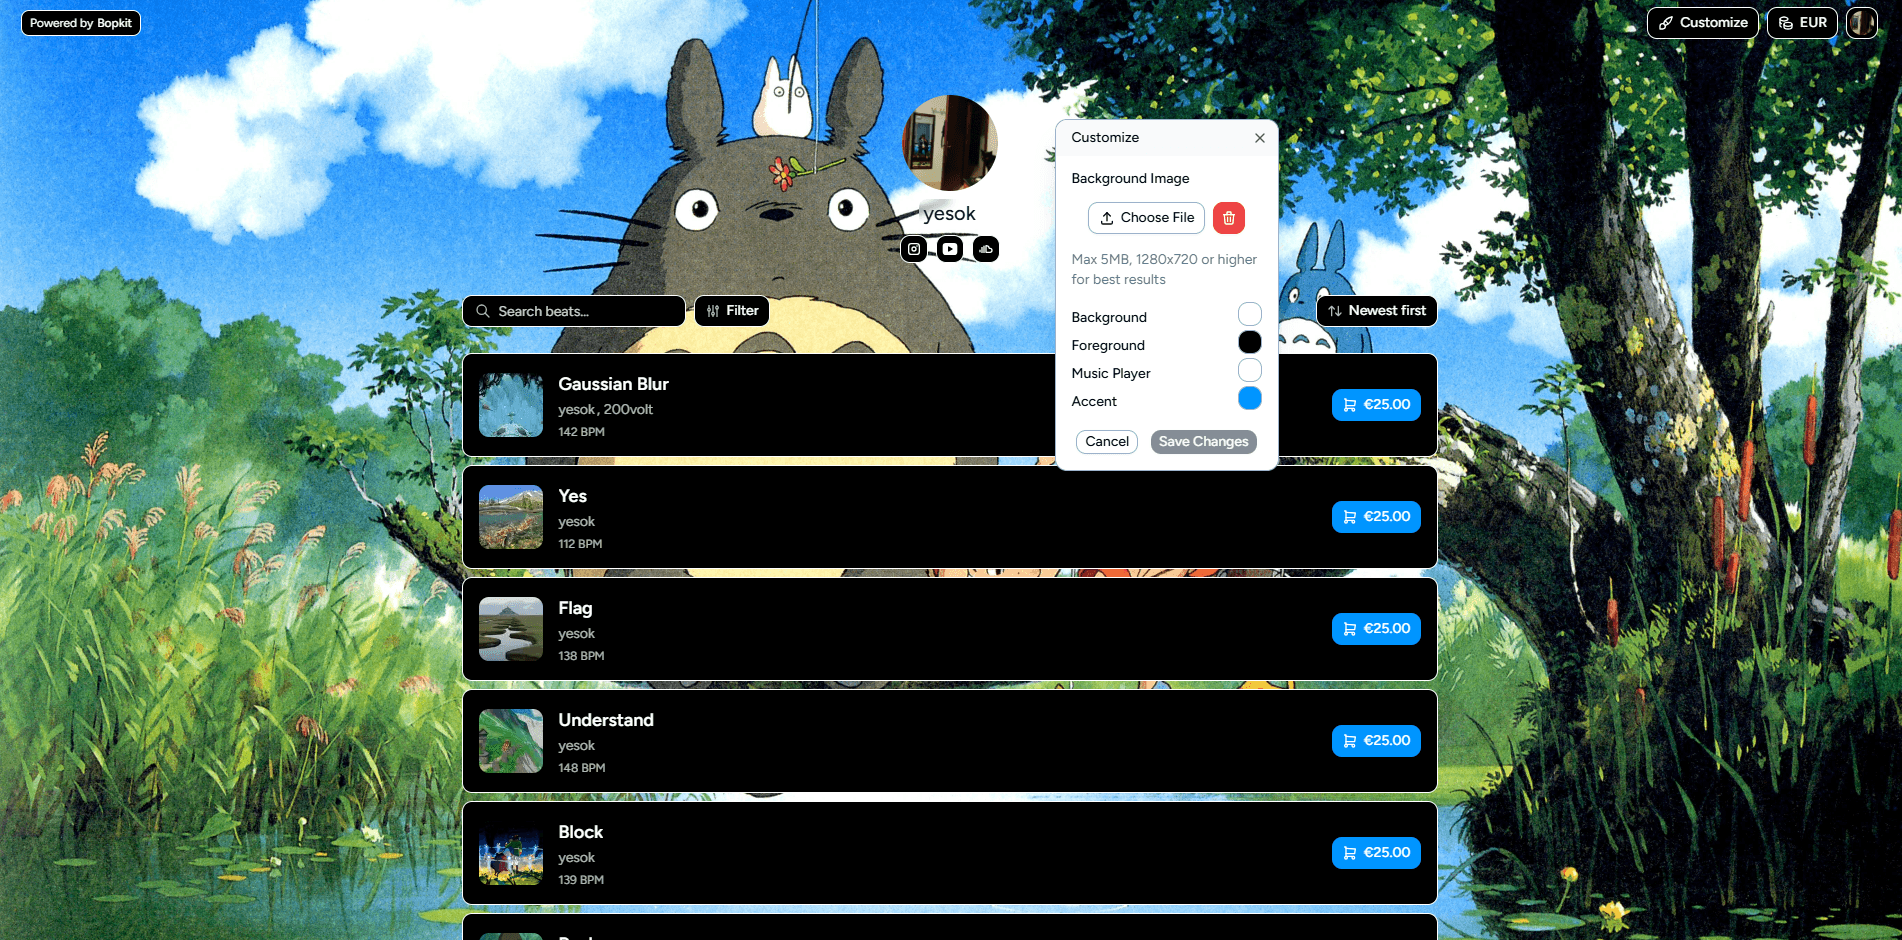
Customization Dialog
Producers can customize their shop's appearance through a draggable dialog that floats over the shop so they can see changes in real time. There are four color options: background, foreground (cards and surfaces), accent (buttons and interactive elements), and music player. An optional background image can also be uploaded.
The producer only picks these four colors. The system automatically derives readable text colors for each surface using a luminance formula, so text is always legible regardless of how light or dark the chosen color is. Contrast colors for borders and hover states are also calculated automatically. This means a producer can't accidentally create a shop with unreadable text.
Changes preview live. When a color is changed in the dialog, the shop behind it updates instantly without any API call. This works by optimistically updating the cached shop data, which flows through a provider that recalculates all derived colors and updates the CSS variables. If the producer cancels, the colors revert to the previous values.
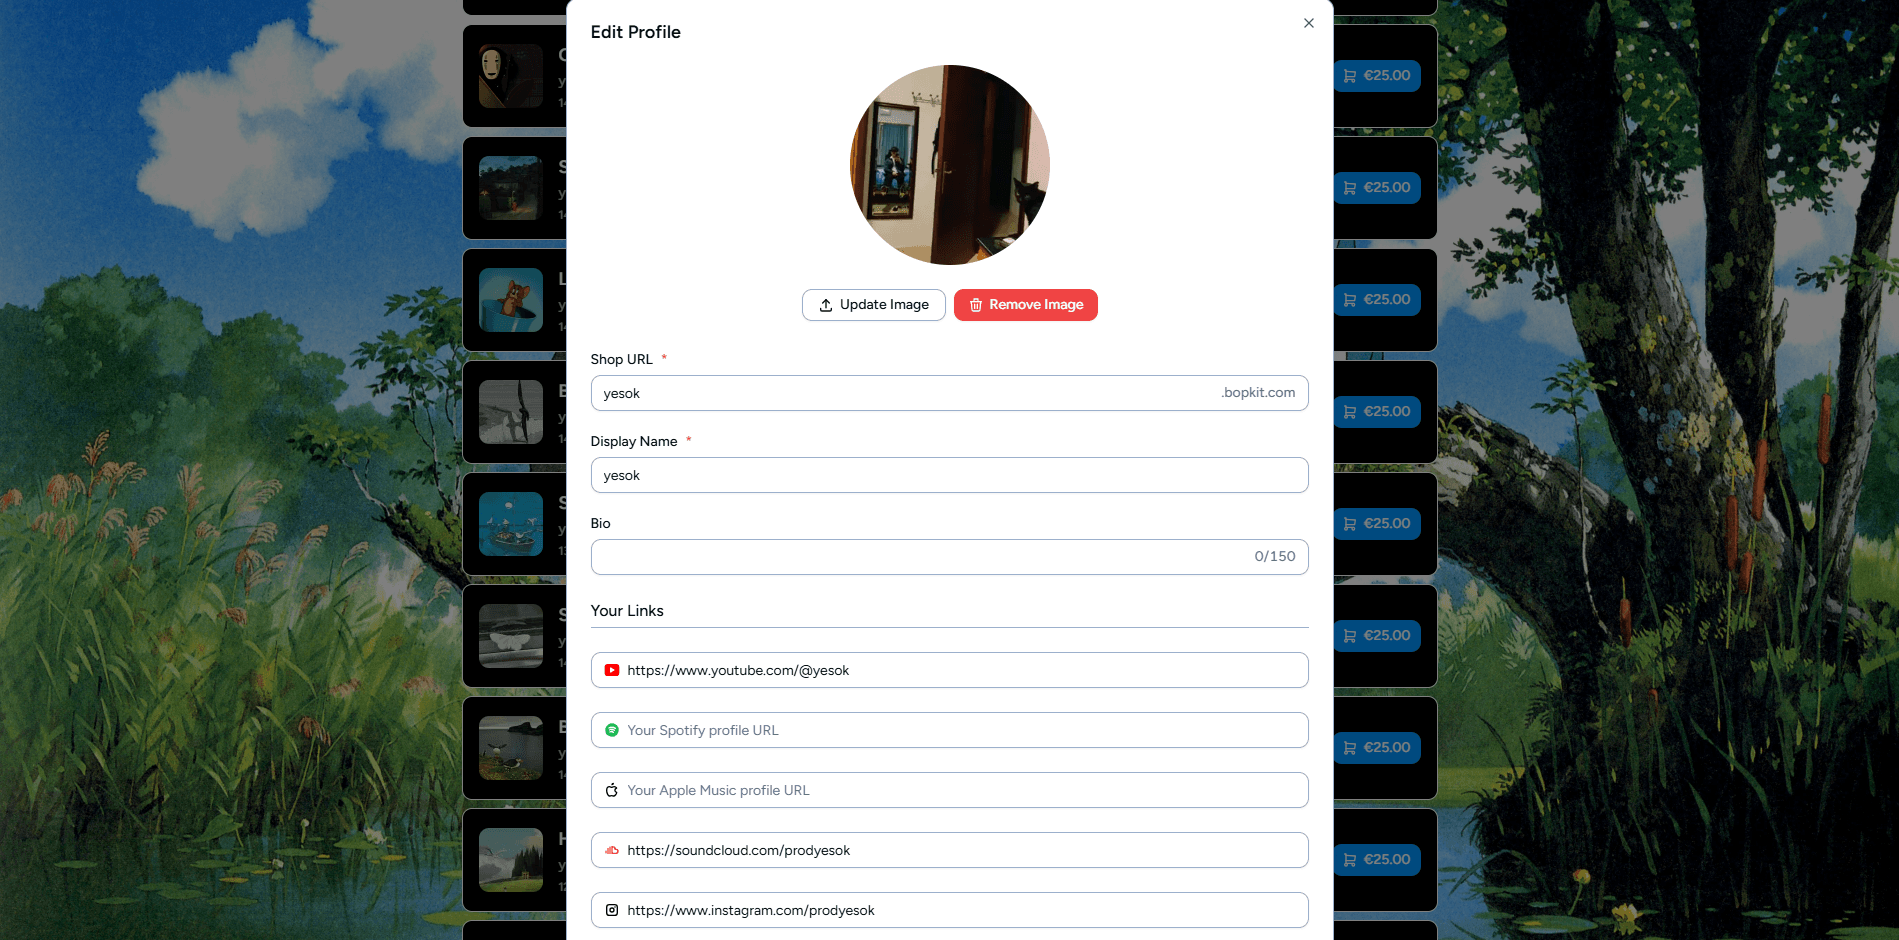
Profile & Social Links
Producers can edit their display name, bio (up to 150 characters), and avatar through a profile dialog accessible from the shop header. The avatar is cropped to a square and processed before upload. Nine social link fields are available: YouTube, Spotify, Apple Music, SoundCloud, Instagram, TikTok, X, Discord, and Twitch. Configured links appear as icons in the shop header.
Producer Dashboard
The dashboard is the producer's home base for managing their business. It's accessible via a “Manage Shop” button in the site header, or through the avatar dropdown when viewing their own shop. A sidebar navigates between five sections: Overview, Beats, Sales, Collaborations, and Analytics. The sidebar footer also shows the producer's beat quota (e.g. “3/10 beats remaining” on the free plan).
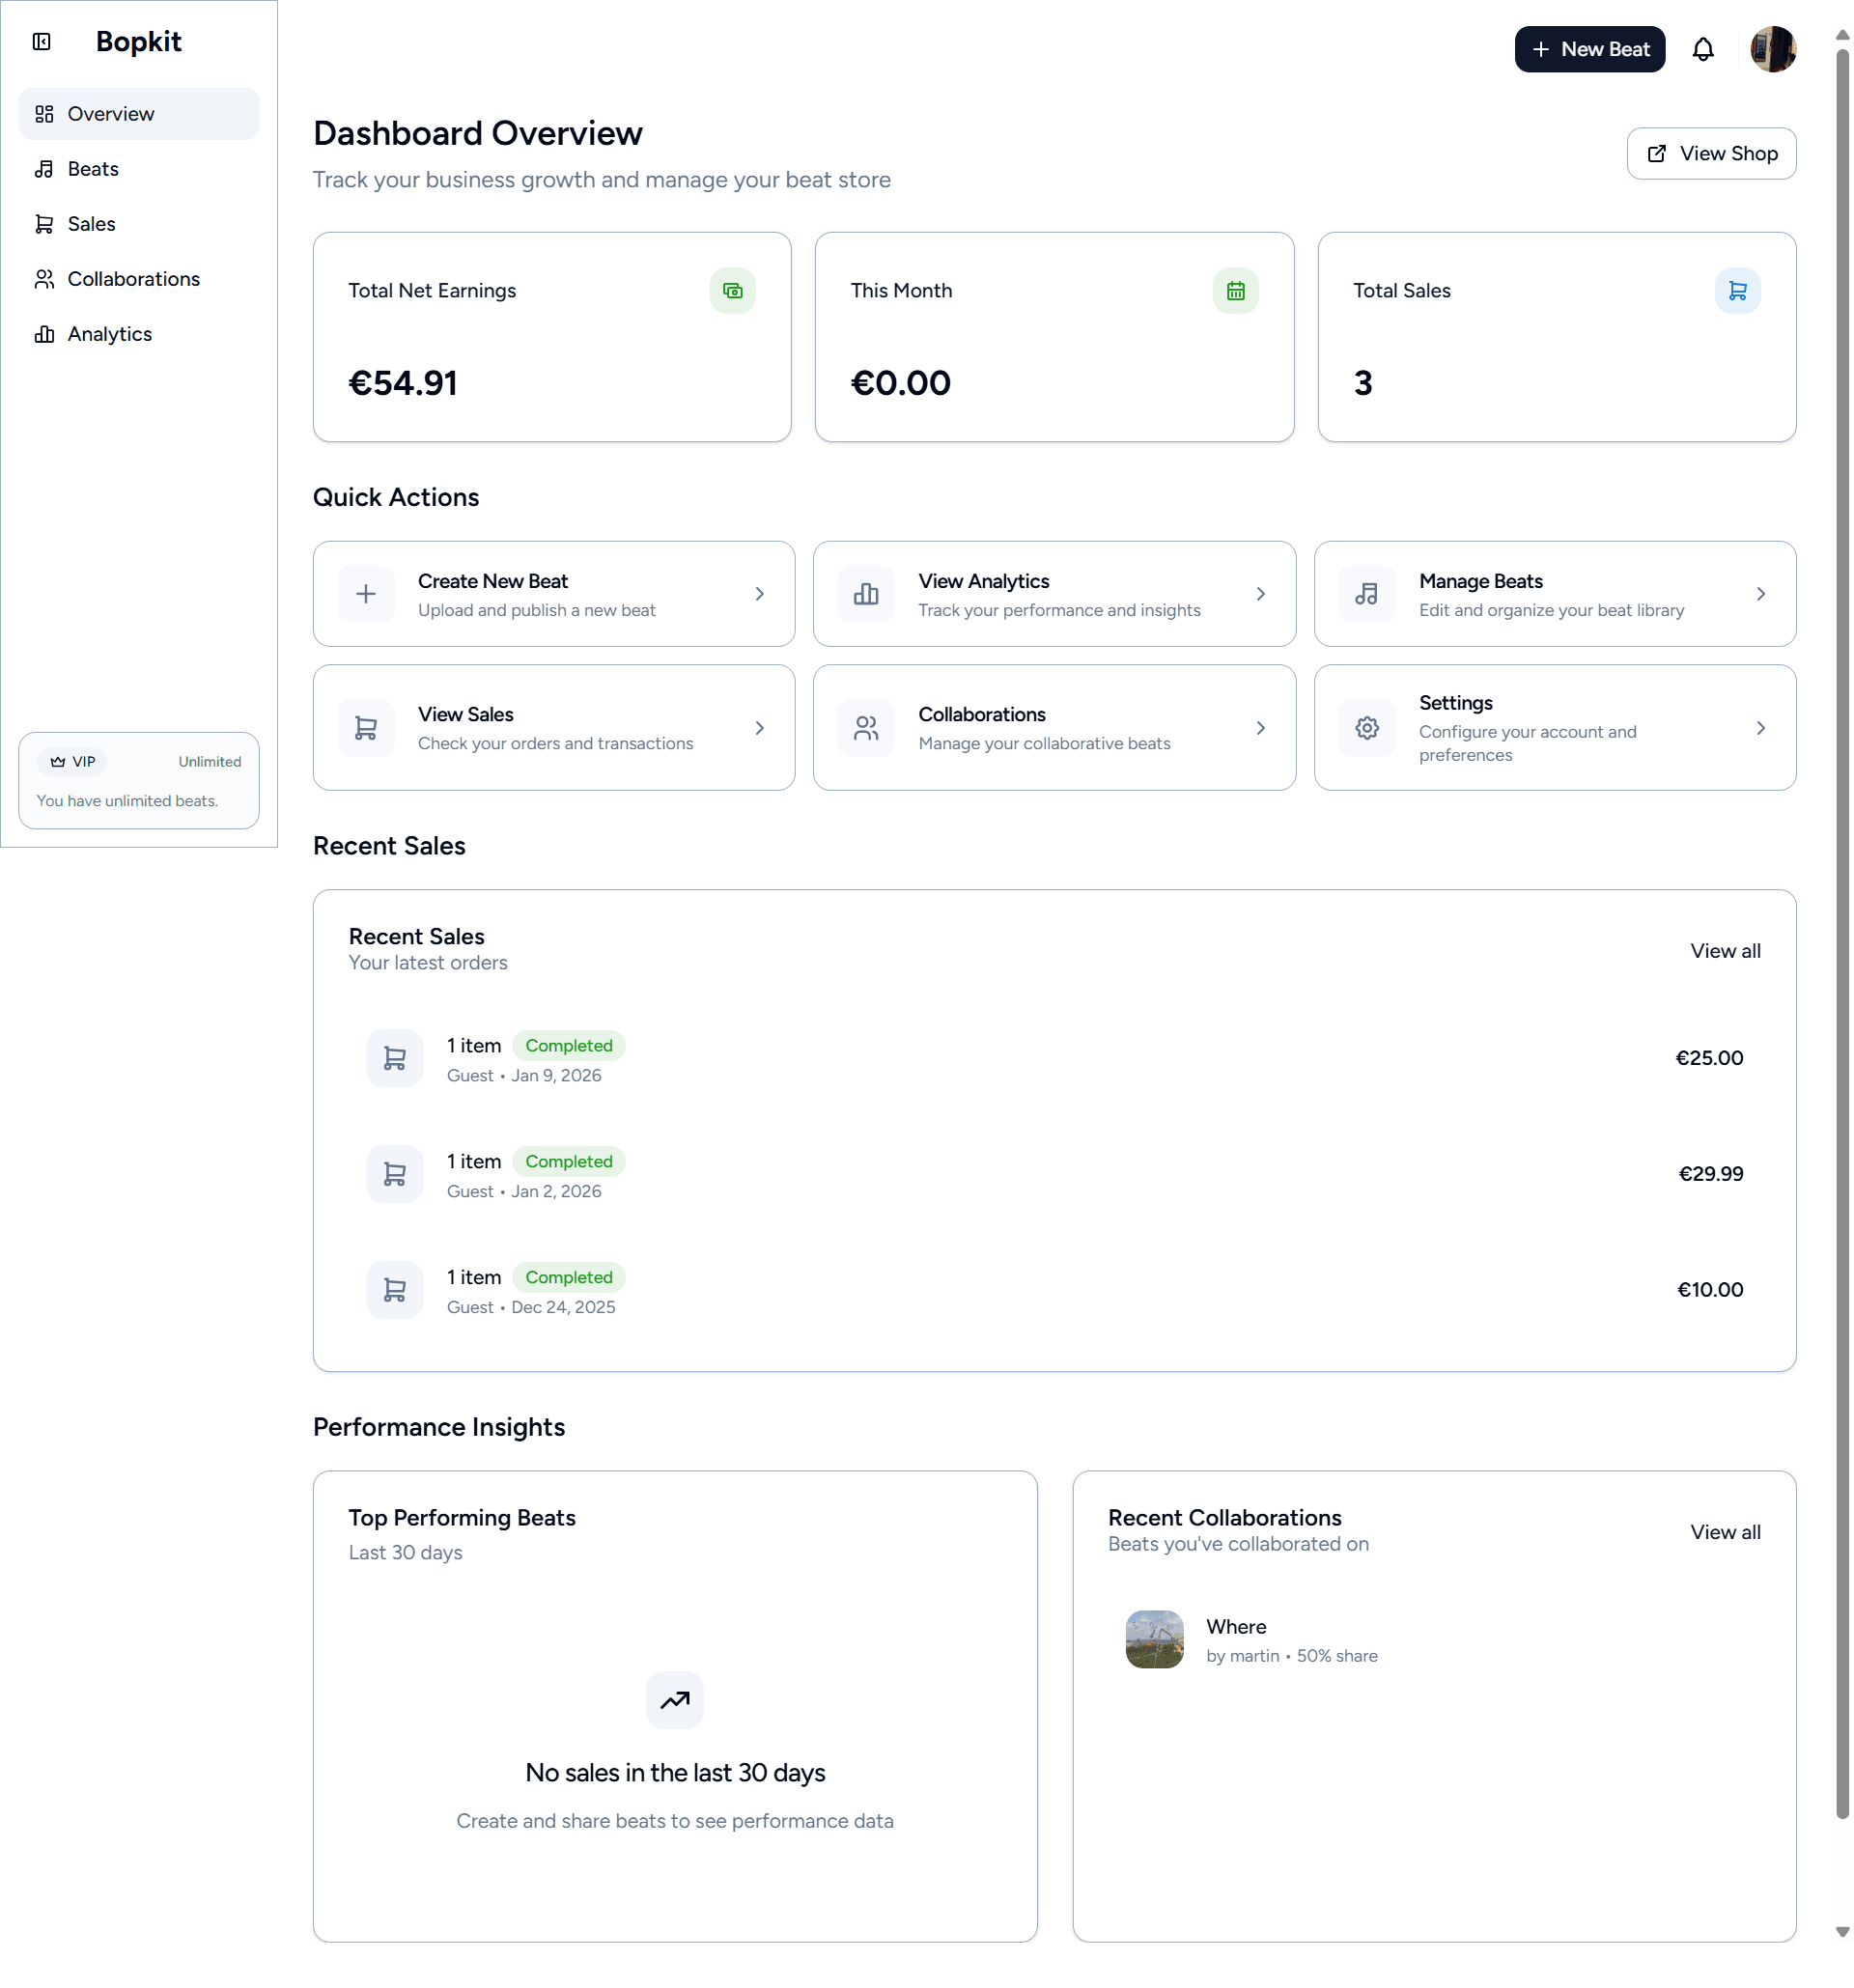
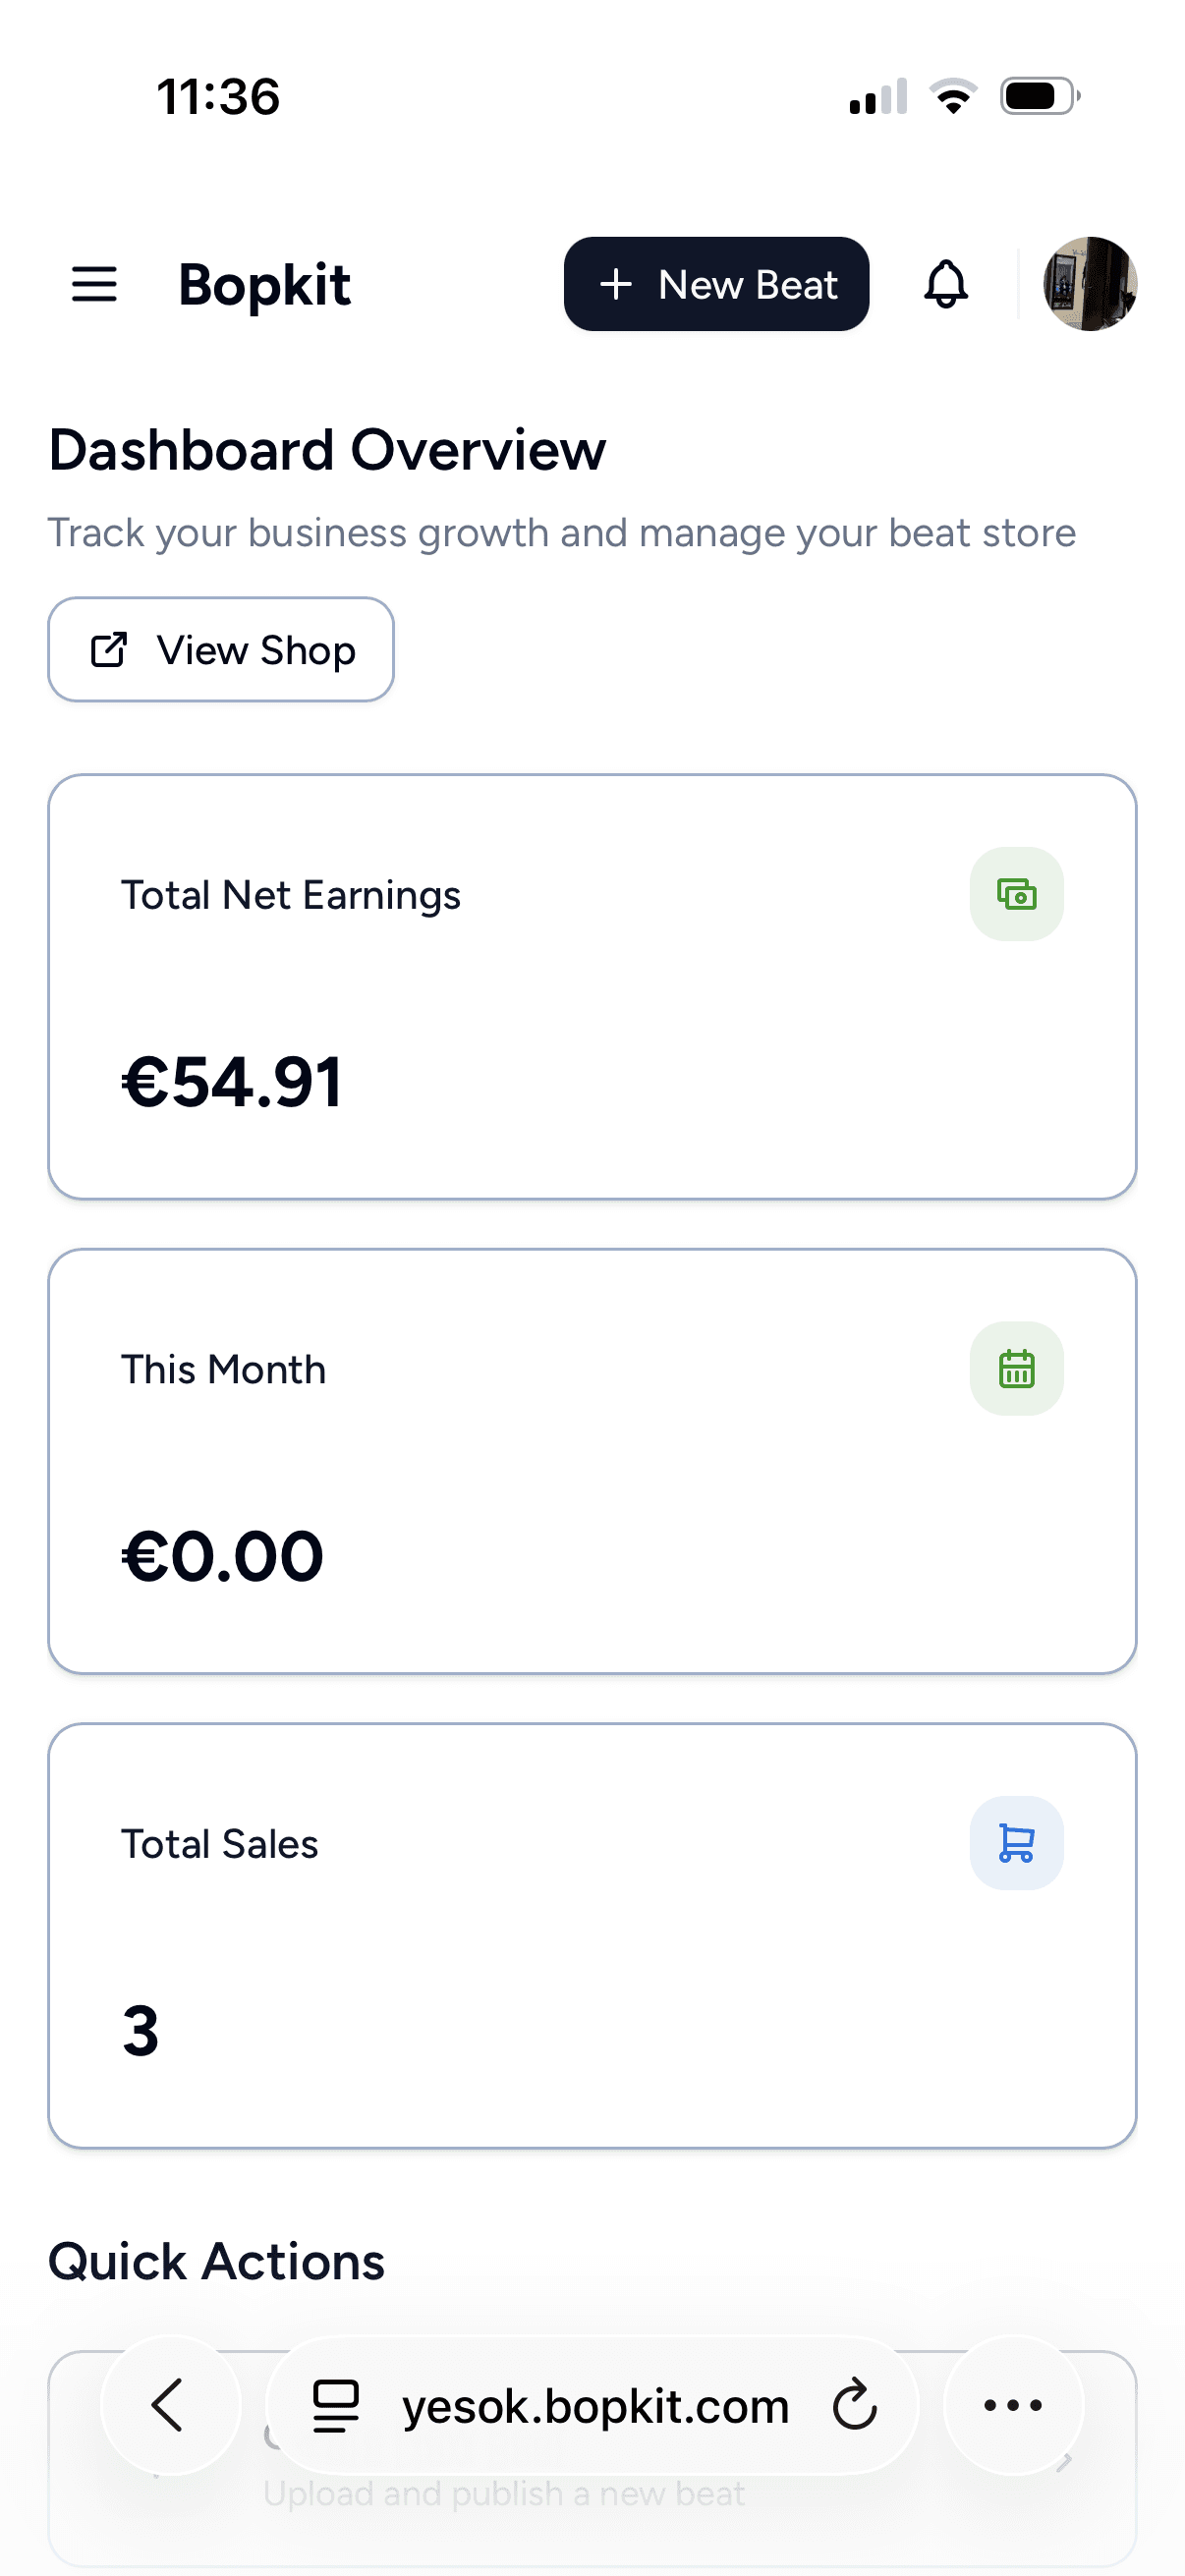
Overview
The overview page is designed to give producers a snapshot of their business. Three metric cards sit at the top: total net earnings, this month's revenue, and total sales count. Below that, a grid of quick action cards links to the most common tasks: creating a new beat, viewing analytics, managing beats, viewing sales, collaborations, and settings.
The bottom half of the page shows recent activity. A recent sales table lists the latest orders with the buyer's name, item count, amount, and a status badge. Next to it, two performance cards show the top performing beats (ranked by sales in the last 30 days with revenue) and recent collaborations (showing the owner's name, your profit share percentage, and sales count).
For new users, a getting started checklist appears at the top of the overview. It tracks four tasks: upload your first beat, connect PayPal, add a profile picture, and customize your shop. A progress bar fills as tasks are completed, and a congratulations message appears when all four are done. The checklist is dismissible once finished.
Analytics
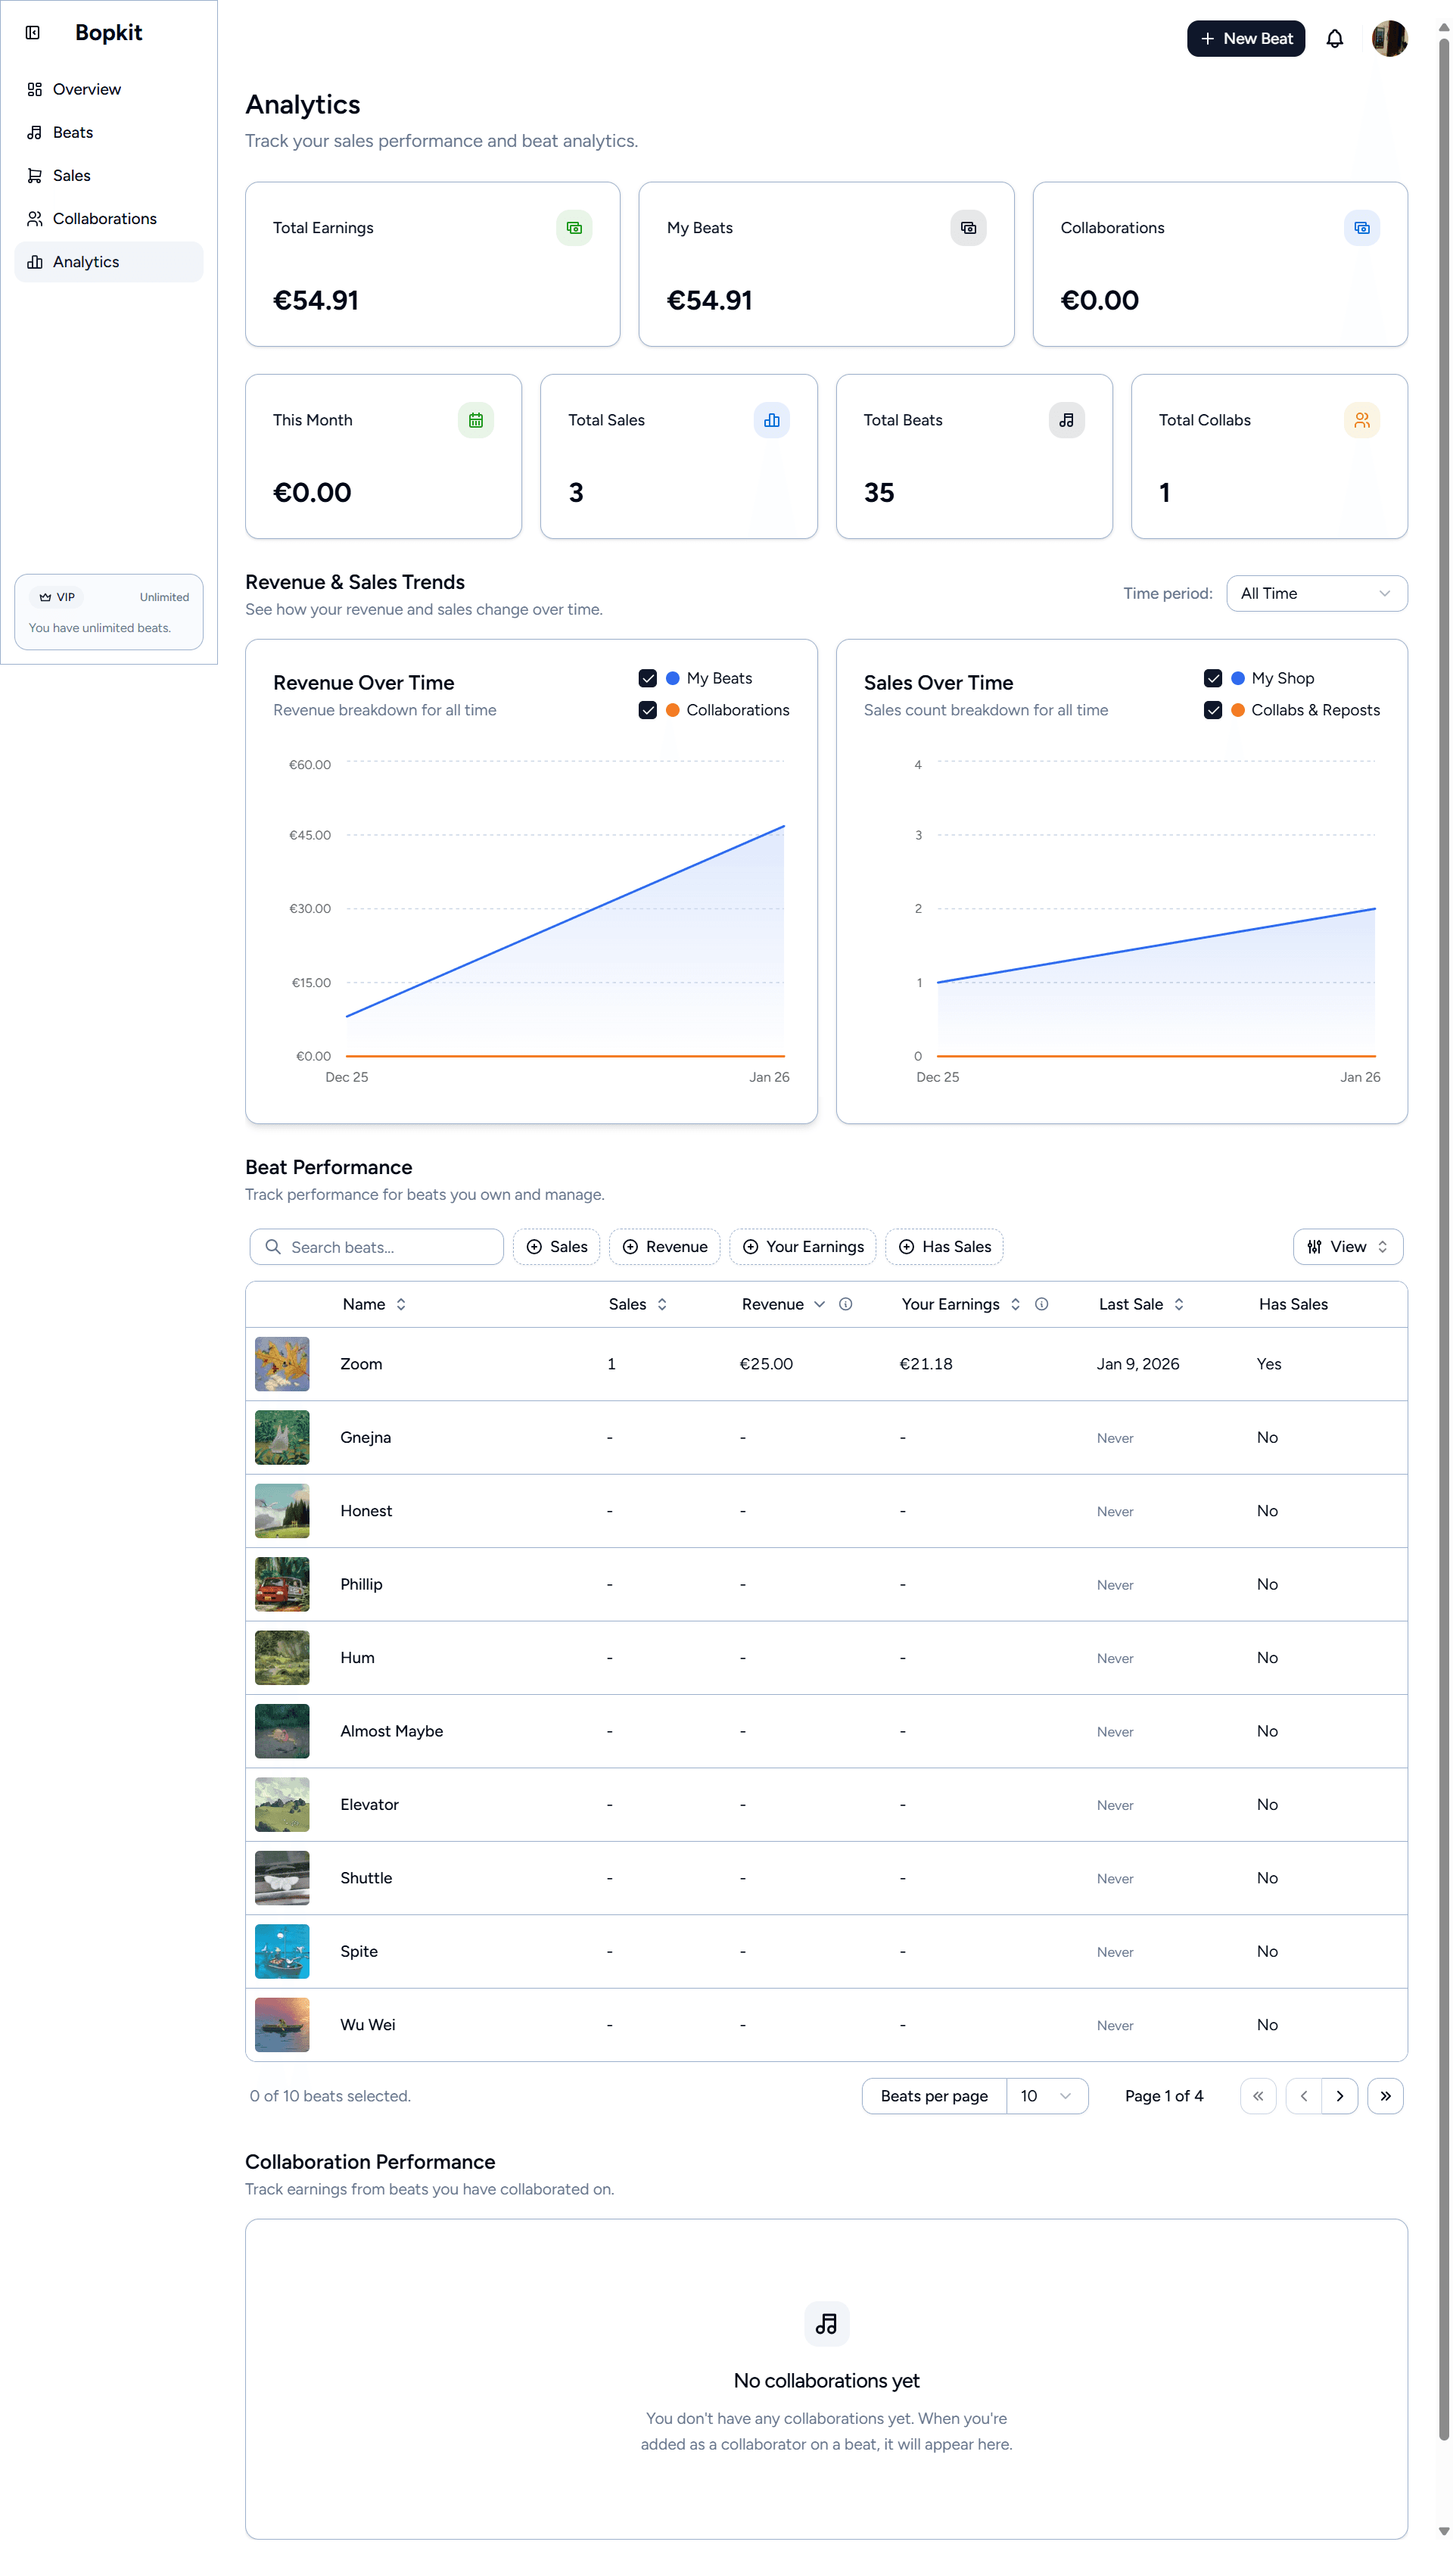
The analytics page gives producers a deeper look at their revenue and sales trends. Seven metric cards break down the numbers: total earnings, earnings from owned beats, earnings from collaborations, this month's revenue, total sales count, total beats, and total collaborations. The distinction between owned and collaboration earnings runs through the entire analytics system, since producers need to understand where their money is coming from.
Two stacked area charts show revenue and sales over time, each with separate series for owned beats and collaborations. The series are toggleable so producers can isolate either one. A timeframe selector above the charts offers preset ranges (7 days, 30 days, 3 months, 6 months, 12 months, year to date, all time) plus a custom date range picker with a two-month calendar view.
The time-series data is pre-aggregated in the database at daily and monthly granularity rather than computed from raw orders on each page load. When a payment is captured, a background workflow updates these aggregated records as part of the post-capture process. This keeps the analytics page fast regardless of how many orders a producer has.
Below the charts, two performance tables break down individual beats and collaborations. Each table shows sales count, revenue, and last sale date, with rich filtering: name search, sales and revenue range sliders, and a toggle to filter by beats that have actually sold. All tables support sorting, pagination, and configurable column visibility.
Sales
The sales page is split into two tabs: My Shop for orders placed on the producer's storefront, and Collaborations for orders that include beats the producer collaborated on. Both tabs share the same table structure but show different financial perspectives.
The shop sales table shows each order's date, order ID, buyer name and email, item count, status badge, refund status, order total, and then the producer's personal financial breakdown: gross share, fees, and net earnings. For orders that are still pending capture, the financial columns show a “Pending” label instead of amounts. The table supports filtering by date range, buyer name, amount range, order status, and refund status. Both tabs support CSV export for all orders or just selected rows.

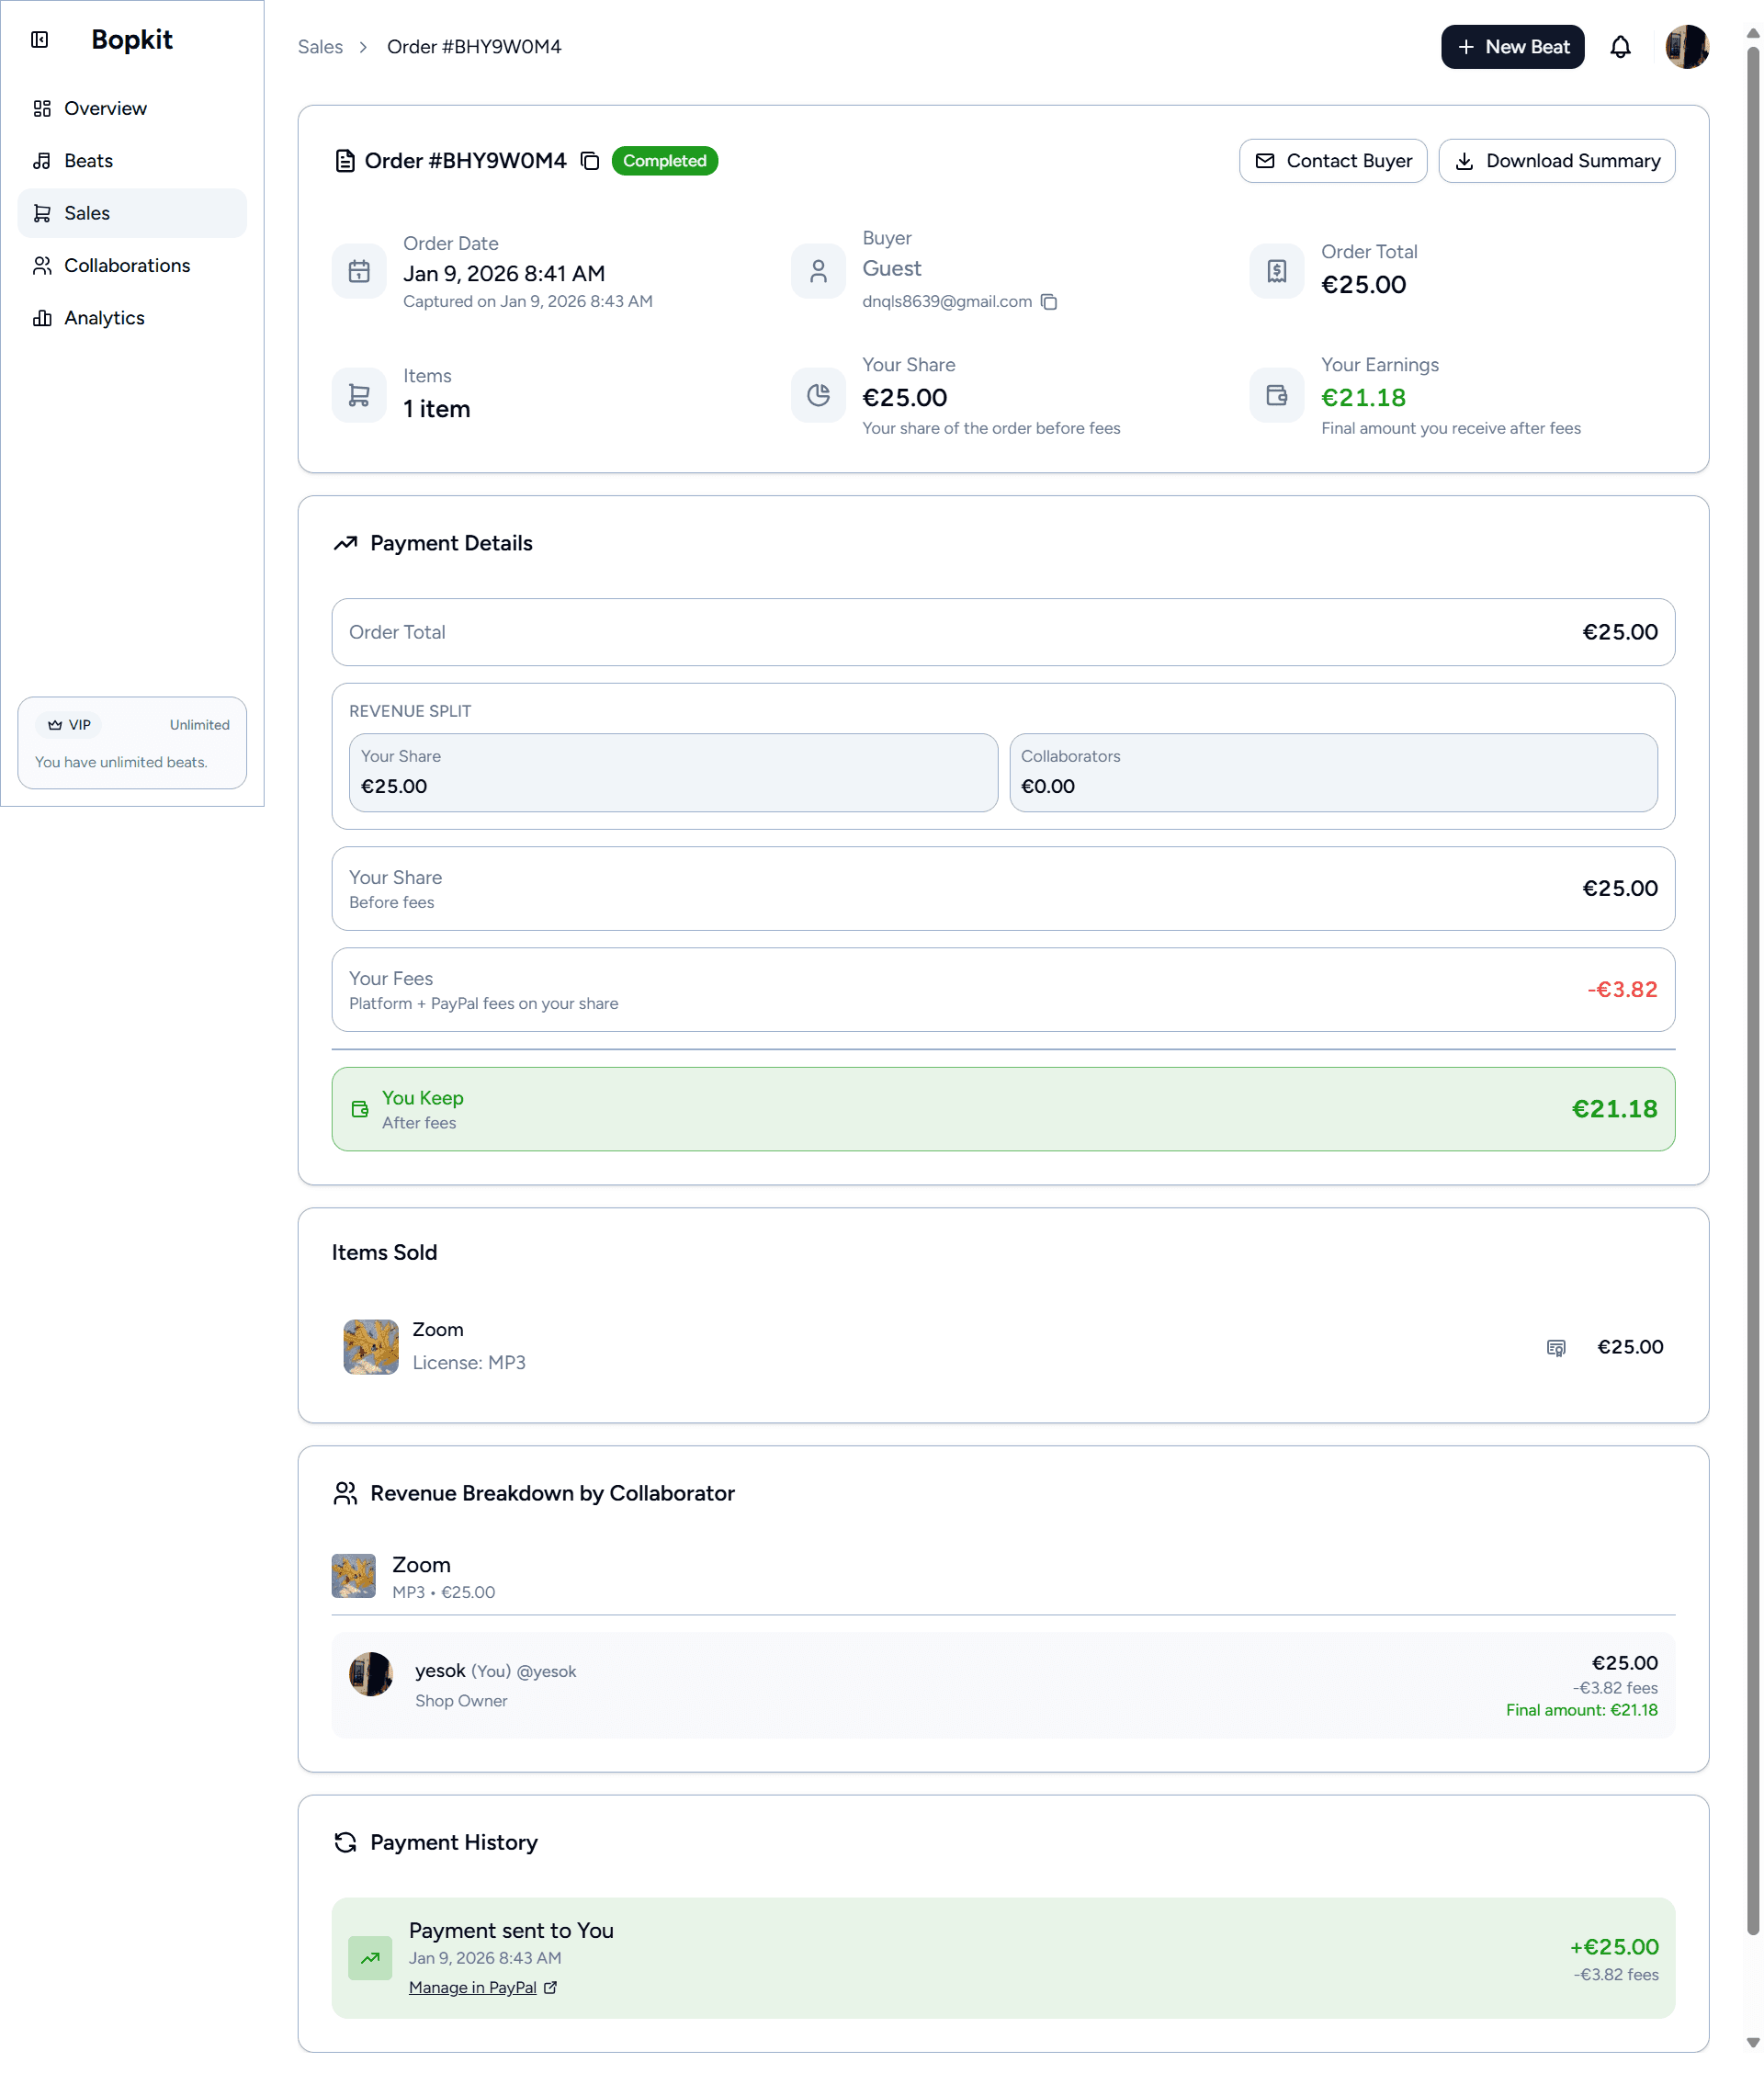
Clicking into an order opens a detail page with full transparency into the payment. An overview card shows the order status, buyer info, capture date, and the producer's share and net earnings. A payment details card breaks down the financials: gross amount, PayPal fees, platform fees, and the final take-home amount. If the beat has collaborators, a collaborator breakdown card shows each person's share, their fees, and their net payout. A payment history card at the bottom shows the full transaction timeline, including any refunds or reversals.
All financial figures on this page come from actual PayPal fee breakdowns reported via webhooks, not estimates. When a payment is captured, PayPal reports the exact fees charged to each payee, and those are what the dashboard displays. Refund and reversal amounts are tracked separately and deducted from the running totals.
Beats Management
The beats page lists all published beats in a table with inline audio playback. Each row shows the beat's name, MP3 and WAV prices, audio tag status, collaborators with their profit share percentages, and the creation date. Additional columns like BPM and key are available but hidden by default and can be toggled on. Column visibility preferences are saved locally so they persist across sessions.
The header shows the producer's beat quota. On the free plan, this displays as a count (e.g. “2 of 10 remaining”) and the “New Beat” button becomes disabled with an upgrade tooltip when the limit is reached. The quota is enforced at the database level too: the publishing workflow double-checks the count inside a transaction to prevent race conditions from concurrent publishes.
Selecting rows reveals a bulk action bar with two options. Bulk download lets the producer choose which file types to include (MP3, WAV, tagged MP3) and packages them into a ZIP file. Bulk delete removes the selected beats after a confirmation dialog. Individual beat actions are available through a dropdown menu on each row.

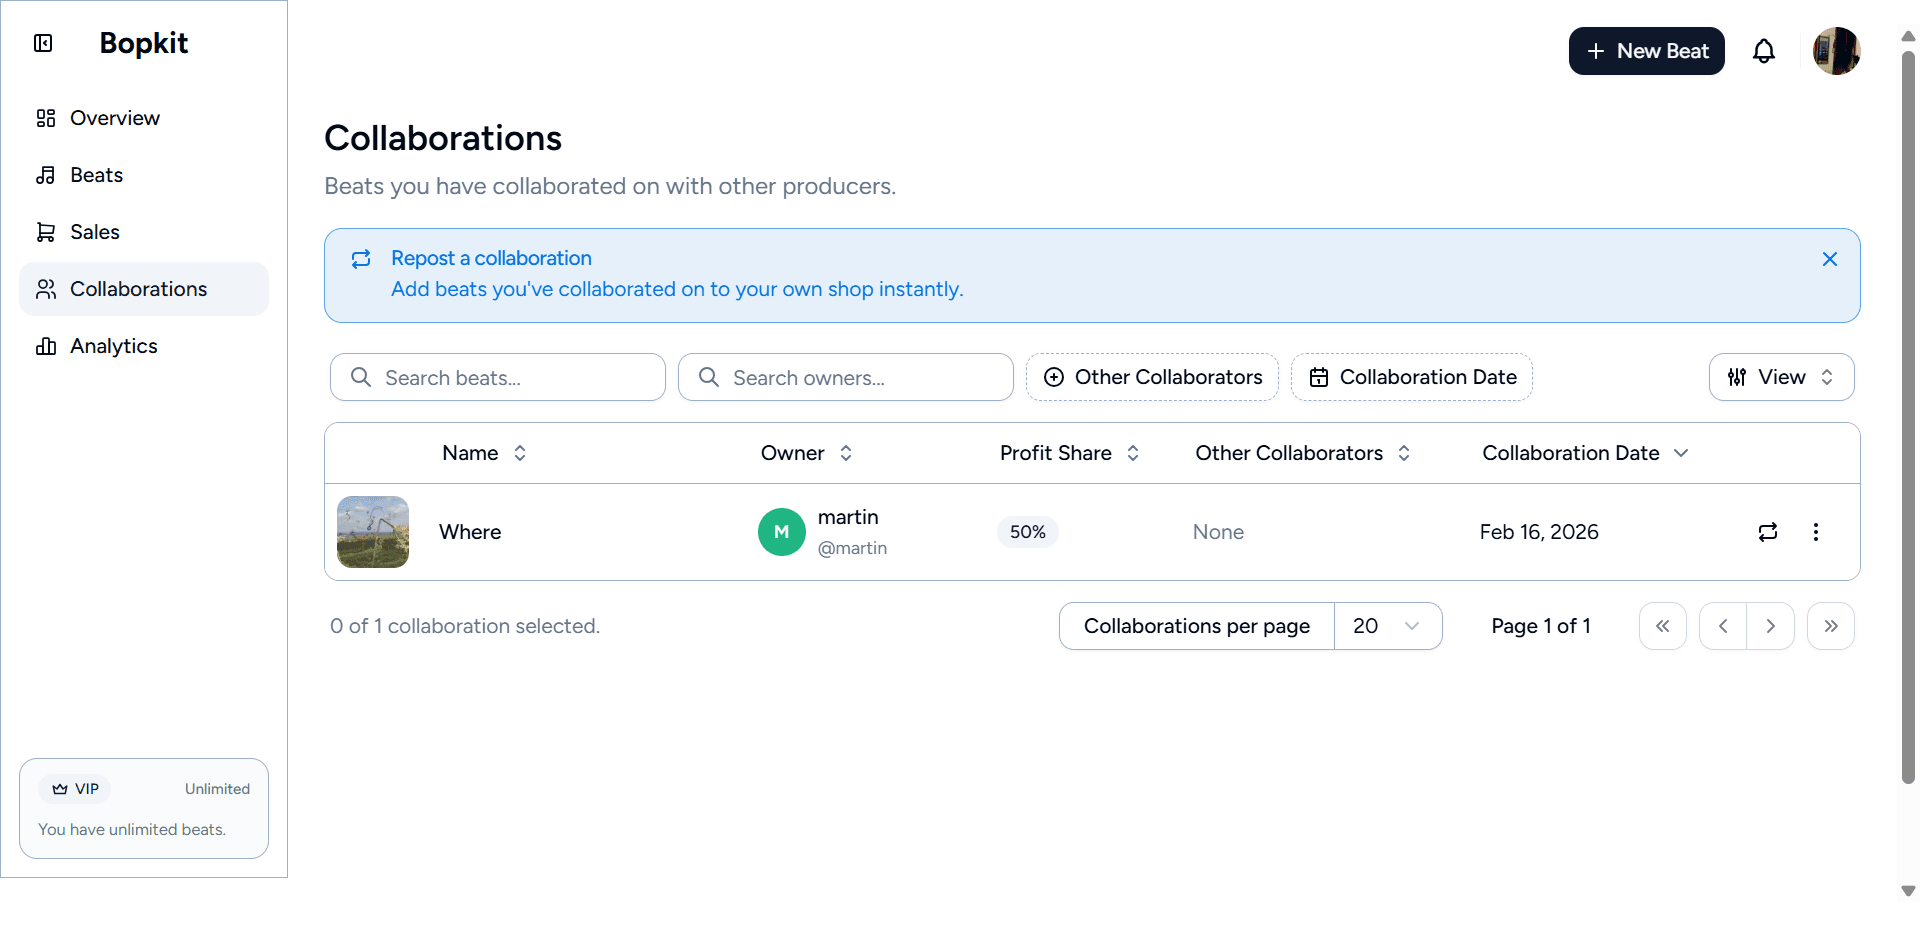
Collaborations
The collaborations page shows the other side of the collaborator system: beats that other producers have added you to. Each row displays the beat name, the shop owner's name and username, your profit share percentage, sales count, and your net earnings from that beat. A tip banner at the top explains the repost feature, which lets collaborators add a beat to their own shop without re-uploading anything. The original files and metadata are referenced, so the beat appears in the collaborator's storefront alongside their own beats.
This separation between owned beats and collaborations is consistent across the entire dashboard. Sales are split into shop and collaboration tabs, analytics track owner and collaboration revenue as separate series, and earnings are always attributed to the correct role. A producer can see exactly how much they earned from their own beats versus beats they contributed to.
Settings
The settings page is organized into five tabs: Account, PayPal, YouTube, Pricing, and Audio Tags. Most of these have been covered in context elsewhere in this case study (PayPal connection in onboarding, audio tag configuration in beat creation, YouTube account linking in the YouTube section). The pricing tab lets producers set their shop currency and default prices for MP3 and WAV licenses, which pre-fill the pricing section when creating new beats. The account tab covers username, email, password changes, and account deletion.
Buyer Experience
Everything up to this point has been from the producer's perspective. The buyer side of Bopkit is a separate experience entirely: browsing a producer's storefront, previewing beats, adding items to a cart, checking out via PayPal, and downloading purchased files. Buyers don't need an account to purchase, and the entire flow is designed to feel like shopping on a producer's own website rather than a third-party marketplace.
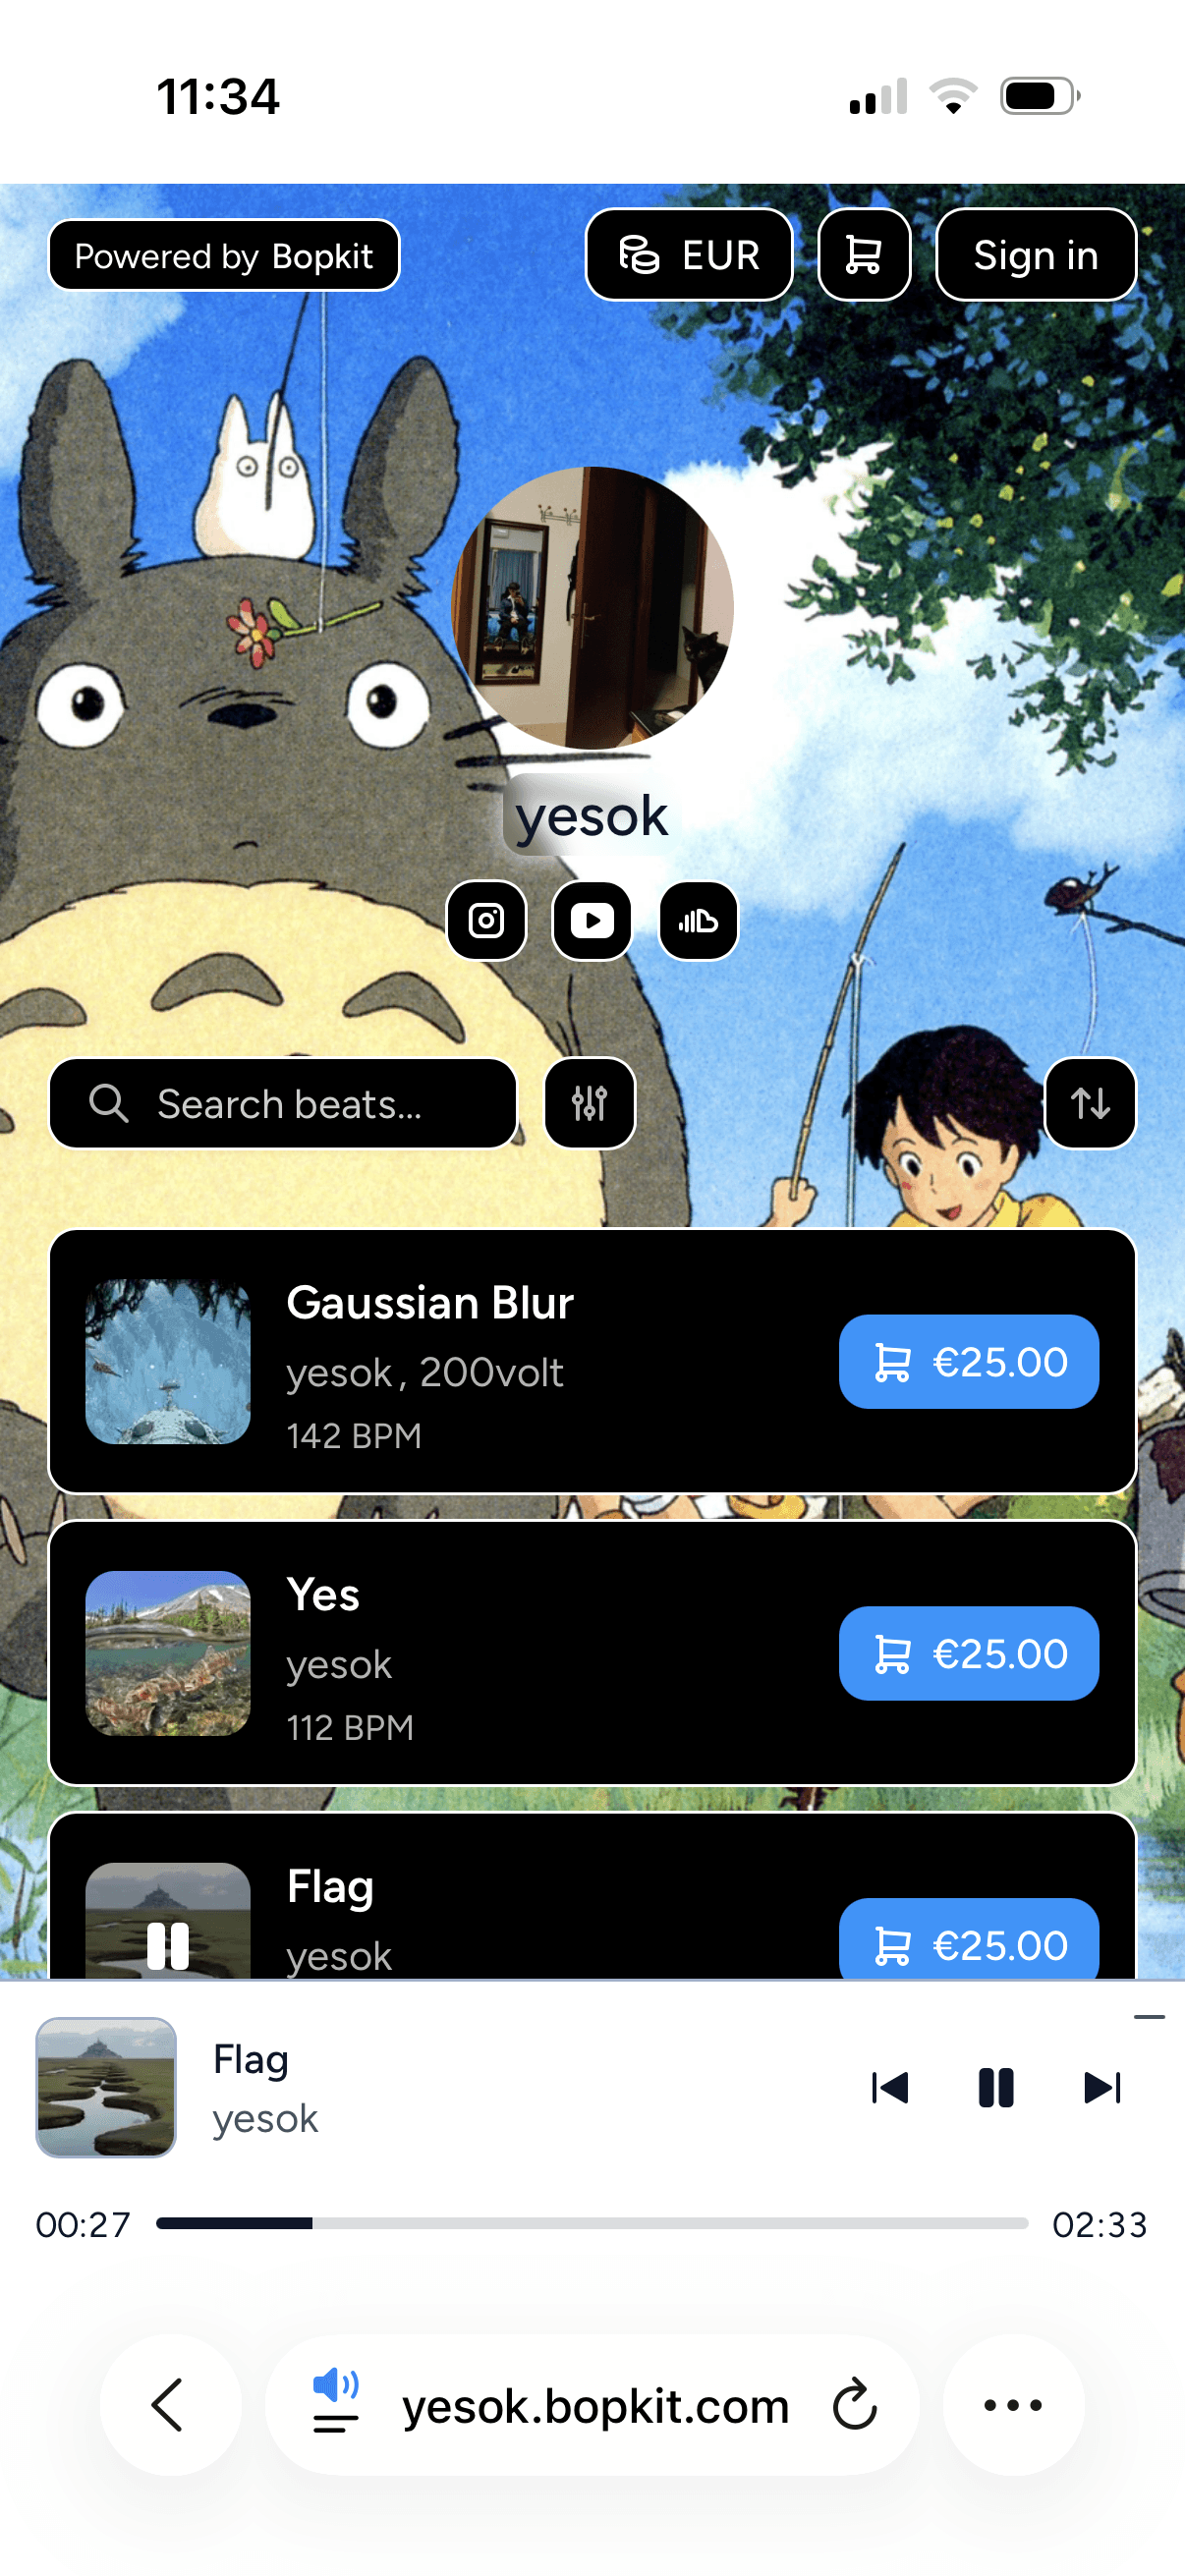
Shop Browsing
When a buyer visits a producer's storefront at username.bopkit.com, they see the producer's profile (avatar, name, bio, social links) and a grid of published beats. Each beat in the list shows its artwork, name, collaborator credits, BPM, key, and price. Beats can be filtered by search, BPM, and key, and sorted by different criteria. The list loads incrementally via infinite scroll rather than traditional pagination.
Hovering over a beat's artwork reveals a play button. Clicking it starts the watermarked audio preview and opens the music player at the bottom of the page. The player persists across navigation, so a buyer can click into a beat's detail page, browse other beats, or open the cart without interrupting playback. This works because the audio engine runs outside of React's lifecycle in a global state store. The audio instance itself is never torn down on navigation, and signed URLs for audio files are cached client-side to avoid re-fetching. The player also preloads the next track in the background to minimize gaps between songs.
The player has two modes: a full bar across the bottom of the page with artwork, track info, playback controls, a seek bar, and volume control, and a minimized compact version that tucks into the bottom-right corner. On mobile, the layout stacks vertically with the seek bar below the controls.
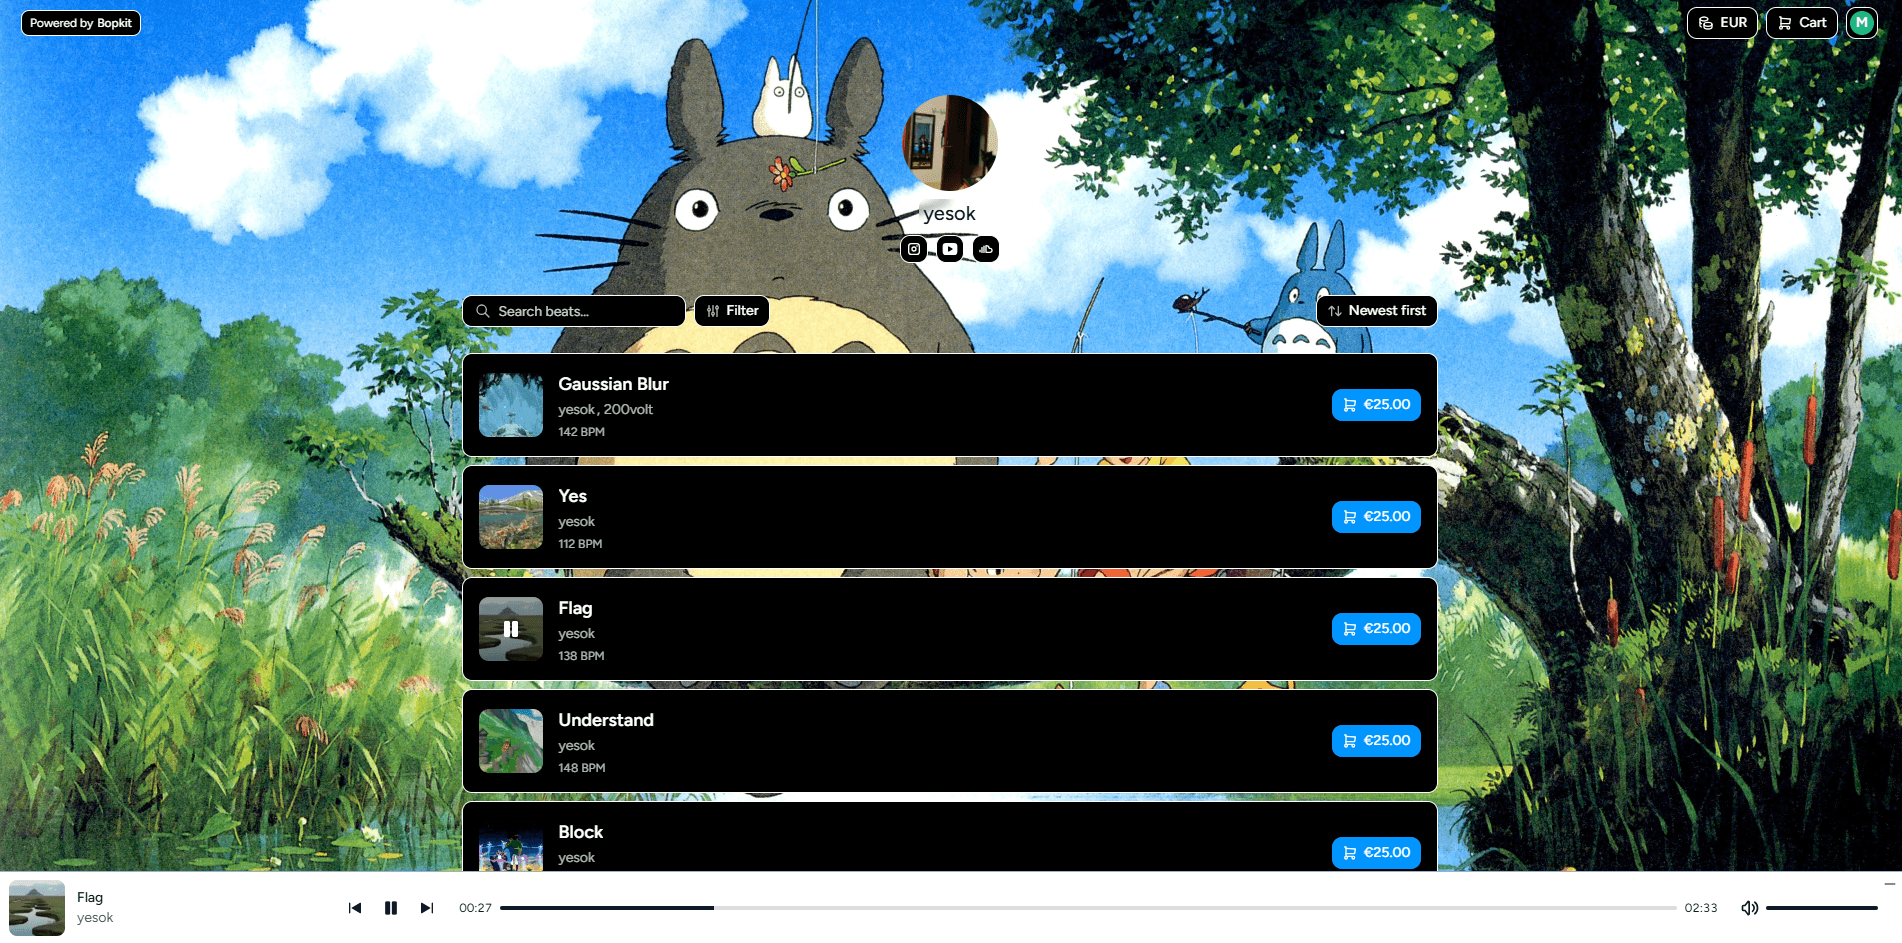
Every shop is fully themed using CSS custom properties. The producer's chosen colors for background, foreground, accent, and music player are applied as variables on the shop layout, and every component references them. Text color readability is computed automatically using a luminance algorithm so that light backgrounds get dark text and vice versa. This means the entire shop, including the music player, filters, buttons, and hover states, adapts to the producer's brand without any manual text color configuration.
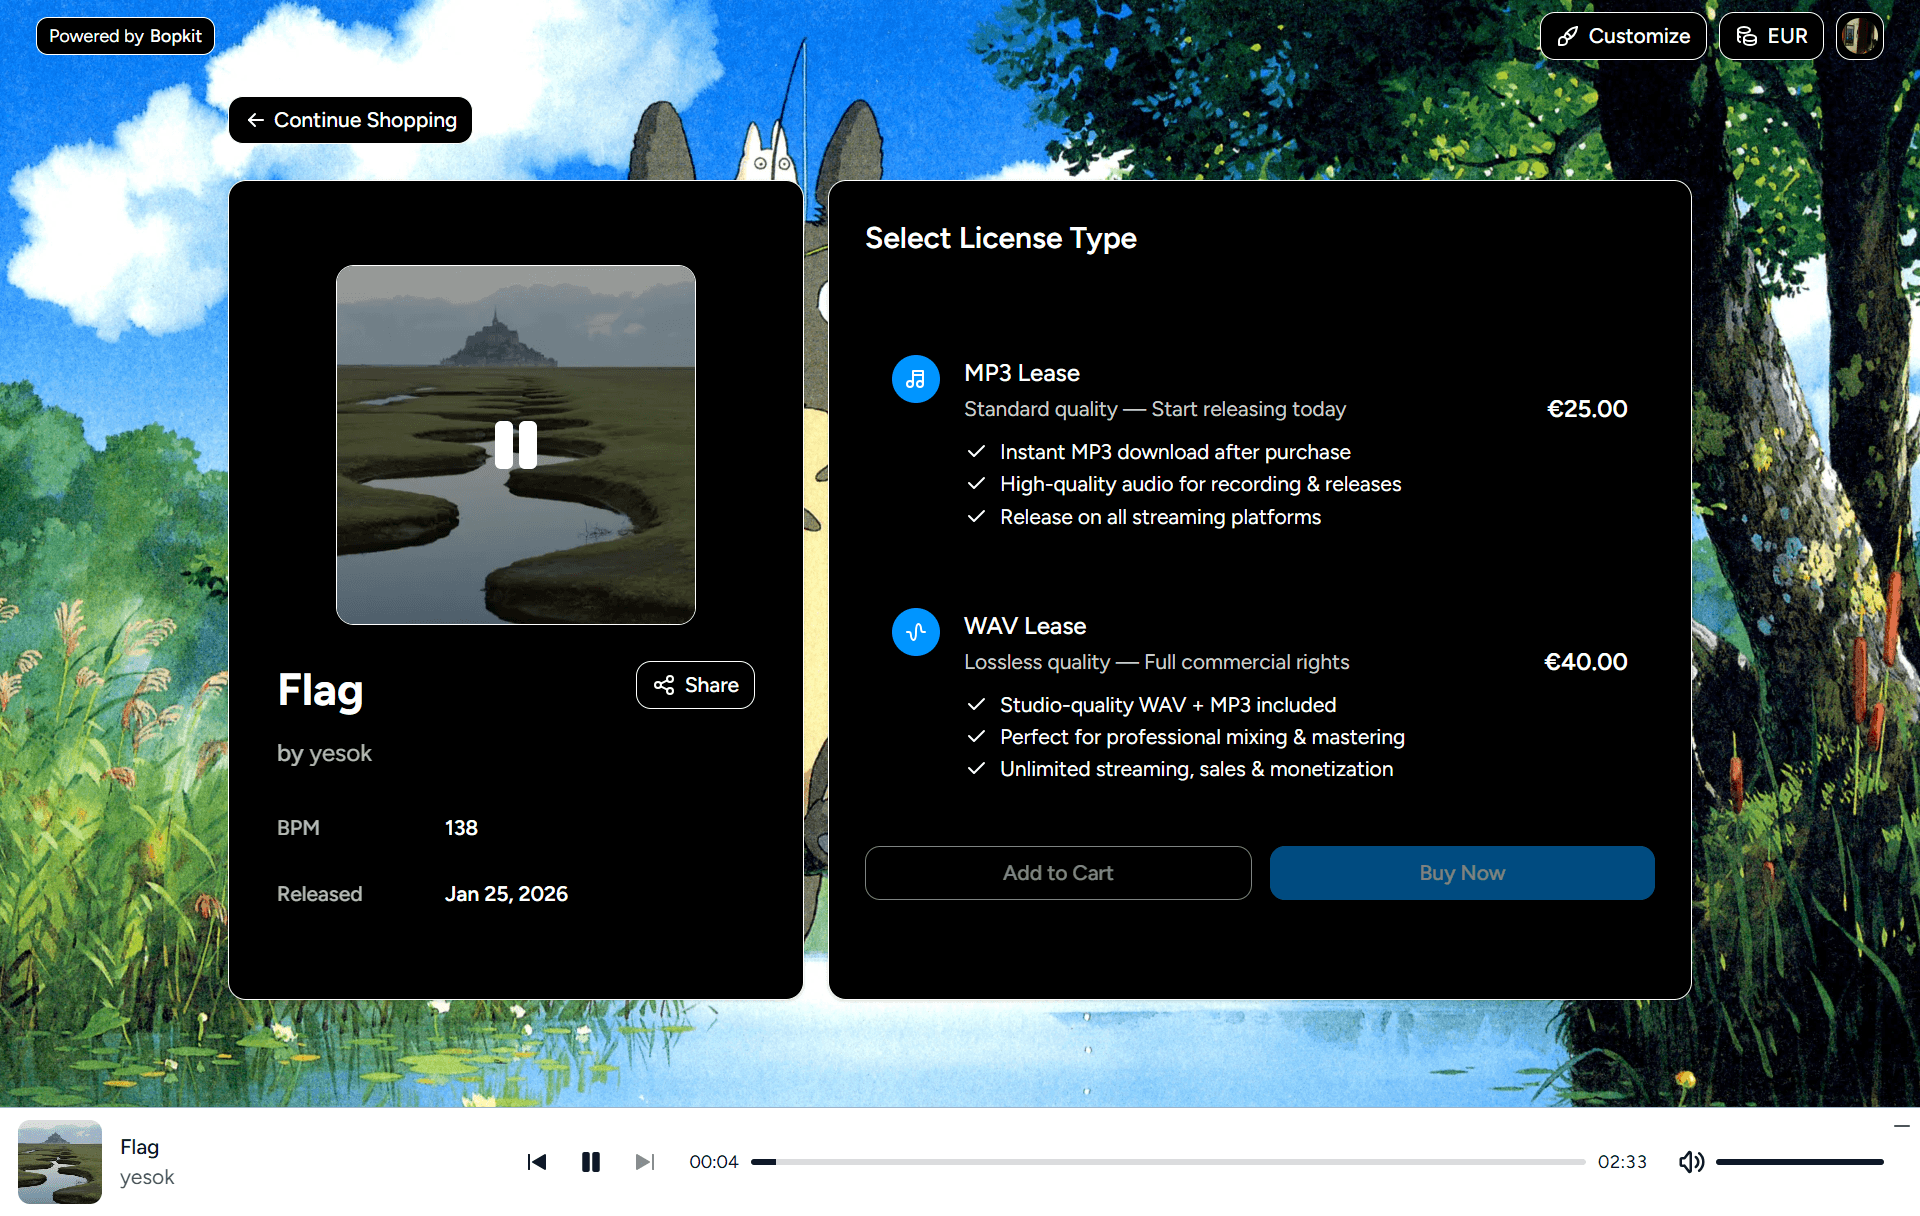
Beat Detail & Currency
Clicking a beat opens its detail page with a two-column layout. The left side shows the artwork with a play/pause overlay and the beat's metadata: name, credits (owner and collaborators), BPM, key, and release date. The right side presents the available license types (MP3 and WAV) with their prices, and Add to Cart and Buy Now buttons. If the producer hasn't completed PayPal onboarding, the purchase buttons are disabled with a message explaining that the shop isn't accepting payments yet.
Prices are displayed in the buyer's local currency by default. On the first visit, the system detects the buyer's country via IP geolocation and maps it to a currency. Exchange rates are fetched from the Frankfurter API and cached for 24 hours on the client. The conversion is display-only: prices are shown in the buyer's currency for familiarity, but the actual PayPal charge is always in the seller's configured shop currency. This avoids any conversion fee surprises. A currency selector in the shop header lets buyers switch manually if the auto-detected currency is wrong, and the preference is persisted in local storage for return visits.
The system also handles zero-decimal currencies like JPY and KRW correctly, where prices don't use decimal places, and uses the browser's Intl.NumberFormat API for proper currency symbol placement and formatting across locales.
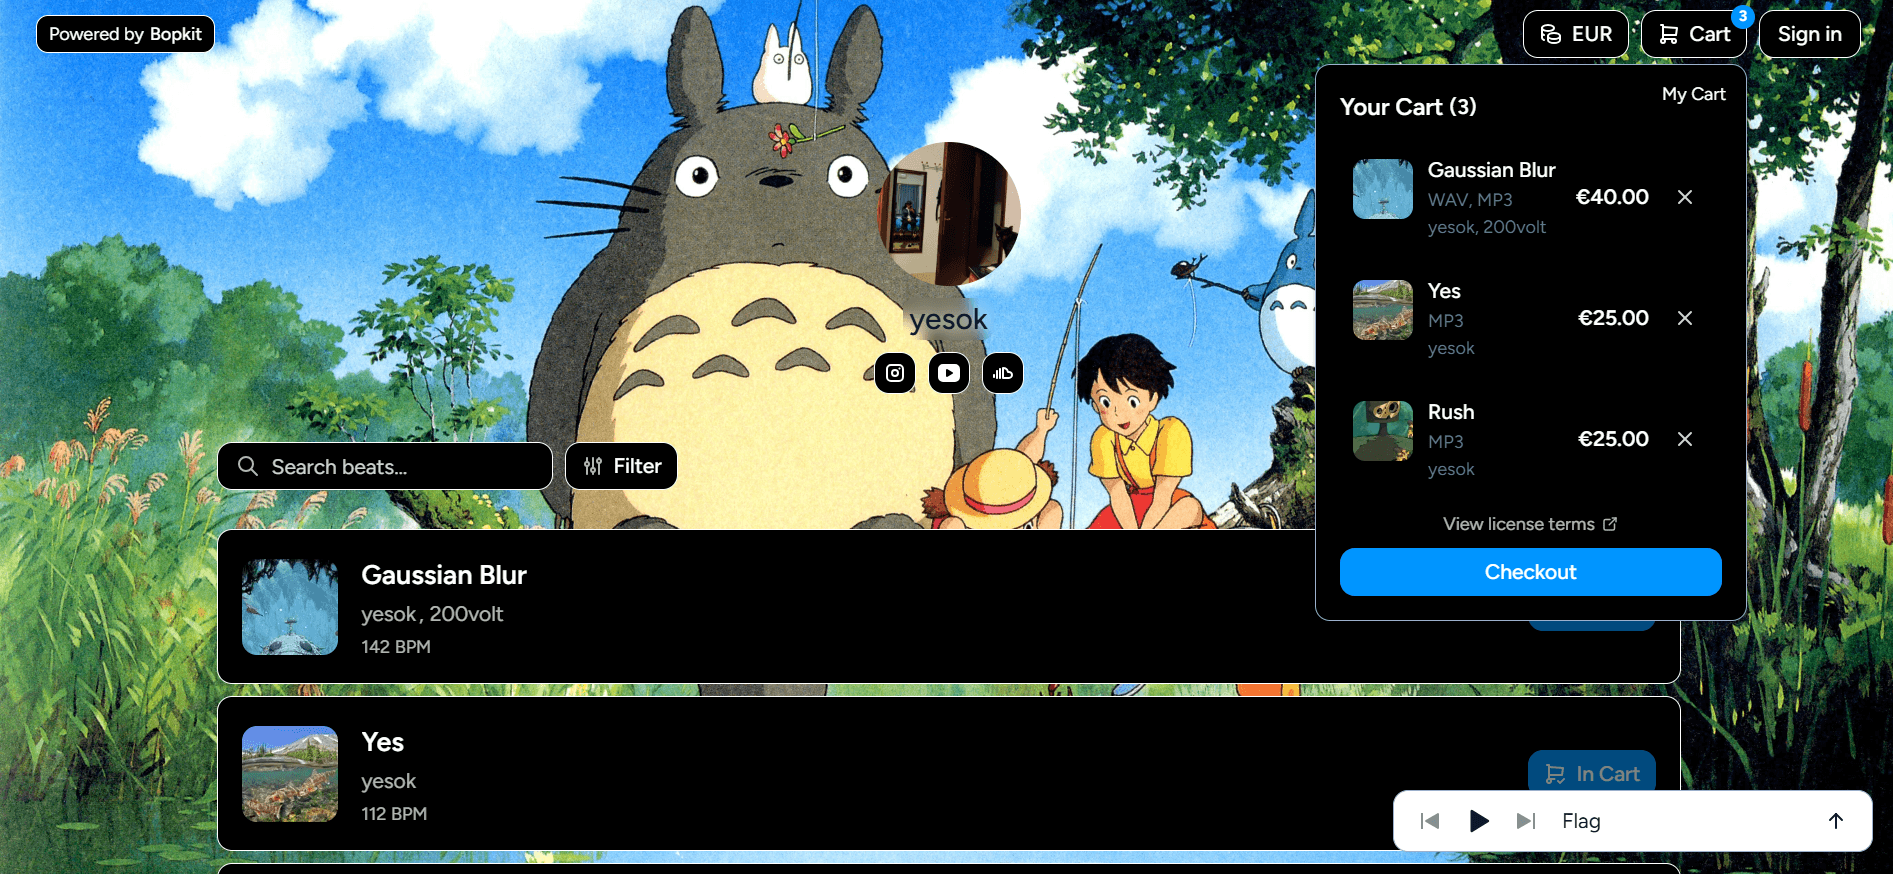
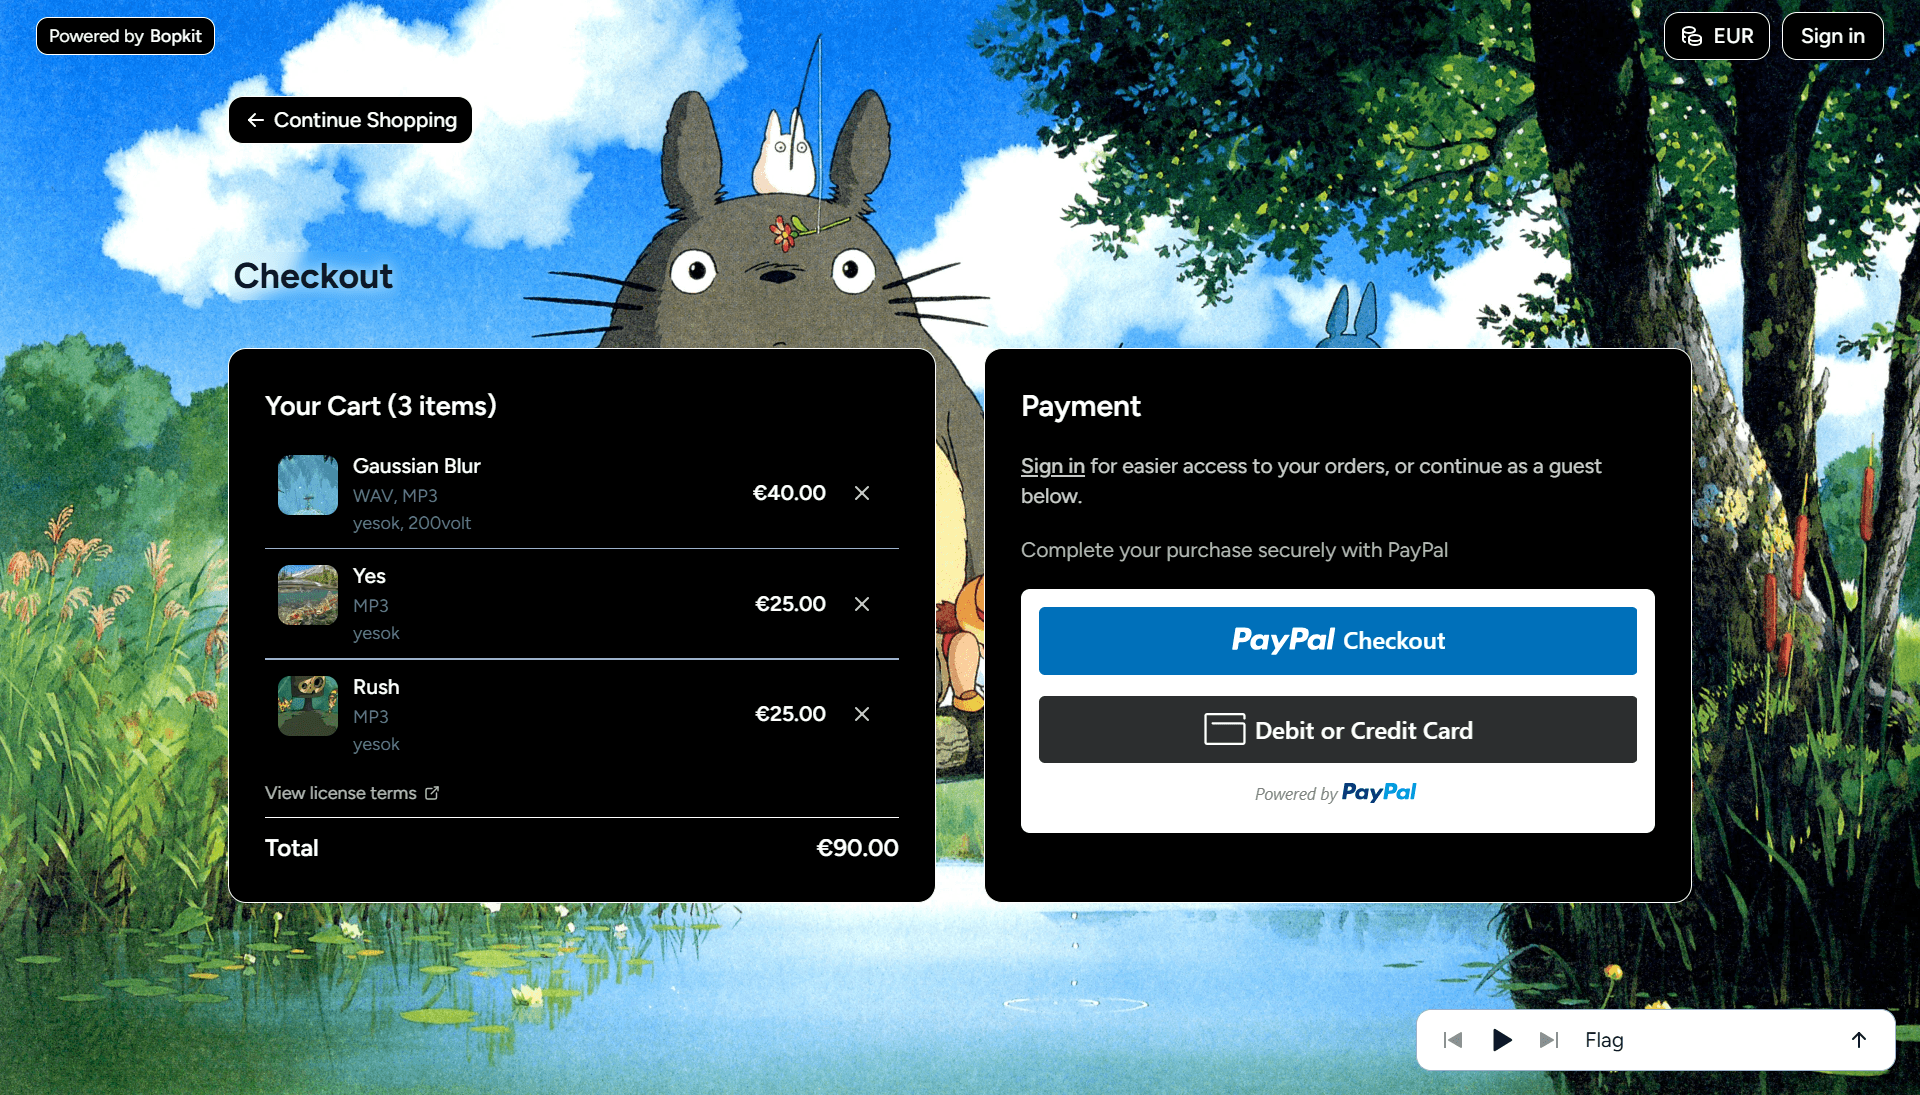
Cart & Checkout
Carts are per-shop, meaning a buyer can have items from multiple producer storefronts simultaneously without them mixing together. Each cart item stores the selected license type (MP3 or WAV), and the cart UI shows the line items, license types, and total. Cart actions use optimistic updates so adding and removing items feels instant, with a rollback if the server request fails. Carts expire after 30 days and the expiration extends automatically on each interaction.
Guest buyers get a cart without needing to sign up. The system assigns a guest identifier via a cookie, and if the buyer later creates an account, their guest cart merges into their authenticated cart automatically.
When the buyer enters checkout, the system creates a draft order: a frozen snapshot of the cart at that moment with a 15-minute expiration. This locks in the prices so that if the producer edits pricing during the checkout session, the buyer isn't affected. If prices have changed since the draft was created, the buyer is alerted and the draft refreshes with the updated amounts. If the draft is about to expire, the system auto-refreshes it in the background.
The checkout page shows an order summary with a PayPal button. Guest checkout is fully supported since PayPal collects the buyer's email during their own flow. Behind the scenes, clicking the PayPal button creates a PayPal order with multiple purchase units, one for each person receiving funds. If the beat has collaborators, each collaborator's PayPal account receives their share directly at capture time, with the platform fee deducted from each payee. This is the multi-party payment split covered in the architecture section.
The system also handles edge cases around the checkout flow: if the buyer closes the PayPal popup and returns later, it detects the pending order and picks up where they left off rather than creating a duplicate. Popup closures, cancellations, and payment errors all surface user-friendly messages.
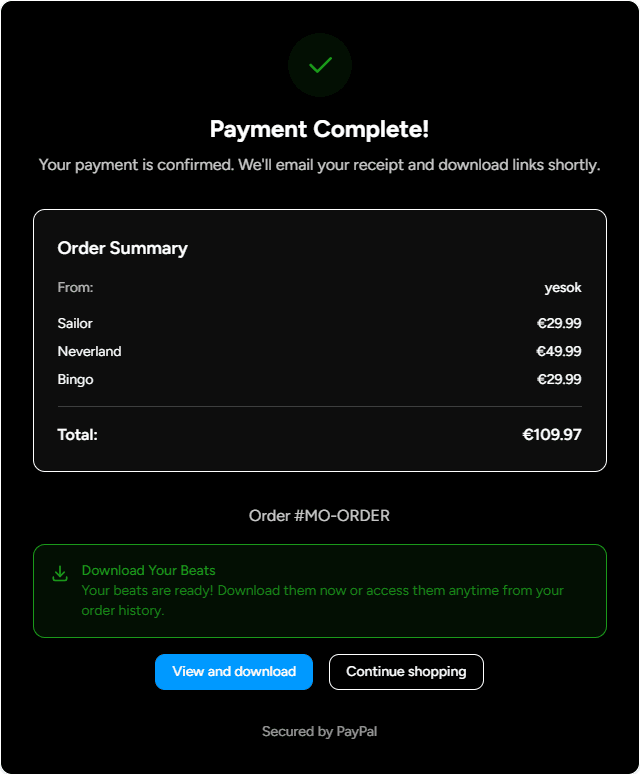
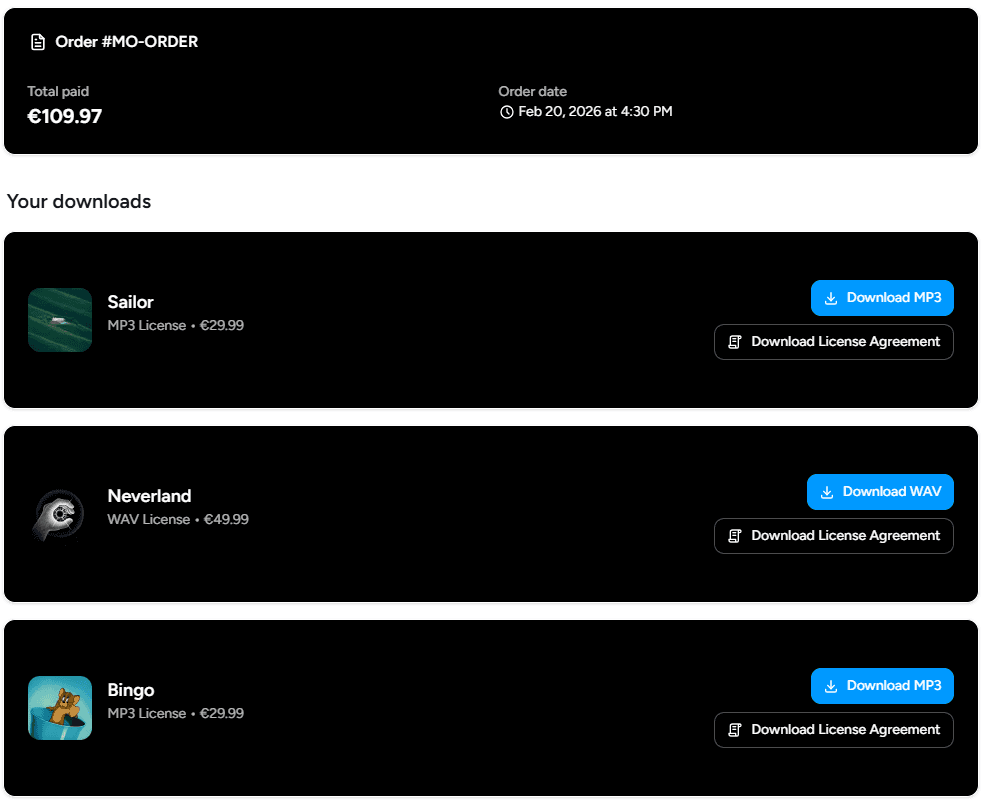
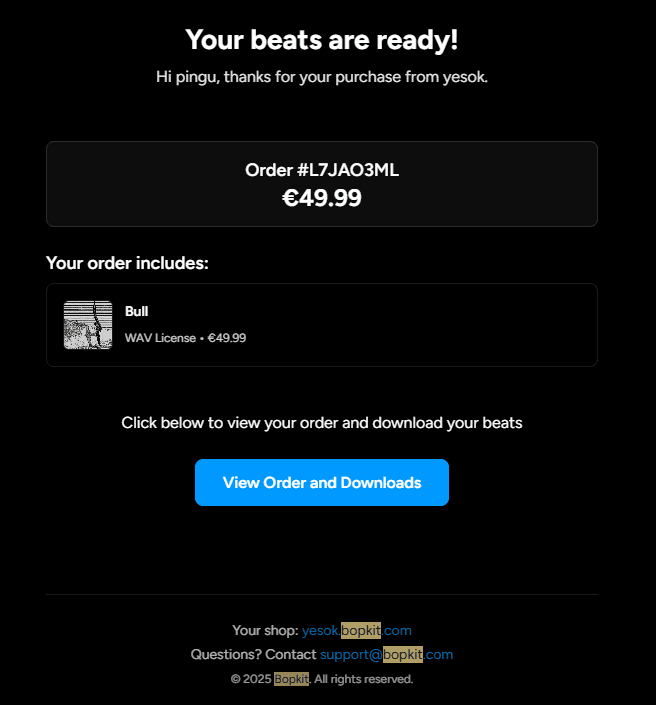
Order Confirmation & Downloads
After the buyer approves the PayPal payment, they land on a processing page that polls the order status every two seconds until the payment is confirmed or a 45-second timeout is reached. The page shows different states as the order progresses: confirming payment, payment complete, payment under review, or an error with guidance. Guest buyers see a message that download links have been sent to their email, while registered users are directed to their order page to download immediately.
The order detail page shows the full breakdown: items purchased, license types, prices, and download buttons for each file. Downloads generate signed URLs on-demand with a 30-minute expiration, so files are never publicly accessible. The buyer can also download a license agreement PDF for each item, generated client-side using React PDF. The document includes buyer and seller information, beat details, usage rights specific to the license type (streaming limits, sales limits, music video rights), restrictions, and legal terms. The PDF renderer is dynamically imported only when the buyer clicks the download button, so it doesn't add to the initial page bundle.
A key design decision here is asset freezing. When a purchase completes, the system snapshots the exact file paths for every purchased item at that moment. If the producer later edits the beat, re-uploads files, or deletes the beat entirely, the buyer's downloads still work because they reference the frozen copies, not the current beat files. This ensures that buyers always get what they paid for, regardless of what happens to the beat after the sale.
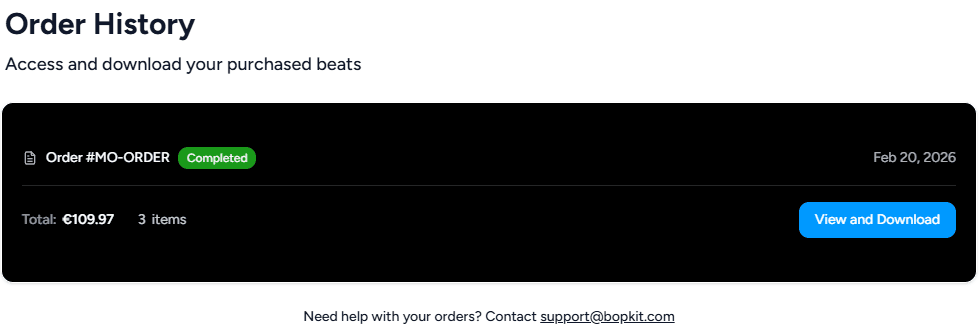
Order History
Registered buyers can access their full order history in two places: a per-shop view within each producer's storefront, and a global view across all shops from their account page. Both use cursor-based pagination and show the order status, date, total, and a link to view the full order with downloads.
Guest buyers can still access their orders. After purchase, they receive an email with a link containing a signed access token. The token is generated using HMAC-SHA256 with a 7-day expiration and includes the order ID in its payload. The server validates the signature, checks the expiration, and confirms the order ID matches before granting access. If the token expires, guests can request a new link by entering their email address. The system always returns a generic success message regardless of whether the email matches, preventing anyone from probing which email addresses have orders.
Communication & Notifications
Every meaningful event in the platform triggers a notification to the relevant parties. When a sale completes, the buyer gets an order confirmation, the seller gets a sale notification, and each collaborator gets an earnings notification. The same pattern applies for refunds, reversals, and payment declines: every party involved receives both an email and an in-app notification specific to their role.
Email System
The platform has 15 email templates built with React Email and delivered through Resend. Ten are order-related: buyer confirmation, seller notification, collaborator notification, and then the same trio for refunds, reversals, and a payment declined notice. The remaining five handle authentication: email verification, password reset, and password change confirmation, plus a feature suggestion acknowledgment.
Emails are never sent inline from API routes. They are triggered from Inngest workflows, which means if the email service is temporarily unavailable, the workflow retries the step automatically. Resend enforces rate limits, so the email sender serializes requests with a minimum 600ms interval between sends and retries with exponential backoff when it receives a 429 response.
Every sent email is logged in the database. If a workflow retries and attempts to send the same email again, the duplicate is detected and the send is skipped. This ensures that even in failure-and-retry scenarios, a buyer never gets two copies of the same order confirmation.
In-App Notifications
A notification bell in the site header shows an unread count badge. Clicking it opens a dropdown with the notification list, loaded via cursor-based pagination with infinite scroll. Each notification has an icon with color coding (green for sales, red for refunds, yellow for warnings), a description, and a relative timestamp. Producers can mark individual notifications as read, mark all as read, or clear them entirely.
Notifications cover over ten event types: completed sales, refunds, reversals, checkout approval reversals, collaborators leaving a beat, beats being reposted, beats being updated or deleted by collaborators, and PayPal account status changes. Mark-as-read uses optimistic updates so the badge count decrements instantly, and the notification list refreshes automatically when the browser window regains focus so producers see new activity without a manual refresh.
To prevent duplicate notifications from workflow retries, each notification is created with a deterministic ID derived from its type and parameters. If the same event triggers the same notification twice, the duplicate is silently ignored.
Refunds, Disputes & Error Handling
The payment lifecycle doesn't end at checkout. Refunds, chargebacks, and payment declines all need to be handled gracefully and reflected accurately across the system. This section covers how each of these flows works.
Refund Processing
When a refund occurs on PayPal, a webhook arrives. The handler verifies the signature, records the refund (guarded by a unique constraint to prevent duplicates), and dispatches a background workflow to handle the downstream effects.
The refund workflow loads the full order context, identifies which payee was refunded, and decrements their analytics. The adjustment is precise: the refund amount is allocated proportionally across beats based on their share of the original gross amount, and all earnings aggregations are updated. A processing flag on the refund record ensures that if the workflow retries, the analytics are only decremented once. After analytics, the workflow sends emails to the buyer, the seller, and the affected collaborator, and creates in-app notifications for each party.
Reversals & Disputes
Reversals (chargebacks and disputes) follow the same structure as refunds but are triggered by a different webhook event. The workflow decrements analytics, sends emails to all parties, and creates notifications. The same idempotency patterns apply: unique constraints to prevent duplicate records and a processing flag to prevent double-counting in analytics.
Decline Reason Mapping
PayPal returns cryptic decline codes and reason phrases when a payment fails. Rather than surfacing these raw codes to users, the system maps them to 16 human-readable categories like card declined, insufficient funds, account restricted, and payer action required. Each category has a user-friendly message explaining what happened and contextual guidance suggesting what the buyer can try. The mapper uses defensive substring matching as a fallback for unrecognized codes and logs warnings for any unmapped values so they can be added in future updates.
Webhook Idempotency
All nine PayPal webhook event types go through the same entry point. The handler first verifies the webhook signature by calling PayPal's verification endpoint with the five required transmission headers. Only after the signature is confirmed does processing begin.
Every record type in the system uses unique constraints to prevent duplicate processing. Captures, refunds, and reversals are each keyed by their PayPal identifier, and event IDs are also stored as unique fields. If the same webhook is delivered twice, the database rejects the duplicate and the handler returns a success response without reprocessing. For operations that can't rely on a database constraint alone, like analytics decrements, a processing timestamp acts as a flag that is checked before and set after each operation within a transaction.
Mobile Responsiveness
The entire platform is responsive across mobile, tablet, and desktop. Layouts stack vertically on small screens and expand into multi-column grids on larger viewports. The checkout page goes from a two-column layout to a single column, the dashboard sidebar collapses to icons, beat detail pages stack the artwork above the pricing panel, and buttons expand to full width for easier touch targets. All responsive behavior is handled through Tailwind breakpoints with no separate mobile components or device detection.
Infrastructure & Monitoring
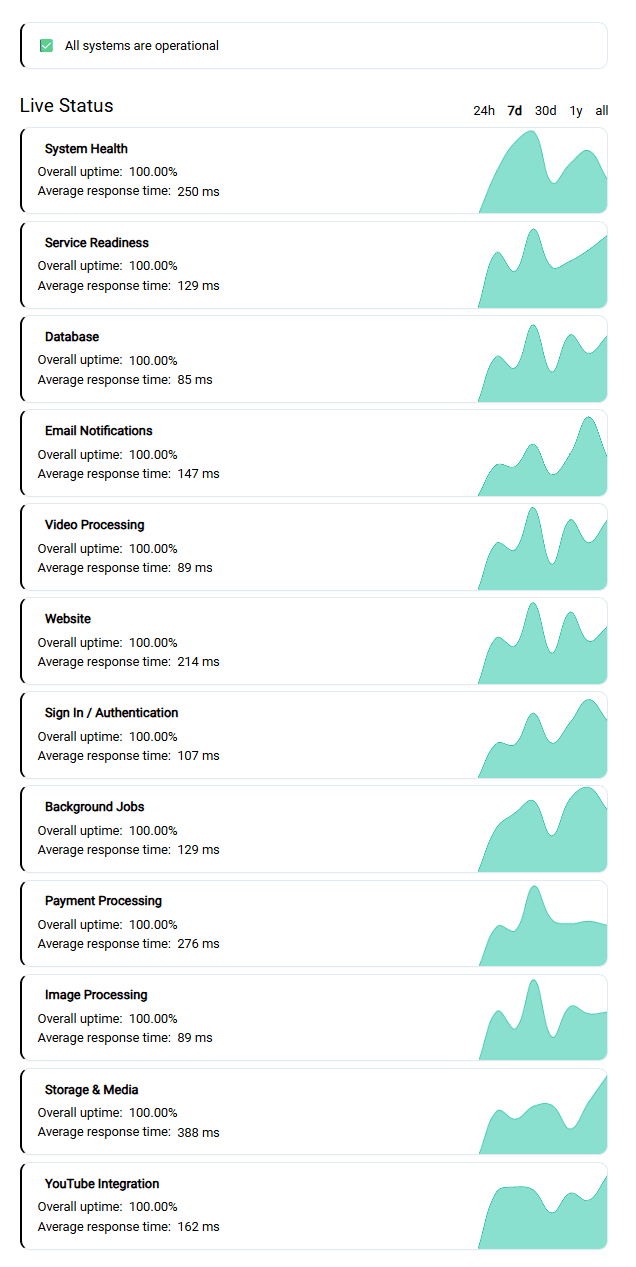
Running a platform that processes payments and handles file delivery means knowing immediately when something breaks. Bopkit has 12 health check endpoints that cover every external service the platform depends on.
Health Checks
Two primary probes serve as the system's pulse. The liveness probe at /api/healthz confirms the application is running and returns uptime. The readiness probe at /api/readyz goes further, testing database connectivity with a one-second timeout and returning a degraded status if the connection fails.
Beyond the probes, ten dedicated status endpoints each test a specific dependency: PostgreSQL connectivity, Supabase Storage bucket access, PayPal API availability and webhook configuration, FFmpeg binary presence, frontend SSR rendering, Resend email API, Inngest workflow registration, Sharp image processing, Google OAuth discovery, and YouTube Data API access. Each endpoint returns a simple JSON response with an ok or error status, sets no-cache headers, and requires no authentication.
Status Page & Uptime Monitoring
These health check endpoints are polled by Upptime, which powers a public status page at status.bopkit.com. Core health checks are polled every 30 to 60 seconds, and less critical services every 60 to 120 seconds. The status page is linked from the support page and the site footer, giving both users and the developer visibility into system health.
Reflections
What Went Well
The PayPal Commerce Platform partner integration ended up being the most rewarding part of the project. It was far and away the most complex system to build, but getting multi-party payment splits working correctly, with proper fee allocation, minimum payout validation, and full webhook lifecycle handling, felt like a genuine achievement. The financial calculations alone span hundreds of lines and handle edge cases like rounding discrepancies across collaborator splits, partial refunds affecting proportional fee allocation, and currency-specific minimum payout thresholds.
Choosing Inngest for background workflows turned out to be one of the best technical decisions in the project. The durable execution model, where each step is persisted independently and retries automatically on failure, made it possible to build complex pipelines like the beat publishing workflow without worrying about partial failures leaving the system in a broken state. If step three of four fails, the first two steps don't re-run, and cleanup logic handles any artifacts. This gave me a level of reliability that would have been much harder to achieve with a traditional job queue.
Using tRPC for the API layer paid off consistently throughout development. Having types flow from the Prisma schema through the API to the frontend meant that breaking changes were caught at compile time rather than surfacing as runtime bugs. Renaming a field in the database schema would immediately highlight every component that needed updating.
Building idempotency into every system from the start, rather than bolting it on later, saved me from real production issues. Webhooks can be delivered multiple times, workflows can retry, and users can double-click buttons. Having every write operation designed to handle duplicates gracefully meant I could trust the system to self-correct without manual intervention.
What Was Harder Than Expected
PayPal's APIs and documentation were significantly harder to work with than I anticipated. The documentation is fragmented across multiple versions and portals, error messages are often vague, and the partner integration model has a steep learning curve compared to something like Stripe Connect. The multi-party payment split logic in particular required working through edge cases around rounding, minimum payouts per currency, fee allocation across collaborators, and the interaction between platform fees and PayPal's own processing fees. I ended up building an iterative solver to calculate minimum prices because the analytical solution wasn't reliable across all fee combinations.
Running FFmpeg inside Vercel serverless functions came with constraints I didn't fully appreciate upfront. There's no persistent disk, so all file processing has to stream to and from cloud storage. Timeouts needed to be configured up to five minutes for longer audio files, and the FFmpeg binary itself had to be bundled carefully to keep deploy sizes manageable. I used dynamic imports so the FFmpeg code only loads when a workflow actually needs it, and temporary directories for intermediate files like audio tags that need to exist on disk briefly during processing. It works, but it's the kind of thing that would be simpler on a dedicated server.
The minimum pricing validation was a surprisingly deep mathematical problem. Every collaborator needs to receive at least PayPal's minimum payout after all fees are deducted: the platform fee, PayPal's percentage fee, a fixed fee per currency, potential cross-border fees, and rounding from flooring collaborator shares. The system simulates the worst-case fee scenario and increments the price until the net payout clears the minimum. This validation runs both when a producer sets their price and again at checkout to catch any edge cases that might have changed between the two moments.
Technology Choices
I chose Better Auth over NextAuth for authentication. NextAuth has been the default choice in the Next.js ecosystem for years, but its migration history between major versions and API instability made me hesitant. Better Auth offered a cleaner integration with Prisma, more control over session management (including cookie-based session caching to reduce database hits and configurable expiry/refresh intervals), and a more predictable API surface. It was a less common choice, but it turned out to be the right one for this project.
The decision to use PayPal Commerce Platform instead of Stripe Connect was a product decision, not a technical one. Stripe Connect would have been significantly easier to integrate, with better documentation and a more developer-friendly API. But the target audience is music producers, and PayPal is the dominant payment method in the beat selling space. Producers expect PayPal, and buyers are comfortable paying with it. Choosing the harder integration because it was the right fit for the users was a trade-off I'd make again, even knowing how much more complex the implementation would be.
Back